
Horizontal ListView Android Without RecyclerView is the heart of this example tutorial.
We will create horizontal custom ListView With Image example Using Android studio.
Generally, we create listview in vertical position, but sometimes we need to make it horizontally.
Android provides a method using which you can make horizontal recyclerview easily, but unfortunately, android’s built in system does not provide any method to create horizontal listview.
Here, I have used one class that will convert the position of listview to horizontal instead of vertical.
So let us go through all the steps to accomplish our target.
See the video
Step 1. Adding Attributes
We will add some attributes to support horizontal display.
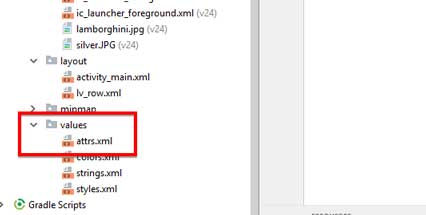
For this, first create a new xml file in values directory. Keep the name of this file as attrs.xml
You can get reference from the below image to understand the directory structure.
Now copy the following code in attrs.xml
<?xml version="1.0" encoding="utf-8"?>
<resources>

    <!-- Defines the custom XML attributes supported for a HorizontalListView -->
    <declare-styleable name="HorizontalListView">
        <attr name="dividerWidth" format="dimension" />
        <attr name="android:divider" />
        <attr name="android:requiresFadingEdge" />
        <attr name="android:fadingEdgeLength" />
    </declare-styleable>

</resources>
Step 2. Horizontal Class
We need to create one new class named HorizontalListView.java
Write down the below lines in HorizontalListView.java
import android.annotation.SuppressLint;
import android.annotation.TargetApi;
import android.content.Context;
import android.content.res.TypedArray;
import android.database.DataSetObserver;
import android.graphics.Canvas;
import android.graphics.Rect;
import android.graphics.drawable.Drawable;
import android.os.Build;
import android.os.Bundle;
import android.os.Parcelable;
import android.support.v4.view.ViewCompat;
import android.support.v4.widget.EdgeEffectCompat;
import android.util.AttributeSet;
import android.view.GestureDetector;
import android.view.HapticFeedbackConstants;
import android.view.MotionEvent;
import android.view.View;
import android.view.ViewGroup;
import android.widget.AdapterView;
import android.widget.ListAdapter;
import android.widget.ListView;
import android.widget.ScrollView;
import android.widget.Scroller;

This class has 1333 lines of code so see it at this link : https://github.com/MeetMe/Android-HorizontalListView/blob/master/AndroidHorizontalListView/src/com/meetme/android/horizontallistview/HorizontalListView.java
Above class is very big so I am not writing it here.
For the above class, I have taken reference from this github library.
Visit above to view all the coding lines but you can find this in my source code also which you can download at the end of this tutorial.
Step 3. Images of vehicle
- In this listview, I will show images of various vehicles in the each row.
- So we need to add some images in drawable folder.
Download the images using the below link.
[sociallocker]Download Vehicle images[/sociallocker]
- Save these images in the res->drawable directory.
Step 4. ListView Row Layout
Make a new layout file in res->layout directory.
Set the name of this file as lv_row.xml
Add the below coding lines in lv_row.xml
<?xml version="1.0" encoding="utf-8"?>
<LinearLayout xmlns:android="http://schemas.android.com/apk/res/android"
    android:layout_width="match_parent"
    android:layout_height="match_parent"
    android:orientation="vertical">

    <LinearLayout
        android:layout_width="wrap_content"
        android:layout_height="wrap_content"
        android:padding="10dp"
        android:orientation="vertical">

        <ImageView
            android:id="@+id/imgView"
            android:scaleType="fitXY"
            android:layout_width="100dp"
            android:layout_height="100dp"
             android:layout_marginTop="10dp" />

        <TextView
            android:id="@+id/name"
            android:layout_width="match_parent"
            android:layout_height="wrap_content"
            android:gravity="center"
            android:layout_marginTop="10dp"
            android:text="Name" />

    </LinearLayout>


</LinearLayout>
- I have taken one imageview and one textview. Both these UI widgets are the children of the Linearlayout which has vertical orientation.
- Textview holds the name of the Image of the vehicle.
Step 5. Model For Horizontal ListView
Let us prepare a new java class and give it a name as “Model.java”
Write down the following lines in “Model.java”
public class Model {

    private String name;
    private int image_drawable;

    public String getName() {
        return name;
    }

    public void setName(String name) {
        this.name = name;
    }

    public int getImage_drawable() {
        return image_drawable;
    }

    public void setImage_drawable(int image_drawable) {
        this.image_drawable = image_drawable;
    }
}
- This model class creates proper data structure.
- It holds getter ans setter methods to operate the data in efficient way.
Step 6. Horizontal Adapter
Now it is time to create an adapter class. Make a new java class again.
Name of the the new Java class should be “HorizontalAdapter.java”
Copy and paste the following code snippet in “HorizontalAdapter.java”
import android.content.Context;
import android.view.LayoutInflater;
import android.view.View;
import android.view.ViewGroup;
import android.widget.BaseAdapter;
import android.widget.ImageView;
import android.widget.TextView;

import java.util.ArrayList;

public class HorizontalAdapter extends BaseAdapter {

    private Context context;
    private ArrayList<Model> imageModelArrayList;

    public HorizontalAdapter(Context context, ArrayList<Model> imageModelArrayList) {

        this.context = context;
        this.imageModelArrayList = imageModelArrayList;
    }

    @Override
    public int getViewTypeCount() {
        return getCount();
    }
    @Override
    public int getItemViewType(int position) {

        return position;
    }

    @Override
    public int getCount() {
        return imageModelArrayList.size();
    }

    @Override
    public Object getItem(int position) {
        return imageModelArrayList.get(position);
    }

    @Override
    public long getItemId(int position) {
        return 0;
    }

    @Override
    public View getView(int position, View convertView, ViewGroup parent) {
        ViewHolder holder;

        if (convertView == null) {
            holder = new ViewHolder();
            LayoutInflater inflater = (LayoutInflater) context
                    .getSystemService(Context.LAYOUT_INFLATER_SERVICE);
            convertView = inflater.inflate(R.layout.lv_row, null, true);

            holder.tvname = (TextView) convertView.findViewById(R.id.name);
            holder.iv = (ImageView) convertView.findViewById(R.id.imgView);

            convertView.setTag(holder);
        }else {
            // the getTag returns the viewHolder object set as a tag to the view
            holder = (ViewHolder)convertView.getTag();
        }

        holder.tvname.setText(imageModelArrayList.get(position).getName());
        holder.iv.setImageResource(imageModelArrayList.get(position).getImage_drawable());

        return convertView;
    }

    private class ViewHolder {

        protected TextView tvname;
        private ImageView iv;

    }

}
- This class will receives an arraylist (objects of Model class) via the second parameter of it’s constructor.
See the below lines which shows the constructor
 public HorizontalAdapter(Context context, ArrayList<Model> imageModelArrayList) {

        this.context = context;
        this.imageModelArrayList = imageModelArrayList;
    }
- As you can see in above code, first parameter is context and second is imageModelArrayList
Now look at the following code of getView() method.
 @Override
    public View getView(int position, View convertView, ViewGroup parent) {
        ViewHolder holder;

        if (convertView == null) {
            holder = new ViewHolder();
            LayoutInflater inflater = (LayoutInflater) context
                    .getSystemService(Context.LAYOUT_INFLATER_SERVICE);
            convertView = inflater.inflate(R.layout.lv_row, null, true);

            holder.tvname = (TextView) convertView.findViewById(R.id.name);
            holder.iv = (ImageView) convertView.findViewById(R.id.imgView);

            convertView.setTag(holder);
        }else {
            // the getTag returns the viewHolder object set as a tag to the view
            holder = (ViewHolder)convertView.getTag();
        }

        holder.tvname.setText(imageModelArrayList.get(position).getName());
        holder.iv.setImageResource(imageModelArrayList.get(position).getImage_drawable());

        return convertView;
    }
- This method will first inflate the row layout file lv_row.xml which we created in the fourth step.
Step 7. Main Activity Modification
Last thing is to change the main files.
Update the code of activity_main.xml as per the below snippet.
<?xml version="1.0" encoding="utf-8"?>
<android.support.constraint.ConstraintLayout xmlns:android="http://schemas.android.com/apk/res/android"
    xmlns:app="http://schemas.android.com/apk/res-auto"
    xmlns:tools="http://schemas.android.com/tools"
    android:layout_width="match_parent"
    android:layout_height="match_parent"
    tools:context=".MainActivity">

    <com.example.parsaniahardik.listview_horizontal.HorizontalListView
        xmlns:android="http://schemas.android.com/apk/res/android"
        xmlns:widget="http://schemas.android.com/apk/res-auto"
        android:id="@+id/HorizontalListView"
        android:layout_width="match_parent"
        android:layout_height="175dp"
        android:divider="#878787"
        widget:dividerWidth="2dp" />

</android.support.constraint.ConstraintLayout>
- As you can see in the above code that we have taken <com.example.parsania……HorizontalListView> instead of just <ListView>
- This will create a listview from the class HorizontalListView.java (written in second step)
Make the source code for MainActivity.java as a following look
import android.support.v7.app.AppCompatActivity;
import android.os.Bundle;
import android.util.Log;

import java.util.ArrayList;

public class MainActivity extends AppCompatActivity {

    private HorizontalListView horizontalListView;
    private HorizontalAdapter customeAdapter;
    private ArrayList<Model> imageModelArrayList;
    private int[] myImageList = new int[]{R.drawable.benz, R.drawable.bike,
            R.drawable.car,R.drawable.carrera
            ,R.drawable.ferrari,R.drawable.harly,
            R.drawable.lamborghini,R.drawable.silver};
    private String[] myImageNameList = new String[]{"Benz", "Bike",
            "Car","Carrera"
            ,"Ferrari","Harly",
            "Lamborghini","Silver"};

    @Override
    protected void onCreate(Bundle savedInstanceState) {
        super.onCreate(savedInstanceState);
        setContentView(R.layout.activity_main);

        horizontalListView = (HorizontalListView) findViewById(R.id.HorizontalListView);

        imageModelArrayList = populateData();
        Log.d("hjhjh",imageModelArrayList.size()+"");
        customeAdapter = new HorizontalAdapter(this,imageModelArrayList);
        horizontalListView.setAdapter(customeAdapter);

    }

    private ArrayList<Model> populateData(){

        ArrayList<Model> list = new ArrayList<>();

        for(int i = 0; i < 8; i++){
            Model imageModel = new Model();
            imageModel.setName(myImageNameList[i]);
            imageModel.setImage_drawable(myImageList[i]);
            list.add(imageModel);
        }

        return list;
    }
}
Thoughts on above code
Pay attention at the below code
 private HorizontalListView horizontalListView;
    private HorizontalAdapter customeAdapter;
    private ArrayList<Model> imageModelArrayList;
    private int[] myImageList = new int[]{R.drawable.benz, R.drawable.bike,
            R.drawable.car,R.drawable.carrera
            ,R.drawable.ferrari,R.drawable.harly,
            R.drawable.lamborghini,R.drawable.silver};
    private String[] myImageNameList = new String[]{"Benz", "Bike",
            "Car","Carrera"
            ,"Ferrari","Harly",
            "Lamborghini","Silver"};
- First line will simply create an object of HorizontalListView class.
- Second one will give us an object of adapter class.
- Third will create an arraylist with objects of the Model class.
- Fourth will create an integer array (myImageList). This myImageList holds the integer reference of all the images that we have added in the drawable folder.
- Last line will define a string array named myImageNameList which includes the names of the vehicles.
Below line is creating a data
imageModelArrayList = populateData();
- Here, compiler will use populateData() method.
Code for populateData() method is as the following
  private ArrayList<Model> populateData(){

        ArrayList<Model> list = new ArrayList<>();

        for(int i = 0; i < 8; i++){
            Model imageModel = new Model();
            imageModel.setName(myImageNameList[i]);
            imageModel.setImage_drawable(myImageList[i]);
            list.add(imageModel);
        }

        return list;
    }
Thus, it was all wording about horizontal listview in android studio example.
You can read the below tutorial to make horizontal recyclerview.
Android Horizontal RecyclerView example with Cardview
Download Source Code For Horizontal ListView Android
[sociallocker]Download Source Code For ListView_Horizontal[/sociallocker]