
Android Listview with image and text example tutorial will guide you today.
This article consists four different example as the below table.
1. Android ListView With Image and Text
2. ListView with CheckBox In Android
Listview is used when you want to display multiple items which have a dynamic number of items.
1. Android ListView With Image and Text
We will create a listview which contains image and text in it’s every row item.
I have put one divider between every listview row item. Divider helps user to differentiate among listview items easily.
Watch this video to have a brief idea about the output of this tutorial.
Step 1. Create a new project
Make a new project in the Android Studio.
Step 2. Necessary Images
We require few images in this example to use them in the listview.
Click on the below link to download these images.
download this images
Now put these images in the drawable folder.
Step 3. Update activity_main.xml
copy and paste following code
<?xml version="1.0" encoding="utf-8"?>
<RelativeLayout xmlns:android="http://schemas.android.com/apk/res/android"
    xmlns:tools="http://schemas.android.com/tools"
    android:layout_width="match_parent"
    android:layout_height="match_parent"
    tools:context="com.exampledemo.parsaniahardik.listview_with_image_demonuts.MainActivity">
    <ListView
        android:layout_width="wrap_content"
        android:layout_height="wrap_content"
        android:id="@+id/listView"
        android:divider="@null"
       />
</RelativeLayout>
I have taken one listview in the above code.
Step 4. Create java class named CustomeAdapter.java
copy following code in it.
import android.content.Context;
import android.view.LayoutInflater;
import android.view.View;
import android.view.ViewGroup;
import android.widget.BaseAdapter;
import android.widget.ImageView;
import android.widget.TextView;
import java.util.ArrayList;
import java.util.HashMap;
/**
 * Created by Parsania Hardik on 03-Jan-17.
 */
public class CustomeAdapter  extends BaseAdapter {
    private Context context;
    private ArrayList<ImageModel> imageModelArrayList;
    public CustomeAdapter(Context context, ArrayList<ImageModel> imageModelArrayList) {
        this.context = context;
        this.imageModelArrayList = imageModelArrayList;
    }
    @Override
    public int getViewTypeCount() {
        return getCount();
    }
    @Override
    public int getItemViewType(int position) {
        return position;
    }
    @Override
    public int getCount() {
        return imageModelArrayList.size();
    }
    @Override
    public Object getItem(int position) {
        return imageModelArrayList.get(position);
    }
    @Override
    public long getItemId(int position) {
        return 0;
    }
    @Override
    public View getView(int position, View convertView, ViewGroup parent) {
        ViewHolder holder;
        if (convertView == null) {
            holder = new ViewHolder(); LayoutInflater inflater = (LayoutInflater) context
                    .getSystemService(Context.LAYOUT_INFLATER_SERVICE);
            convertView = inflater.inflate(R.layout.lv_item, null, true);
            holder.tvname = (TextView) convertView.findViewById(R.id.name);
            holder.iv = (ImageView) convertView.findViewById(R.id.imgView);
            convertView.setTag(holder);
        }else {
            // the getTag returns the viewHolder object set as a tag to the view
            holder = (ViewHolder)convertView.getTag();
        }
        holder.tvname.setText(imageModelArrayList.get(position).getName());
        holder.iv.setImageResource(imageModelArrayList.get(position).getImage_drawable());
        return convertView;
    }
    private class ViewHolder {
        protected TextView tvname;
        private ImageView iv;
    }
}
getView() method will create layout for every listview row item.
Below two lines from getView() method will set the Image and Text.
 holder.tvname.setText(imageModelArrayList.get(position).getName());
 holder.iv.setImageResource(imageModelArrayList.get(position).getImage_drawable());
Compiler will get the appropriate object from the imageModelArrayList using position.
From that object, it will use getName() and getImage_drawable() method to get related text and image resource.
Layout File
While developing listview, we need to create adapter class in which we can define code for each cell of listview.
We need to create one layout resource file(lv_item.xml here in our example, you can name it as you like) in the resource folder.
This file will contain components like TextView,ImageView, etc. as per requirement.
This file represents a single cell of the listview. In our example it contains one ImageView and one TextView.
Thus, every row will contain one image and one text.
In getView() method, lv_item.xml is inflated, and all the components of lv_item can be set here for each cell of listview as per requirement.
Code for lv_item.xml is like:
<?xml version="1.0" encoding="utf-8"?>
<LinearLayout xmlns:android="http://schemas.android.com/apk/res/android"
    android:layout_width="match_parent"
    android:layout_height="match_parent"
    android:orientation="vertical">
    <LinearLayout
        android:layout_width="match_parent"
        android:layout_height="wrap_content"
        android:orientation="horizontal">
        <ImageView
            android:id="@+id/imgView"
            android:layout_width="100dp"
            android:layout_height="100dp"
            android:layout_marginLeft="10dp"
            android:layout_marginTop="10dp" />
        <TextView
            android:id="@+id/name"
            android:layout_width="match_parent"
            android:layout_height="110dp"
            android:gravity="center_vertical"
            android:textAppearance="?android:attr/textAppearanceMedium"
            android:paddingLeft="10dp"
            android:text="Name" />
    </LinearLayout>
    <View
        android:layout_width="match_parent"
        android:layout_height="1dp"
        android:layout_marginTop="10dp"
        android:layout_marginLeft="10dp"
        android:layout_marginRight="10dp"
        android:background="@color/colorAccent"/>
</LinearLayout>
Step 5. Create a class named ImageModel.java
Add following source code in it.
package com.exampledemo.parsaniahardik.listview_with_image_demonuts;
/**
 * Created by Parsania Hardik on 03-Jan-17.
 */
public class ImageModel {
    private String name;
    private int image_drawable;
    public String getName() {
        return name;
    }
    public void setName(String name) {
        this.name = name;
    }
    public int getImage_drawable() {
        return image_drawable;
    }
    public void setImage_drawable(int image_drawable) {
        this.image_drawable = image_drawable;
    }
}
Step 6. Finally, update MainActivity.java class.
Copy and paste below code in MainActivity.java
package com.exampledemo.parsaniahardik.listview_with_image_demonuts;
import android.support.v7.app.AppCompatActivity;
import android.os.Bundle;
import android.util.Log;
import android.widget.ImageView;
import android.widget.ListView;
import java.util.ArrayList;
public class MainActivity extends AppCompatActivity {
    private ListView lv;
    private CustomeAdapter customeAdapter;
    private ArrayList<ImageModel> imageModelArrayList;
    private int[] myImageList = new int[]{R.drawable.benz, R.drawable.bike,
                                            R.drawable.car,R.drawable.carrera
                                           ,R.drawable.ferrari,R.drawable.harly,
                                            R.drawable.lamborghini,R.drawable.silver};
    private String[] myImageNameList = new String[]{"Benz", "Bike",
            "Car","Carrera"
            ,"Ferrari","Harly",
            "Lamborghini","Silver"};
    @Override
    protected void onCreate(Bundle savedInstanceState) {
        super.onCreate(savedInstanceState);
        setContentView(R.layout.activity_main);
        lv = (ListView) findViewById(R.id.listView);
        imageModelArrayList = populateList();
        Log.d("hjhjh",imageModelArrayList.size()+"");
        customeAdapter = new CustomeAdapter(this,imageModelArrayList);
        lv.setAdapter(customeAdapter);
    }
    private ArrayList<ImageModel> populateList(){
        ArrayList<ImageModel> list = new ArrayList<>();
        for(int i = 0; i < 8; i++){
            ImageModel imageModel = new ImageModel();
            imageModel.setName(myImageNameList[i]);
            imageModel.setImage_drawable(myImageList[i]);
            list.add(imageModel);
        }
        return list;
    }
}
Consider below source code
private int[] myImageList = new int[]{R.drawable.benz, R.drawable.bike,
                                            R.drawable.car,R.drawable.carrera
                                           ,R.drawable.ferrari,R.drawable.harly,
                                            R.drawable.lamborghini,R.drawable.silver};
I have declared one integer array in above code.
This integer array includes the drawable references to the images which are stored in the drawable folder.
We have used this integer reference to set the images in the imageview in adapter class.
private String[] myImageNameList = new String[]{"Benz", "Bike",
            "Car","Carrera"
            ,"Ferrari","Harly",
            "Lamborghini","Silver"};
Above code have declared a string variable. This variable includes the names of the vehicles.
Adapter have used this string array to fill the text in every row of the listview.
Read below code for populateList() method
private ArrayList<ImageModel> populateList(){
        ArrayList<ImageModel> list = new ArrayList<>();
        for(int i = 0; i < 8; i++){
            ImageModel imageModel = new ImageModel();
            imageModel.setName(myImageNameList[i]);
            imageModel.setImage_drawable(myImageList[i]);
            list.add(imageModel);
        }
        return list;
    }
populateList() method will create one arraylist. This arraylist contains the objects of the ImageModel class.
Compiler will create the object of the ImageModel class and will add it into the arraylist in the every iteration of the for loop.
After the successful operation of populateList() method, we will send arraylist to the adapter.
Now run your project, and yes, it will work like shown in the video.
If you have any questions regarding this tutorial, feel free to ask in comment section.
2. ListView with CheckBox In Android
In Listview with Checkbox in Android Studio example,learn how to make custom Listview with a checkbox.
You will have to create a listview with checkbox in Android Studio when you want to show certain options to the user and wants to take more than one options to be selected.
There is a common problem like “checkbox unchecked when I scroll listview.”
We will solve this problem in this listview with checkbox in Android Studio.
We will use listview’s onitemclicklistener() and checkbox’s OnClickListener() method to get checked items.
In this example, we will get single selection, multiple selection and also select all scenario.
Check out the output of Listview with Checkbox in Android Studio tutorial below which is prepared by Demonuts.com:
Step 1. Create a new project in the Android Studio.
Choose empty as your Main Activity.
Step 2. Create a class named Model.java
copy the following source code in it:
public class Model {
    private boolean isSelected;
    private String animal;
    public String getAnimal() {
        return animal;
    }
    public void setAnimal(String animal) {
        this.animal = animal;
    }
    public boolean getSelected() {
        return isSelected;
    }
    public void setSelected(boolean selected) {
        isSelected = selected;
    }
}
This class represents the various methods to set and get the data in the adapter class.
Objects of this class will be used to maintain the proper data structure.
Step 3. Creating lv_item.xml layout file
Create a new layout resource file named lv_item.xml file and add following
<?xml version="1.0" encoding="utf-8"?>
<LinearLayout xmlns:android="http://schemas.android.com/apk/res/android"
    android:orientation="horizontal" android:layout_width="match_parent"
    android:layout_height="match_parent">
    <CheckBox
        android:layout_width="wrap_content"
        android:layout_height="wrap_content"
        android:id="@+id/cb"
        android:text="Checkbox"/>
    <TextView
        android:layout_width="wrap_content"
        android:layout_height="wrap_content"
        android:id="@+id/animal"
        android:layout_marginLeft="20dp"
        android:textSize="20sp"
        android:text="animal"/>
</LinearLayout>
This file will create the layout for all the rows of the listview. Adapter class will use this file.
It contains one checkbox and one textview.
Step 4. Updating activity_main.xml
Copy and Paste following source code in activity_main.xml
<?xml version="1.0" encoding="utf-8"?>
<LinearLayout xmlns:android="http://schemas.android.com/apk/res/android"
    xmlns:tools="http://schemas.android.com/tools"
    android:layout_width="match_parent"
    android:layout_height="match_parent"
    android:orientation="vertical"
    tools:context="com.example.zerones_hardik.listview_with_checkbox_demonuts.MainActivity">
    <ListView
        android:layout_width="match_parent"
        android:layout_height="match_parent"
        android:layout_weight="1"
        android:id="@+id/lv">
    </ListView>
    <LinearLayout
        android:layout_width="match_parent"
        android:layout_height="wrap_content"
        android:orientation="horizontal">
        <Button
            android:layout_width="wrap_content"
            android:layout_height="wrap_content"
            android:id="@+id/select"
            android:text="Select all"/>
        <Button
            android:layout_width="wrap_content"
            android:layout_height="wrap_content"
            android:id="@+id/deselect"
            android:text="Deselct all"/>
        <Button
            android:layout_width="wrap_content"
            android:layout_height="wrap_content"
            android:id="@+id/next"
            android:text="Next activity"/>
    </LinearLayout>
</LinearLayout>
I have taken one listview and three buttons in main layout.
Step 5. Create one class and name it: CustomAdapter.java
Copy and paste following code in this class:
import android.content.Context;
import android.view.LayoutInflater;
import android.view.View;
import android.view.ViewGroup;
import android.widget.BaseAdapter;
import android.widget.CheckBox;
import android.widget.TextView;
import android.widget.Toast;
import java.util.ArrayList;
/**
 * Created by hardik on 9/1/17.
 */
public class CustomAdapter  extends BaseAdapter {
    private Context context;
    public static ArrayList<Model> modelArrayList;
    public CustomAdapter(Context context, ArrayList<Model> modelArrayList) {
        this.context = context;
        this.modelArrayList = modelArrayList;
    }
    @Override
    public int getViewTypeCount() {
        return getCount();
    }
    @Override
    public int getItemViewType(int position) {
        return position;
    }
    @Override
    public int getCount() {
        return modelArrayList.size();
    }
    @Override
    public Object getItem(int position) {
        return modelArrayList.get(position);
    }
    @Override
    public long getItemId(int position) {
        return 0;
    }
    @Override
    public View getView(int position, View convertView, ViewGroup parent) {
        final ViewHolder holder;
        if (convertView == null) {
            holder = new ViewHolder(); LayoutInflater inflater = (LayoutInflater) context
                    .getSystemService(Context.LAYOUT_INFLATER_SERVICE);
            convertView = inflater.inflate(R.layout.lv_item, null, true);
            holder.checkBox = (CheckBox) convertView.findViewById(R.id.cb);
            holder.tvAnimal = (TextView) convertView.findViewById(R.id.animal);
            convertView.setTag(holder);
        }else {
            // the getTag returns the viewHolder object set as a tag to the view
            holder = (ViewHolder)convertView.getTag();
        }
        holder.checkBox.setText("Checkbox "+position);
        holder.tvAnimal.setText(modelArrayList.get(position).getAnimal());
        holder.checkBox.setChecked(modelArrayList.get(position).getSelected());
        holder.checkBox.setTag(R.integer.btnplusview, convertView);
        holder.checkBox.setTag( position);
        holder.checkBox.setOnClickListener(new View.OnClickListener() {
            @Override
            public void onClick(View v) {
                View tempview = (View) holder.checkBox.getTag(R.integer.btnplusview);
                TextView tv = (TextView) tempview.findViewById(R.id.animal);
                Integer pos = (Integer)  holder.checkBox.getTag();
                Toast.makeText(context, "Checkbox "+pos+" clicked!", Toast.LENGTH_SHORT).show();
                if(modelArrayList.get(pos).getSelected()){
                    modelArrayList.get(pos).setSelected(false);
                }else {
                    modelArrayList.get(pos).setSelected(true);
                }
            }
        });
        return convertView;
    }
    private class ViewHolder {
        protected CheckBox checkBox;
        private TextView tvAnimal;
    }
}
We are getting one arraylist of the objects of the Model class in the constructor.
We are using this arraylist in the below method.
Now check following code snippet:
  holder.checkBox.setTag(R.integer.btnplusview, convertView);
        holder.checkBox.setTag( position);
        holder.checkBox.setOnClickListener(new View.OnClickListener() {
            @Override
            public void onClick(View v) {

                View tempview = (View) holder.checkBox.getTag(R.integer.btnplusview);
                TextView tv = (TextView) tempview.findViewById(R.id.animal);
                Integer pos = (Integer)  holder.checkBox.getTag();
                Toast.makeText(context, "Checkbox "+pos+" clicked!", Toast.LENGTH_SHORT).show();
                if(modelArrayList.get(pos).getSelected()){
                    modelArrayList.get(pos).setSelected(false);
                }else {
                    modelArrayList.get(pos).setSelected(true);
                }
            }
        });
Check first two lines of above snippet. Two tags are set to checkbox
One for getting position (checkbox.setTag())
And other for getting whole row view in which checkbox is present. (checkbox.getTag())
To set the Tag of view, we need to assign key which is R.integer.btnplusview here.
When we are getting this view using getTag, we used the same key to get the whole view as shown in the checkbox.OnClickListener().
Now you might say what is R.integer.btnplusview??
It is nothing but same as you define your string resources in the string.xml, you can define your integer resources in an integer.xml file.
When you create a project in the android studio, string.xml is generated automatically, while you have to manually create integer.xml , that’s it, nothing special.
Create integer.xml under res/values directory(same directory in which string.xml is present) and copy following code:
<?xml version="1.0" encoding="utf-8"?>
<resources>
<integer name="btnplusview">1</integer>
<integer name="btnpluspos">2</integer>
</resources>
The Logic for updating value of each model item is written on OnClickListener() of the checkbox.
We have used setTag and getTag to get which checkbox is clicked(position of clicked checkbox), and we can also get the whole view of row item which is clicked, and it is taken as tempview in above code.
Using tempview, you can inflate all views(TextView, EditText,ImageView etc.) of that particular row(row which is clicked).
TextView is inflated from tempview, and then we can get the value of this textview to use as per requirements.
Step 6. Copy and paste following code in MainActivity.java
import android.content.Intent;
import android.support.v7.app.AppCompatActivity;
import android.os.Bundle;
import android.view.View;
import android.widget.Button;
import android.widget.ListView;
import java.util.ArrayList;
public class MainActivity extends AppCompatActivity {
    private ListView lv;
    private ArrayList<Model> modelArrayList;
    private CustomAdapter customAdapter;
    private Button btnselect, btndeselect, btnnext;
    private  String[] animallist = new String[]{"Lion", "Tiger", "Leopard", "Cat"};
    @Override
    protected void onCreate(Bundle savedInstanceState) {
        super.onCreate(savedInstanceState);
        setContentView(R.layout.activity_main);
        lv = (ListView) findViewById(R.id.lv);
        btnselect = (Button) findViewById(R.id.select);
        btndeselect = (Button) findViewById(R.id.deselect);
        btnnext = (Button) findViewById(R.id.next);
        modelArrayList = getModel(false);
        customAdapter = new CustomAdapter(this,modelArrayList);
        lv.setAdapter(customAdapter);
        btnselect.setOnClickListener(new View.OnClickListener() {
            @Override
            public void onClick(View v) {
                modelArrayList = getModel(true);
                customAdapter = new CustomAdapter(MainActivity.this,modelArrayList);
                lv.setAdapter(customAdapter);
            }
        });
        btndeselect.setOnClickListener(new View.OnClickListener() {
            @Override
            public void onClick(View v) {
                modelArrayList = getModel(false);
                customAdapter = new CustomAdapter(MainActivity.this,modelArrayList);
                lv.setAdapter(customAdapter);
            }
        });
        btnnext.setOnClickListener(new View.OnClickListener() {
            @Override
            public void onClick(View v) {
                Intent intent = new Intent(MainActivity.this,NextActivity.class);
                startActivity(intent);
            }
        });
    }
    private ArrayList<Model> getModel(boolean isSelect){
        ArrayList<Model> list = new ArrayList<>();
        for(int i = 0; i < 4; i++){
            Model model = new Model();
            model.setSelected(isSelect);
            model.setAnimal(animallist[i]);
            list.add(model);
        }
        return list;
    }
}
There are three buttons in the above code snippet.
Below is the onclick for first one
btnselect.setOnClickListener(new View.OnClickListener() {
            @Override
            public void onClick(View v) {
                modelArrayList = getModel(true);
                customAdapter = new CustomAdapter(MainActivity.this,modelArrayList);
                lv.setAdapter(customAdapter);
            }
        });
When the user clicks on this button, all the checkboxes in the listview are automatically selected or checked.
Next button will take the user to the Next Activity.
Consider below code
btndeselect.setOnClickListener(new View.OnClickListener() {
            @Override
            public void onClick(View v) {
                modelArrayList = getModel(false);
                customAdapter = new CustomAdapter(MainActivity.this,modelArrayList);
                lv.setAdapter(customAdapter);
            }
        });
When the user clicks the deselect button, all the checkboxes in the listview are deselected.
This select all and deselect all feature is very useful for user when he wants to do all the process from scratch.
Look at the below method
private ArrayList<Model> getModel(boolean isSelect){
        ArrayList<Model> list = new ArrayList<>();
        for(int i = 0; i < 4; i++){
            Model model = new Model();
            model.setSelected(isSelect);
            model.setAnimal(animallist[i]);
            list.add(model);
        }
        return list;
    }
getModel() method will create an arraylist of the objects of the model class.
This arraylist is sent to the adapter class via constructor where it will work as the data provider.
Step 7. Create a new activity and name it NextActivity.
Now when clicking on Next button, a new activity opens with names of selected animals as shown in the output video.
So you will have two files: 1. NextActivity.java and 2. activity_next.xml
Copy and paste following code into NextActivity.java class:
import android.os.Bundle;
import android.support.v7.app.AppCompatActivity;
import android.widget.TextView;
public class NextActivity extends AppCompatActivity {
    private TextView tv;
    @Override
    protected void onCreate(Bundle savedInstanceState) {
        super.onCreate(savedInstanceState);
        setContentView(R.layout.activity_next);
        tv = (TextView) findViewById(R.id.tv);
        for (int i = 0; i < CustomAdapter.modelArrayList.size(); i++){
            if(CustomAdapter.modelArrayList.get(i).getSelected()) {
                tv.setText(tv.getText() + " " + CustomAdapter.modelArrayList.get(i).getAnimal());
            }
        }
    }
}
for loop in the above code will check all the object one by one. It will print the animal name which are checked.
Copy following in activity_next.xml
<?xml version="1.0" encoding="utf-8"?>
<RelativeLayout xmlns:android="http://schemas.android.com/apk/res/android"
    xmlns:tools="http://schemas.android.com/tools"
    android:layout_width="match_parent"
    android:layout_height="match_parent"
   tools:context="com.example.zerones_hardik.listview_with_checkbox_demonuts.NextActivity">
    <TextView
        android:layout_width="wrap_content"
        android:layout_height="wrap_content"
        android:textSize="20sp"
        android:id="@+id/tv"/>
</RelativeLayout>
Observe all the code snippets for listview with checkbox example carefully and understand it throughout so that you can change all things as per your different requirements.
All for Listview with Checkbox in Android Studio.
3. Android ListView with EditText Example
Android Listview Edittext With TextView Tutorial Example is today’s topic.
We will implement Custom Listview with EditText and will set and get text values of all edittext in all child elements of listview.
Many developers have oftern several problems regarding this topic like:
- Value of edittext changes when scrolling
- How to set edittext value in listview items
- How to retain edittext value while scrolling
- How to get all the text values of all the edittexts of listview and pass it to next activity.
Today’s tutorial will give perfect answers and solutions of above problems.
TextWatcher class is used to put logic when user enter text in any Edittext of Listview.
We will pass all the edittext values to next activity so that they can be used as per requirement of app.
Check out the output of Android Listview Edittext With TextView tutorial.
1. Create a model class
Create a new class named “EditModel.java” and copy below code
public class EditModel {
    private String editTextValue;
    public String getEditTextValue() {
        return editTextValue;
    }
    public void setEditTextValue(String editTextValue) {
        this.editTextValue = editTextValue;
    }
}
We will use objects of this model to perfectly retain the edittext value when scrolling listview.
Getter and Setter methods are the key for every mode class. So we have created in this model also.
2. Making ListView Item
Open new resource layout file and give it a name lv_item.xml
<?xml version="1.0" encoding="utf-8"?>
<LinearLayout xmlns:android="http://schemas.android.com/apk/res/android"
    android:layout_width="match_parent"
    android:layout_height="match_parent"
    android:orientation="vertical">
    <LinearLayout
        android:layout_width="match_parent"
        android:layout_height="wrap_content"
        android:orientation="horizontal">
       <TextView
           android:layout_width="wrap_content"
           android:layout_height="wrap_content"
           android:layout_marginTop="12dp"
           android:textColor="#000"
           android:text="TextView:"/>
        <EditText
            android:layout_width="match_parent"
            android:layout_height="50dp"
            android:id="@+id/editid"
            android:layout_marginTop="10dp"
            android:paddingLeft="10dp"
            android:textColor="#000"
            android:text="hello"
            />
    </LinearLayout>
    <View
        android:layout_width="match_parent"
        android:layout_height="1dp"
        android:layout_marginTop="10dp"
        android:background="@color/colorAccent"/>
</LinearLayout>
This is the complete view of every single row item of listview.
It contains a textview along with edittext.
3. Preparing Custom Adapter
Make a new java class named “CustomeAdapter.java”.
Add following into this class
import android.content.Context;
import android.text.Editable;
import android.text.TextWatcher;
import android.view.LayoutInflater;
import android.view.View;
import android.view.ViewGroup;
import android.widget.BaseAdapter;
import android.widget.EditText;
import java.util.ArrayList;
/**
 * Created by Parsania Hardik on 03-Jan-17.
 */
public class CustomeAdapter extends BaseAdapter {
    private Context context;
    public static ArrayList<EditModel> editModelArrayList;
    public CustomeAdapter(Context context, ArrayList<EditModel> editModelArrayList) {
        this.context = context;
        this.editModelArrayList = editModelArrayList;
    }
    @Override
    public int getViewTypeCount() {
        return getCount();
    }
    @Override
    public int getItemViewType(int position) {
        return position;
    }
    @Override
    public int getCount() {
        return editModelArrayList.size();
    }
    @Override
    public Object getItem(int position) {
        return editModelArrayList.get(position);
    }
    @Override
    public long getItemId(int position) {
        return 0;
    }
    @Override
    public View getView(final int position, View convertView, ViewGroup parent) {
        final ViewHolder holder;
        if (convertView == null) {
            holder = new ViewHolder();
            LayoutInflater inflater = (LayoutInflater) context
                    .getSystemService(Context.LAYOUT_INFLATER_SERVICE);
            convertView = inflater.inflate(R.layout.lv_item, null, true);
            holder.editText = (EditText) convertView.findViewById(R.id.editid);
            convertView.setTag(holder);
        }else {
            // the getTag returns the viewHolder object set as a tag to the view
            holder = (ViewHolder)convertView.getTag();
        }
        holder.editText.setText(editModelArrayList.get(position).getEditTextValue());
        holder.editText.addTextChangedListener(new TextWatcher() {
            @Override
            public void beforeTextChanged(CharSequence charSequence, int i, int i1, int i2) {
            }
            @Override
            public void onTextChanged(CharSequence charSequence, int i, int i1, int i2) {
                    editModelArrayList.get(position).setEditTextValue(holder.editText.getText().toString());
            }
            @Override
            public void afterTextChanged(Editable editable) {
            }
        });
        return convertView;
    }
    private class ViewHolder {
        protected EditText editText;
    }
}
Explanation
This class is the heart of the whole tutorial.
The main logic is inside this lines of code
@Override
 public void onTextChanged(CharSequence charSequence, int i, int i1, int i2) {
                   editModelArrayList.get(position).setEditTextValue(holder.editText.getText().toString());
 }
When user enter any text value, above method will be called.
Now we are using an ArrayList of the objects of EditModel class. So every single object of EditModel class contains value of edittext.
Now suppose, when user enters the text in the 1st edittext of listview, 1st object from ArrayList is called and the value of edittext is updated in that. Thus when user scrolls the listview, again listview will be populated and updated value of 1st edittext will be printed.
The ArrayList is defined as public static, so that it can be used in any other activity.
4. Changing MainActivity
Change you MainActivity.java class as per below
import android.support.v7.app.AppCompatActivity;
import android.os.Bundle;
import android.view.View;
import android.widget.Button;
import android.widget.ListView;
import android.content.Intent;
import java.util.ArrayList;
public class MainActivity extends AppCompatActivity {
    private Button btn;
    private ListView lv;
    private CustomeAdapter customeAdapter;
    public ArrayList<EditModel> editModelArrayList;
    @Override
    protected void onCreate(Bundle savedInstanceState) {
        super.onCreate(savedInstanceState);
        setContentView(R.layout.activity_main);
        lv = (ListView) findViewById(R.id.listView);
        btn = (Button) findViewById(R.id.btn);
        editModelArrayList = populateList();
        customeAdapter = new CustomeAdapter(this,editModelArrayList);
        lv.setAdapter(customeAdapter);
        btn.setOnClickListener(new View.OnClickListener() {
            @Override
            public void onClick(View view) {
                Intent intent = new Intent(MainActivity.this,NextActivity.class);
                startActivity(intent);
            }
        });
    }
    private ArrayList<EditModel> populateList(){
        ArrayList<EditModel> list = new ArrayList<>();
        for(int i = 0; i < 8; i++){
            EditModel editModel = new EditModel();
            editModel.setEditTextValue(String.valueOf(i));
            list.add(editModel);
        }
        return list;
    }
}
ListView is populated in MainActivity with the object of customAdapter class.
Button click event is also defined in above class.
Update your activity_main.xml
Add below code
<?xml version="1.0" encoding="utf-8"?>
<LinearLayout xmlns:android="http://schemas.android.com/apk/res/android"
    xmlns:app="http://schemas.android.com/apk/res-auto"
    xmlns:tools="http://schemas.android.com/tools"
    android:orientation="vertical"
    android:layout_width="match_parent"
    android:layout_height="match_parent"
    tools:context="com.example.parsaniahardik.listview_edittext.MainActivity">
    <Button
        android:layout_width="wrap_content"
        android:layout_height="wrap_content"
        android:id="@+id/btn"
        android:text="Pass All EditText value to Next Activity"/>
    <ListView
        android:layout_width="wrap_content"
        android:layout_height="wrap_content"
        android:id="@+id/listView"
        android:divider="@null"/>
</LinearLayout>
5. NextActivity Creation
Make a new activity and give it a name “NextActivity”
Now write following source code into NextActivity.java class
import android.os.Bundle;
import android.support.v7.app.AppCompatActivity;
import android.widget.TextView;
public class NextActivity extends AppCompatActivity {
    private TextView tv;
    @Override
    protected void onCreate(Bundle savedInstanceState) {
        super.onCreate(savedInstanceState);
        setContentView(R.layout.activity_next);
        tv = (TextView) findViewById(R.id.tv);
        for (int i = 0; i < CustomeAdapter.editModelArrayList.size(); i++){
                tv.setText(tv.getText() + " " + CustomeAdapter.editModelArrayList.get(i).getEditTextValue() +System.getProperty("line.separator"));
        }
    }
}
This class simply prints the text valued of all the edittexts.
We have used ArrayList of the objects of EdiModel class which was defined in CustomAdapter.
Add below into activity_next.xml
<?xml version="1.0" encoding="utf-8"?>
<RelativeLayout xmlns:android="http://schemas.android.com/apk/res/android"
    xmlns:tools="http://schemas.android.com/tools"
    android:layout_width="match_parent"
    android:layout_height="match_parent"
   tools:context="com.example.parsaniahardik.listview_edittext.NextActivity">
    <TextView
        android:layout_width="wrap_content"
        android:layout_height="wrap_content"
        android:textSize="20sp"
        android:id="@+id/tv"/>
</RelativeLayout>
Thus, you have seen that implementing a custom listview with edittext and textview is not a big deal.
It is also easy to retain the value even when user scrolls the listview.
And finally, getting values of edittexts to any other future activities is also not complex.
4. Android ListView with Button Tutorial
Hello, In this listview with button android tutorial, you will learn how to use a button in listview item.
We will see how to handle button’s click listeners in every row item of listview.
I have created listview elements with multiple clickable buttons in this tutorial example.
There are some problems like
You click on first button, but system clicks on last button
Quantity number of item change when scroll the listview.
Implementing button in the listview is a little complex task.
But you can do it smoothly if you follow proper method with the efficient code snippets.
Getting the proper position of clicked button and set onclick event for button required some additional coding lines.
I will go through all these problems and teach you how to solve them easily.
First of all check out the output of this example, so that you can have an idea what we are developing at the end of the tutorial.
Step 1: Create a new project in the android studio.
Empty Activity is the option, you need to select when creating a new project in the android studio.
Step 2: Updating activity_main.xml file
Add following code into activity_main.xml file
<?xml version="1.0" encoding="utf-8"?>
<LinearLayout xmlns:android="http://schemas.android.com/apk/res/android"
    xmlns:tools="http://schemas.android.com/tools"
    android:layout_width="match_parent"
    android:layout_height="match_parent"
    android:orientation="vertical"
    tools:context="com.exampledemo.parsaniahardik.listview_with_button_demonuts.MainActivity">
    <ListView
        android:layout_width="match_parent"
        android:layout_height="match_parent"
        android:layout_weight="1"
        android:id="@+id/lv"/>
        <LinearLayout
            android:layout_width="match_parent"
            android:layout_height="50dp"
            android:orientation="horizontal">
            <Button
                android:layout_width="match_parent"
                android:layout_height="wrap_content"
                android:layout_gravity="center"
                android:layout_weight="1"
                android:id="@+id/next"
                android:text="Next Activity"/>
            </LinearLayout>
</LinearLayout>
Step 3: Creating Model.java class
Create a new class named Model.java and add following
public class Model {
    private int number;
    private String fruit;
    public int getNumber() {
        return number;
    }
    public void setNumber(int number) {
        this.number = number;
    }
    public String getFruit() {
        return fruit;
    }
    public void setFruit(String fruit) {
        this.fruit = fruit;
    }
}
This class represents the various methods to set and get the data in the adapter class.
Objects of this class will be used to maintain the proper data structure.
Step 4: Creating Integer Resource File
In this tutorial, we need to create integer resources.
Integer resources are same as string resources which are written at string.xml file in values directory.
To define integer resources, we need to create integer.xml file in values directory.
To create integer.xml file, right click on values folder -> New -> Value resource file
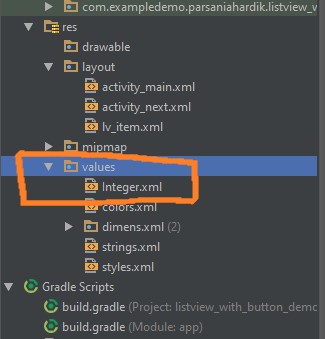
Copy following code in an integer.xml file
<?xml version="1.0" encoding="utf-8"?>
<resources>
<integer name="btn_plus_view">1</integer>
<integer name="btn_plus_pos">2</integer>
    <integer name="btn_minus_view">3</integer>
    <integer name="btn_minus_pos">4</integer>
</resources>
Step 5: Creating row layout for listview
Create one layout resource file and name it as lv_item.xml and copy below code
<?xml version="1.0" encoding="utf-8"?>
<LinearLayout xmlns:android="http://schemas.android.com/apk/res/android"
    android:layout_width="match_parent"
    android:layout_height="match_parent"
    android:orientation="vertical">
    <LinearLayout
        android:layout_width="wrap_content"
        android:layout_height="wrap_content"
        android:orientation="horizontal"
        android:layout_marginTop="20dp">
        <TextView
            android:id="@+id/animal"
            android:layout_width="130dp"
            android:layout_height="wrap_content"
            android:layout_marginLeft="20dp"
            android:text="animal"
            android:textAppearance="?android:attr/textAppearanceMedium"
            android:textColor="#000"
            android:textSize="20sp" />
        <TextView
            android:layout_width="wrap_content"
            android:layout_height="wrap_content"
            android:id="@+id/number"
            android:layout_marginLeft="20dp"
            android:text="1"
            android:textAppearance="?android:attr/textAppearanceLarge"
            android:textColor="#000" />
    </LinearLayout>
    <LinearLayout
        android:layout_width="match_parent"
        android:layout_height="wrap_content"
        android:gravity="center"
        android:orientation="horizontal">
        <Button
            android:layout_width="wrap_content"
            android:layout_height="wrap_content"
            android:id="@+id/plus"
            android:layout_marginLeft="20dp"
            android:text="Plus"
            android:textColor="#000" />
        <Button
            android:layout_width="wrap_content"
            android:layout_height="wrap_content"
            android:id="@+id/minus"
            android:text="Minus"
            android:textColor="#000" />
    </LinearLayout>
</LinearLayout>
This layout file says us how every row of the listview will be look a like.
Mainly two textviews and two buttons are present in this file. One button will increase the fruit quantity and the other one decrease it.
One textview represnts the name of the fruit.
Other textview shows the quantity of that fruit in terms of numbers.
Step 6: Creating CustomAdapter.java class:
Create new java class named CustomAdapter and add following code
import android.content.Context;
import android.view.LayoutInflater;
import android.view.View;
import android.view.ViewGroup;
import android.widget.BaseAdapter;
import android.widget.Button;
import android.widget.CheckBox;
import android.widget.TextView;
import android.widget.Toast;
import java.util.ArrayList;
/**
 * Created by hardik on 9/1/17.
 */
public class CustomAdapter  extends BaseAdapter {
    private Context context;
    public CustomAdapter(Context context) {
        this.context = context;
    }
    @Override
    public int getViewTypeCount() {
        return getCount();
    }
    @Override
    public int getItemViewType(int position) {
        return position;
    }
    @Override
    public int getCount() {
        return MainActivity.modelArrayList.size();
    }
    @Override
    public Object getItem(int position) {
        return MainActivity.modelArrayList.get(position);
    }
    @Override
    public long getItemId(int position) {
        return 0;
    }
    @Override
    public View getView(int position, View convertView, ViewGroup parent) {
        final ViewHolder holder;
        if (convertView == null) {
            holder = new ViewHolder(); LayoutInflater inflater = (LayoutInflater) context
                    .getSystemService(Context.LAYOUT_INFLATER_SERVICE);
            convertView = inflater.inflate(R.layout.lv_item, null, true);
            holder.tvFruit = (TextView) convertView.findViewById(R.id.animal);
            holder.tvnumber = (TextView) convertView.findViewById(R.id.number);
            holder.btn_plus = (Button) convertView.findViewById(R.id.plus);
            holder.btn_minus = (Button) convertView.findViewById(R.id.minus);
            convertView.setTag(holder);
        }else {
            // the getTag returns the viewHolder object set as a tag to the view
            holder = (ViewHolder)convertView.getTag();
        }
        holder.tvFruit.setText(MainActivity.modelArrayList.get(position).getFruit());
        holder.tvnumber.setText(String.valueOf(MainActivity.modelArrayList.get(position).getNumber()));
        holder.btn_plus.setTag(R.integer.btn_plus_view, convertView);
        holder.btn_plus.setTag(R.integer.btn_plus_pos, position);
        holder.btn_plus.setOnClickListener(new View.OnClickListener() {
            @Override
            public void onClick(View v) {
                View tempview = (View) holder.btn_plus.getTag(R.integer.btn_plus_view);
                TextView tv = (TextView) tempview.findViewById(R.id.number);
                Integer pos = (Integer) holder.btn_plus.getTag(R.integer.btn_plus_pos);
                int number = Integer.parseInt(tv.getText().toString()) + 1;
                tv.setText(String.valueOf(number));
                MainActivity.modelArrayList.get(pos).setNumber(number);
            }
        });
        holder.btn_minus.setTag(R.integer.btn_minus_view, convertView);
        holder.btn_minus.setTag(R.integer.btn_minus_pos, position);
        holder.btn_minus.setOnClickListener(new View.OnClickListener() {
            @Override
            public void onClick(View v) {
                View tempview = (View) holder.btn_minus.getTag(R.integer.btn_minus_view);
                TextView tv = (TextView) tempview.findViewById(R.id.number);
                Integer pos = (Integer) holder.btn_minus.getTag(R.integer.btn_minus_pos);
                int number = Integer.parseInt(tv.getText().toString()) - 1;
                tv.setText(String.valueOf(number));
                MainActivity.modelArrayList.get(pos).setNumber(number);
            }
        });
        return convertView;
    }
    private class ViewHolder {
        protected Button btn_plus, btn_minus;
        private TextView tvFruit, tvnumber;
    }
}
We are using an arraylist which is defined in the Main Activity.
This arraylist gives the data information to populate the listview.
Every object of the arraylist have value for fruit name and the quantity number.
Quantity number is changing with respect to the click event of plus and minus buttons.
Step 7: Setting tag for position and convertView
Look at this code
holder.btn_plus.setTag(R.integer.btn_plus_view, convertView);
 holder.btn_plus.setTag(R.integer.btn_plus_pos, position);
When listview is populating, we can set tags for postion and views as per above code.
We have set tags on btn_plus for position and converView.
setTag(key,value) method is used for this.
key for tag is used from the integer.xml file, we created earlier.
Your key should be unique for setting each tag.
Step 8: Getting tags in buttons onClick() method
 holder.btn_plus.setOnClickListener(new View.OnClickListener() {
            @Override
            public void onClick(View v) {
                View tempview = (View) holder.btn_plus.getTag(R.integer.btn_plus_view);
                TextView tv = (TextView) tempview.findViewById(R.id.number);
                Integer pos = (Integer) holder.btn_plus.getTag(R.integer.btn_plus_pos);
                int number = Integer.parseInt(tv.getText().toString()) + 1;
                tv.setText(String.valueOf(number));
                MainActivity.modelArrayList.get(pos).setNumber(number);
            }
        });
You can get position and converView by using getTag(key) method.
We are setting tempview with view got from getTag() method.
In getTag() method we are using same key, which we used in setTag() method.
Similarly we can get position also using getTag() method and proper key.
Here tempview is a whole row view which contains two textView and two button.
You can inflate views of row view and set values to them. Here we are setting textView’s value by following code
tv.setText(String.valueOf(number));
Similarly, for btn_minus, all tags are set and get and values of textView are updated.
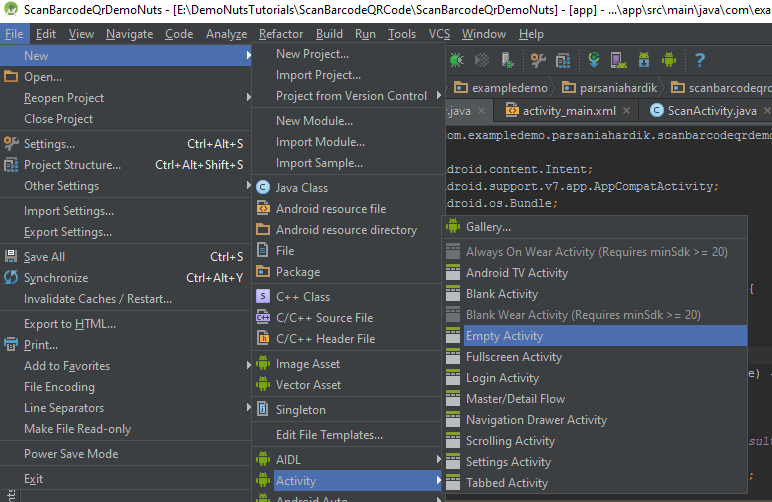
Step 9: Creating NextActivity
To open new activity in android studio, click on File tab which is present at the left top bar.
Now go to File->New->Activity->Empty Activity and give name of activity as NextActivity.
Step 10: Updating NextActivtiy code
Add following code into activity_next.xml
<?xml version="1.0" encoding="utf-8"?>
<RelativeLayout xmlns:android="http://schemas.android.com/apk/res/android"
    xmlns:tools="http://schemas.android.com/tools"
    android:layout_width="match_parent"
    android:layout_height="match_parent"
    tools:context="com.exampledemo.parsaniahardik.listview_with_button_demonuts.NextActivity">
    <TextView
        android:layout_width="wrap_content"
        android:layout_height="wrap_content"
        android:id="@+id/tv"
        android:textAppearance="?android:attr/textAppearanceMedium"
        android:textColor="#000"
        android:layout_marginTop="20dp"
        android:layout_marginLeft="20dp"/>
</RelativeLayout>
Add following into NextActivity.java class
import android.support.v7.app.AppCompatActivity;
import android.os.Bundle;
import android.widget.TextView;
public class NextActivity extends AppCompatActivity {
    private TextView tv;
    @Override
    protected void onCreate(Bundle savedInstanceState) {
        super.onCreate(savedInstanceState);
        setContentView(R.layout.activity_next);
        tv = (TextView) findViewById(R.id.tv);
        for (int i = 0; i < 5; i++) {
            String text = tv.getText().toString();
            tv.setText(text + MainActivity.modelArrayList.get(i).getFruit()+" -> "+MainActivity.modelArrayList.get(i).getNumber()+"\n");
        }
    }
}
Step 11: Updating MainActivity.java class
Put below code in MainActivity.java
import android.content.Intent;
import android.support.v7.app.AppCompatActivity;
import android.os.Bundle;
import android.view.View;
import android.widget.Button;
import android.widget.ListView;
import java.util.ArrayList;
public class MainActivity extends AppCompatActivity {
    private ListView lv;
    public static ArrayList<Model> modelArrayList;
    private CustomAdapter customAdapter;
    private Button btnnext;
    private String[] fruitlist = new String[]{"Apples", "Oranges", "Potatoes", "Tomatoes","Grapes"};
    @Override
    protected void onCreate(Bundle savedInstanceState) {
        super.onCreate(savedInstanceState);
        setContentView(R.layout.activity_main);
        lv = (ListView) findViewById(R.id.lv);
        btnnext = (Button) findViewById(R.id.next);
        modelArrayList = getModel();
        customAdapter = new CustomAdapter(this);
        lv.setAdapter(customAdapter);
        btnnext.setOnClickListener(new View.OnClickListener() {
            @Override
            public void onClick(View v) {
                Intent intent = new Intent(MainActivity.this,NextActivity.class);
                startActivity(intent);
            }
        });
    }
    private ArrayList<Model> getModel(){
        ArrayList<Model> list = new ArrayList<>();
        for(int i = 0; i < 5; i++){
            Model model = new Model();
            model.setNumber(1);
            model.setFruit(fruitlist[i]);
            list.add(model);
        }
        return list;
    }
}
Consider the below code
 private ArrayList<Model> getModel(){
        ArrayList<Model> list = new ArrayList<>();
        for(int i = 0; i < 5; i++){
            Model model = new Model();
            model.setNumber(1);
            model.setFruit(fruitlist[i]);
            list.add(model);
        }
        return list;
    }
getModel() method creates an arraylist with the objects of the Model class.
This arraylist works as a data provider for the listview adapter.
Number of objects in the arraylist is equals to the number of rows in the listview.
So it was all about implementing listview with button android feature in our android app programmatically. Thank you and keep coding!
So we have considered all the possible examples of android listview widget.