
Whatsapp is using Android tablayout for basic navigation.
In today’s Android tablayout example, we will develop that kind of structure programmatically.
Table of Content
1. Android Tablayout Example With Fragments,ViewPager
2. Android Change ActionBar/Toolbar Icon/Text in Each tab
3. Android Custom Tablayout Example
4. Android Change Tab Icon/Text/Background Color/Text Color When Selected
1. Android Tablayout Example With Fragments,ViewPager
Android tablayout uses fragments, material design and view pager as basic components.
First, watch the output, then we will prepare it.
Step 1: Create a new project in Android Studio.
Always try to create new project in android studio with empty activity.
Step 2: Update build.gradle(Module:app) file
Add below in build.gradle(Module:app) file
 compile 'com.android.support:design:23.1.1'
 compile 'com.android.support:support-v4:23.1.1'
Whole source code for build.gradle(Module:app)
apply plugin: 'com.android.application'

android {
    compileSdkVersion 23
    buildToolsVersion "23.0.3"

    defaultConfig {
        applicationId "com.exampledemo.parsaniahardik.simpletabsdemonuts"
        minSdkVersion 16
        targetSdkVersion 22
        versionCode 1
        versionName "1.0"
    }
    buildTypes {
        release {
            minifyEnabled false
            proguardFiles getDefaultProguardFile('proguard-android.txt'), 'proguard-rules.pro'
        }
    }
}

dependencies {
    compile fileTree(dir: 'libs', include: ['*.jar'])
    testCompile 'junit:junit:4.12'

    compile 'com.android.support:appcompat-v7:23.1.1'
    compile 'com.android.support:design:23.1.1'
    compile 'com.android.support:support-v4:23.1.1'
}
Step 3: Updating colors.xml
Go to the res->values->colors.xml directory
update colors.xml as below
<?xml version="1.0" encoding="utf-8"?>
<resources>
    <color name="colorPrimary">#ca9e2d</color>
    <color name="colorPrimaryDark">#d6b153</color>
    <color name="colorAccent">#fff</color>
</resources>
Step 4: Preparing three fragments
Create three fragments and give them name as “OneFragment,” “TwoFragment,” and “ThreeFragment.“
In every application with tab layout, use of fragment is must. Gmail is also using same concept.
Fragments simplifies the back stack problem arises if we use activity instead of fragment.
Here, we are using three fragments. You can increase or decrease this number as per your requirements.
Add below code in fragment_one.xml
<FrameLayout xmlns:android="http://schemas.android.com/apk/res/android"
    xmlns:tools="http://schemas.android.com/tools"
    android:layout_width="match_parent"
    android:layout_height="match_parent"
    tools:context="com.exampledemo.parsaniahardik.simpletabsdemonuts.OneFragment">

    <TextView
        android:layout_width="match_parent"
        android:layout_height="match_parent"
        android:gravity="center"
        android:background="#8cf11f"
        android:textSize="25sp"
        android:textColor="#fff"
        android:text="1. One" />

</FrameLayout>
Add following in OneFragment.java
import android.os.Bundle;
import android.support.v4.app.Fragment;
import android.view.LayoutInflater;
import android.view.View;
import android.view.ViewGroup;

public class OneFragment extends Fragment {

    public OneFragment() {
        // Required empty public constructor
    }

    @Override
    public void onCreate(Bundle savedInstanceState) {
        super.onCreate(savedInstanceState);

    }

    @Override
    public View onCreateView(LayoutInflater inflater, ViewGroup container,
                             Bundle savedInstanceState) {
        // Inflate the layout for this fragment
        return inflater.inflate(R.layout.fragment_one, container, false);
    }
}
Copy below source code in fragment_two.xml
<FrameLayout xmlns:android="http://schemas.android.com/apk/res/android"
    xmlns:tools="http://schemas.android.com/tools"
    android:layout_width="match_parent"
    android:layout_height="match_parent"
    tools:context="com.exampledemo.parsaniahardik.simpletabsdemonuts.TwoFragment">

    <TextView
        android:layout_width="match_parent"
        android:layout_height="match_parent"
        android:gravity="center"
        android:textSize="25sp"
        android:background="#5824dc"
        android:textColor="#fff"
        android:text="2. Two" />

</FrameLayout>
Copy following code in TwoFragment.java
import android.os.Bundle;
import android.support.v4.app.Fragment;
import android.view.LayoutInflater;
import android.view.View;
import android.view.ViewGroup;

public class TwoFragment extends Fragment {

    public TwoFragment() {
        // Required empty public constructor
    }

    @Override
    public void onCreate(Bundle savedInstanceState) {
        super.onCreate(savedInstanceState);

    }

    @Override
    public View onCreateView(LayoutInflater inflater, ViewGroup container,
                             Bundle savedInstanceState) {
        // Inflate the layout for this fragment
        return inflater.inflate(R.layout.fragment_two, container, false);
    }
}
Add below code in fragment_three.xml
<FrameLayout xmlns:android="http://schemas.android.com/apk/res/android"
    xmlns:tools="http://schemas.android.com/tools"
    android:layout_width="match_parent"
    android:layout_height="match_parent"
    tools:context=".ThreeFragment">

    <TextView
        android:layout_width="match_parent"
        android:layout_height="match_parent"
        android:gravity="center"
        android:textSize="25sp"
        android:background="#ec3289"
        android:textColor="#fff"
        android:text="3. Three" />

</FrameLayout>
Paste below code in ThreeFragment.java
import android.os.Bundle;
import android.support.v4.app.Fragment;
import android.view.LayoutInflater;
import android.view.View;
import android.view.ViewGroup;

public class ThreeFragment extends Fragment {

    public ThreeFragment() {
        // Required empty public constructor
    }

    @Override
    public void onCreate(Bundle savedInstanceState) {
        super.onCreate(savedInstanceState);
    }

    @Override
    public View onCreateView(LayoutInflater inflater, ViewGroup container,
                             Bundle savedInstanceState) {
        // Inflate the layout for this fragment
        return inflater.inflate(R.layout.fragment_three, container, false);
    }
}
Step 5: Updating MainActivity
update activity_main.xml as below
<android.support.design.widget.CoordinatorLayout xmlns:android="http://schemas.android.com/apk/res/android"
    xmlns:app="http://schemas.android.com/apk/res-auto"
    android:layout_width="match_parent"
    android:layout_height="match_parent">

    <android.support.design.widget.AppBarLayout
        android:layout_width="match_parent"
        android:layout_height="wrap_content"
        android:theme="@style/ThemeOverlay.AppCompat.Dark.ActionBar">

        <android.support.design.widget.TabLayout
            android:id="@+id/tabs"
            android:layout_width="match_parent"
            android:layout_height="wrap_content"
            app:tabTextColor="#fff"
            app:tabSelectedTextColor="#000"
            app:tabGravity="fill"
            app:tabMode="fixed" />

    </android.support.design.widget.AppBarLayout>

    <android.support.v4.view.ViewPager
        android:id="@+id/viewpager"
        android:layout_width="match_parent"
        android:layout_height="match_parent"
        app:layout_behavior="@string/appbar_scrolling_view_behavior" />

</android.support.design.widget.CoordinatorLayout>
Update MainActivity.java as per following
import android.support.design.widget.TabLayout;
import android.support.v4.app.Fragment;
import android.support.v4.app.FragmentManager;
import android.support.v4.app.FragmentPagerAdapter;
import android.support.v4.view.ViewPager;
import android.support.v7.app.AppCompatActivity;
import android.os.Bundle;
import java.util.ArrayList;
import java.util.List;

public class MainActivity extends AppCompatActivity {

    private TabLayout tabLayout;
    public ViewPager viewPager;

    @Override
    protected void onCreate(Bundle savedInstanceState) {
        super.onCreate(savedInstanceState);
        setContentView(R.layout.activity_main);

        viewPager = (ViewPager) findViewById(R.id.viewpager);
        setupViewPager(viewPager);

        tabLayout = (TabLayout) findViewById(R.id.tabs);
        tabLayout.setupWithViewPager(viewPager);

  }

    private void setupViewPager(ViewPager viewPager) {
        ViewPagerAdapter adapter = new ViewPagerAdapter(getSupportFragmentManager());
        adapter.addFragment(new OneFragment(), "ONE");
        adapter.addFragment(new TwoFragment(), "TWO");
        adapter.addFragment(new ThreeFragment(), "THREE");
        viewPager.setAdapter(adapter);
    }

    class ViewPagerAdapter extends FragmentPagerAdapter {
        private final List<Fragment> mFragmentList = new ArrayList<>();
        private final List<String> mFragmentTitleList = new ArrayList<>();

        public ViewPagerAdapter(FragmentManager manager) {
            super(manager);
        }

        @Override
        public Fragment getItem(int position) {
            return mFragmentList.get(position);
        }

        @Override
        public int getCount() {
            return mFragmentList.size();
        }

        public void addFragment(Fragment fragment, String title) {
            mFragmentList.add(fragment);
            mFragmentTitleList.add(title);
        }

        @Override
        public CharSequence getPageTitle(int position) {
            return mFragmentTitleList.get(position);
        }
    }
}
Step 6: Explanation of MainActivity.java
First of all setupViewPager() method is called.
Consider below source code
private void setupViewPager(ViewPager viewPager) {
        ViewPagerAdapter adapter = new ViewPagerAdapter(getSupportFragmentManager());
        adapter.addFragment(new OneFragment(), "ONE");
        adapter.addFragment(new TwoFragment(), "TWO");
        adapter.addFragment(new ThreeFragment(), "THREE");
        viewPager.setAdapter(adapter);
 }
In above method, we have added each fragment to view pager adapter.
addFragment() method have two parameters. First have the object of fragments and second have the name of that fragment.
The value of Second parameter will shown as the name of the tab.
After that, ViewPagerAdapter class is defined. You do not need to do any modification in this class.
2. Android Change ActionBar/Toolbar Icon/Text in Each tab
We will learn about tablayout android studio example.
Tablayout android studio tutorial will guide you to make different actionbar/toolbar menuitems for different colors.
In whatsapp, when you slide fragments menu items are also changing. We will develop this functionality in tablayout android tutorial.
First, check the output of this example.
Step 1: Creating Base Project
Follow all the steps from basic tablayout Android tutorial.
After you have completed above tutorial, you will have one android project with simple tablayout.
Now follow below steps.
Step 2: Adding images to drawable
Download images and copy them into “drawable” directory
Step 3: Updating styles.xml
Update styles.xml file as per below source code
<resources>
    <!-- Base application theme. -->
    <style name="AppTheme" parent="Theme.AppCompat.Light.DarkActionBar">
        <!-- Customize your theme here. -->
        <item name="windowNoTitle">true</item>
        <item name="windowActionBar">false</item>
        <item name="colorPrimary">@color/colorPrimary</item>
        <item name="colorPrimaryDark">@color/colorPrimaryDark</item>
        <item name="colorAccent">@color/colorAccent</item>
    </style>

</resources>
Step 4: Creating toolbar.xml file
Create a new resource file named toolbar.xml and paste below
<?xml version="1.0" encoding="utf-8"?>
<android.support.v7.widget.Toolbar xmlns:android="http://schemas.android.com/apk/res/android"
    xmlns:local="http://schemas.android.com/apk/res-auto"
    android:id="@+id/toolbar"
    android:layout_width="match_parent"
    android:layout_height="wrap_content"
    android:minHeight="?attr/actionBarSize"
    android:background="?attr/colorPrimary"
    local:theme="@style/ThemeOverlay.AppCompat.Dark.ActionBar"
    local:popupTheme="@style/ThemeOverlay.AppCompat.Light" />
Step 5: Developing OneActivity
Create a new activity named “OneActivity.”
Copy following in activity_one.xml
<?xml version="1.0" encoding="utf-8"?>
<LinearLayout xmlns:android="http://schemas.android.com/apk/res/android"
    xmlns:tools="http://schemas.android.com/tools"
    android:layout_width="match_parent"
    android:layout_height="match_parent"
    android:orientation="vertical"
    tools:context="com.exampledemo.parsaniahardik.tabmenuitem.OneActivity">

    <include
        android:id="@+id/toolbar"
        layout="@layout/toolbar" />

    <TextView
        android:layout_width="match_parent"
        android:layout_height="match_parent"
        android:gravity="center"
        android:background="#f12a1f"
        android:textSize="25sp"
        android:textColor="#fff"
        android:text="This is One Activity. Similarly you can create activity for two and three fragments." />

</LinearLayout>
Add following source code into OneActivity.java class
import android.support.v7.app.AppCompatActivity;
import android.os.Bundle;
import android.support.v7.widget.Toolbar;
import android.view.MenuItem;

public class OneActivity extends AppCompatActivity {

    private Toolbar toolbar;

    @Override
    protected void onCreate(Bundle savedInstanceState) {
        super.onCreate(savedInstanceState);
        setContentView(R.layout.activity_one);

        toolbar = (Toolbar) findViewById(R.id.toolbar);
        setSupportActionBar(toolbar);
        getSupportActionBar().setTitle("One Activity");
        getSupportActionBar().setDisplayHomeAsUpEnabled(true);

    }
    @Override
    public boolean onOptionsItemSelected(MenuItem item) {
        if (item.getItemId() == android.R.id.home) {
            onBackPressed();
            return true;
        }
        return false;
    }
}
Step 6: Creating menu resource directory
Create a new resource directory named “menu” inside the “res” directory as per below image.
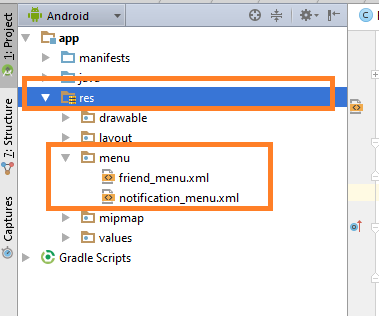
Inside “menu,” make three new xml files and name them as one_menu.xml,two_menu.xml and three_menu.xml
Add below source code in one_menu.xml
<?xml version="1.0" encoding="utf-8"?>
<menu xmlns:android="http://schemas.android.com/apk/res/android"
    xmlns:app="http://schemas.android.com/apk/res-auto">

    <item
        android:id="@+id/action_message"
        android:orderInCategory="100"
        android:title="Message"
        android:icon="@drawable/message"
        app:showAsAction="always" />

</menu>
Add following in two_menu.xml
<?xml version="1.0" encoding="utf-8"?>
<menu xmlns:android="http://schemas.android.com/apk/res/android"
    xmlns:app="http://schemas.android.com/apk/res-auto">

    <item
        android:id="@+id/action_car"
        android:orderInCategory="100"
        android:title="Message"
        android:icon="@drawable/car"
        app:showAsAction="always" />

</menu>
Add below in three_menu.xml
<?xml version="1.0" encoding="utf-8"?>
<menu xmlns:android="http://schemas.android.com/apk/res/android"
    xmlns:app="http://schemas.android.com/apk/res-auto">

    <item
        android:id="@+id/action_logout"
        android:orderInCategory="100"
        android:title="Logout"
        app:showAsAction="never" />
</menu>
Step 7: Updating all fragments
Update OneFragment.java as per below code
import android.content.Intent;
import android.os.Bundle;
import android.support.v4.app.Fragment;
import android.view.LayoutInflater;
import android.view.Menu;
import android.view.MenuInflater;
import android.view.MenuItem;
import android.view.View;
import android.view.ViewGroup;
import android.widget.TextView;
import android.widget.Toast;

public class OneFragment extends Fragment {

    private View view;
    private TextView textView;

    public OneFragment() {
        // Required empty public constructor
    }

    @Override
    public void onCreate(Bundle savedInstanceState) {
        super.onCreate(savedInstanceState);
        setHasOptionsMenu(true);
    }

    @Override
    public View onCreateView(LayoutInflater inflater, ViewGroup container,
                             Bundle savedInstanceState) {
        // Inflate the layout for this fragment
        view = inflater.inflate(R.layout.fragment_one, container, false);

        textView = (TextView) view.findViewById(R.id.tv);

        textView.setOnClickListener(new View.OnClickListener() {
            @Override
            public void onClick(View v) {
                Intent intent = new Intent(getActivity(),OneActivity.class);
                startActivity(intent);
            }
        });

        return view;
    }
    @Override
    public void onCreateOptionsMenu(Menu menu, MenuInflater inflater) {

        inflater.inflate(R.menu.one_menu, menu);

        super.onCreateOptionsMenu(menu, inflater);
    }

    @Override
    public boolean onOptionsItemSelected(MenuItem item) {
        // Handle action bar item clicks here. The action bar will
        // automatically handle clicks on the Home/Up button, so long
        // as you specify a parent activity in AndroidManifest.xml.
        int id = item.getItemId();

        //noinspection SimplifiableIfStatement
        if (id == R.id.action_message) {
            Toast.makeText(getActivity(), "Message clicked!", Toast.LENGTH_SHORT).show();
            return true;

        }

        return super.onOptionsItemSelected(item);
    }

}
Update TwoFragment.java as per following
import android.os.Bundle;
import android.support.v4.app.Fragment;
import android.view.LayoutInflater;
import android.view.Menu;
import android.view.MenuInflater;
import android.view.MenuItem;
import android.view.View;
import android.view.ViewGroup;
import android.widget.Toast;

public class TwoFragment extends Fragment {

    public TwoFragment() {
        // Required empty public constructor
    }

    @Override
    public void onCreate(Bundle savedInstanceState) {
        super.onCreate(savedInstanceState);
        setHasOptionsMenu(true);
    }

    @Override
    public View onCreateView(LayoutInflater inflater, ViewGroup container,
                             Bundle savedInstanceState) {
        // Inflate the layout for this fragment
        return inflater.inflate(R.layout.fragment_two, container, false);
    }

    @Override
    public void onCreateOptionsMenu(Menu menu, MenuInflater inflater) {

        inflater.inflate(R.menu.two_menu, menu);

        super.onCreateOptionsMenu(menu, inflater);
    }

    @Override
    public boolean onOptionsItemSelected(MenuItem item) {
        // Handle action bar item clicks here. The action bar will
        // automatically handle clicks on the Home/Up button, so long
        // as you specify a parent activity in AndroidManifest.xml.
        int id = item.getItemId();

        //noinspection SimplifiableIfStatement
        if (id == R.id.action_car) {
            Toast.makeText(getActivity(), "Car clicked!", Toast.LENGTH_SHORT).show();
            return true;

        }

        return super.onOptionsItemSelected(item);
    }
}
Update ThreeFragment.java like below
import android.os.Bundle;
import android.support.v4.app.Fragment;
import android.view.LayoutInflater;
import android.view.Menu;
import android.view.MenuInflater;
import android.view.MenuItem;
import android.view.View;
import android.view.ViewGroup;
import android.widget.Toast;

public class ThreeFragment extends Fragment {

    public ThreeFragment() {
        // Required empty public constructor
    }

    @Override
    public void onCreate(Bundle savedInstanceState) {
        super.onCreate(savedInstanceState);
        setHasOptionsMenu(true);
    }

    @Override
    public View onCreateView(LayoutInflater inflater, ViewGroup container,
                             Bundle savedInstanceState) {
        // Inflate the layout for this fragment
        return inflater.inflate(R.layout.fragment_three, container, false);
    }

    @Override
    public void onCreateOptionsMenu(Menu menu, MenuInflater inflater) {

        inflater.inflate(R.menu.three_menu, menu);

        super.onCreateOptionsMenu(menu, inflater);
    }

    @Override
    public boolean onOptionsItemSelected(MenuItem item) {
        // Handle action bar item clicks here. The action bar will
        // automatically handle clicks on the Home/Up button, so long
        // as you specify a parent activity in AndroidManifest.xml.
        int id = item.getItemId();

        //noinspection SimplifiableIfStatement
        if (id == R.id.action_logout) {
            Toast.makeText(getActivity(), "Logout clicked!", Toast.LENGTH_SHORT).show();
            return true;

        }

        return super.onOptionsItemSelected(item);
    }
}
3. Android Custom Tablayout Example
Custom Tablayout Android Studio example creates custom tablayout with custom view.
We will create a custom view for tablayout in this example.
You can use both icon and tab name in custom tablayout.
There are Four ways to set icons with respect to text(tab name)
- Left side of text,
- Right side of text,
- Above text and
- Below text.
First, check the output of a tutorial, then we will develop it.
Step 1: Making Base Project
Follow all the steps from basic tablayout Android tutorial.
After you have completed above tutorial, you will have one android project with tablayout.
Make sure you followed all the steps of above tutorial. It is must for going further with this example.
Now follow below steps.
Step 2: Adding custom_tab.xml file
Create a new resource directory named custom_tab.xml and add below code
<?xml version="1.0" encoding="utf-8"?>

<LinearLayout xmlns:android="http://schemas.android.com/apk/res/android"
    android:layout_width="match_parent"
    android:layout_height="match_parent"
    android:gravity="center"
    android:orientation="vertical">

    <LinearLayout
        android:layout_width="match_parent"
        android:layout_height="0dp"
        android:id="@+id/ll"
        android:orientation="horizontal"
        android:layout_weight="1"
        android:gravity="center">

        <ImageView
            android:layout_width="30dp"
            android:layout_height="30dp"
            android:src="@mipmap/ic_launcher"/>
        <TextView
            android:id="@+id/tvtab1"
            android:layout_width="wrap_content"
            android:layout_height="wrap_content"
            android:text="ONE"
            android:textColor="@color/colorAccent"
            android:textSize="14sp"
            android:textStyle="bold" />
    </LinearLayout>

    <LinearLayout
        android:layout_width="match_parent"
        android:layout_height="0dp"
        android:layout_weight="1"
        android:id="@+id/ll2"
        android:orientation="vertical"
        android:gravity="center">
        <ImageView
            android:layout_width="30dp"
            android:layout_height="30dp"
            android:src="@mipmap/ic_launcher"/>

        <TextView
            android:id="@+id/tvtab2"
            android:layout_width="wrap_content"
            android:layout_height="wrap_content"
            android:text="TWO"
            android:textColor="#26e9dc"
            android:textSize="14sp"
            android:textStyle="bold" />
    </LinearLayout>

    <LinearLayout
        android:layout_width="match_parent"
        android:layout_height="0dp"
        android:layout_weight="1"
        android:id="@+id/ll3"
        android:orientation="vertical"
        android:gravity="center">

        <TextView
            android:id="@+id/tvtab3"
            android:layout_width="wrap_content"
            android:layout_height="wrap_content"
            android:text="THREE"
            android:textColor="#d8ea2b"
            android:textSize="14sp"
            android:textStyle="bold" />
        <ImageView
            android:layout_width="30dp"
            android:layout_height="30dp"
            android:src="@mipmap/ic_launcher"/>
    </LinearLayout>
</LinearLayout>
This custom_tab.xml file is the core of this tutorial.
You can customize all of your tabs here with various icons, tab names and colors of tab names.
Step 3: Updating MainActivity.java
Update MainActivity.java as per below code
import android.content.Context;
import android.support.design.widget.TabLayout;
import android.support.v4.app.Fragment;
import android.support.v4.app.FragmentManager;
import android.support.v4.app.FragmentPagerAdapter;
import android.support.v4.view.ViewPager;
import android.support.v7.app.AppCompatActivity;
import android.os.Bundle;
import android.view.LayoutInflater;
import android.view.View;
import android.widget.LinearLayout;
import java.util.ArrayList;
import java.util.List;

public class MainActivity extends AppCompatActivity {

    private TabLayout tabLayout;
    public ViewPager viewPager;

    @Override
    protected void onCreate(Bundle savedInstanceState) {
        super.onCreate(savedInstanceState);
        setContentView(R.layout.activity_main);

        viewPager = (ViewPager) findViewById(R.id.viewpager);
        setupViewPager(viewPager);

        tabLayout = (TabLayout) findViewById(R.id.tabs);
        tabLayout.setupWithViewPager(viewPager);

        View headerView = ((LayoutInflater) getSystemService(Context.LAYOUT_INFLATER_SERVICE))
                .inflate(R.layout.custom_tab, null, false);

        LinearLayout linearLayoutOne = (LinearLayout) headerView.findViewById(R.id.ll);
        LinearLayout linearLayout2 = (LinearLayout) headerView.findViewById(R.id.ll2);
        LinearLayout linearLayout3 = (LinearLayout) headerView.findViewById(R.id.ll3);

        tabLayout.getTabAt(0).setCustomView(linearLayoutOne);
        tabLayout.getTabAt(1).setCustomView(linearLayout2);
        tabLayout.getTabAt(2).setCustomView(linearLayout3);

    }

    private void setupViewPager(ViewPager viewPager) {
        ViewPagerAdapter adapter = new ViewPagerAdapter(getSupportFragmentManager());
        adapter.addFragment(new OneFragment(), "ONE");
        adapter.addFragment(new TwoFragment(), "TWO");
        adapter.addFragment(new ThreeFragment(), "THREE");
        viewPager.setAdapter(adapter);
    }

    class ViewPagerAdapter extends FragmentPagerAdapter {
        private final List<Fragment> mFragmentList = new ArrayList<>();
        private final List<String> mFragmentTitleList = new ArrayList<>();

        public ViewPagerAdapter(FragmentManager manager) {
            super(manager);
        }

        @Override
        public Fragment getItem(int position) {
            return mFragmentList.get(position);
        }

        @Override
        public int getCount() {
            return mFragmentList.size();
        }

        public void addFragment(Fragment fragment, String title) {
            mFragmentList.add(fragment);
            mFragmentTitleList.add(title);
        }

        @Override
        public CharSequence getPageTitle(int position) {
            return mFragmentTitleList.get(position);
        }
    }
}
Now consider below lines
View headerView = ((LayoutInflater) getSystemService(Context.LAYOUT_INFLATER_SERVICE))
                .inflate(R.layout.custom_tab, null, false);

        LinearLayout linearLayoutOne = (LinearLayout) headerView.findViewById(R.id.ll);
        LinearLayout linearLayout2 = (LinearLayout) headerView.findViewById(R.id.ll2);
        LinearLayout linearLayout3 = (LinearLayout) headerView.findViewById(R.id.ll3);
headerView is the object of View class and is inflated with layout resource file named custom_tab.xml
In above lines, linearlayoutOne, linearlayout2 and linearlayout3 are inflated with headerView.
We will set custom view for each tab with the help of below source code lies.
tabLayout.getTabAt(0).setCustomView(linearLayoutOne);
tabLayout.getTabAt(1).setCustomView(linearLayout2);
tabLayout.getTabAt(2).setCustomView(linearLayout3);
4. Android Change Tab Icon/Text/Background Color/Text Color When Selected
Android change tab icon when selected tutorial with example is tonight’s hot topic.
In this tutorial, you will learn how to change tab icon, tab text, tab icon color, tab text color, tab background color, indicator color programmatically when user selects the tab.
Developers use these features to indicate the current working tab to the user.
Output
What will be the final output at the end of this example?
Check it out in the below video.
Step 1. Update colors.xml file
Add some necessary colors in the colors.xml file which is located at the values->colors.xml path.
<?xml version="1.0" encoding="utf-8"?>
<resources>
    <color name="colorPrimary">#525e5e</color>
    <color name="colorPrimaryDark">#41f8f8</color>
    <color name="colorAccent">#525e5e</color>
    <color name="greyback">#1e2926</color>
    <color name="black">#000000</color>
    <color name="view">#5e6664</color>
    <color name="tranparent">#00ffffff</color>
    <color name="white">#FFFFFF</color>
</resources>
Step 2. Necessary strings
A file which is available at values->strings.xml needed to be replaced with following source code
<resources>
    <string name="app_name">ChangeTabIcon</string>

    <string name="login">Login</string>
    <string name="intro">Introduction</string>
    <string name="Product">Product</string>
    <string name="Location">Location</string>

    <!-- TODO: Remove or change this placeholder text -->
    <string name="hello_blank_fragment">Hello blank fragment</string>
</resources>
Step 3. Various Icons
As we want to change the color or may be the whole icon when the user clicks on the tab, we need to add different icons for every situation.
There should be different icons for both events, when the tab is selected and when it is deselected.
Click on below link to download necessary icons for this practical example tutorial.
[sociallocker]Download All the Icons[/sociallocker]
Now copy all these icons in the mipmap folder.
Step 4. Making Drawable resource files
In the drawable folder, make one new resource file and name it like roundback.xml
Copy the following code in it
<?xml version="1.0" encoding="utf-8"?>
<shape xmlns:android="http://schemas.android.com/apk/res/android" >
    <!-- <stroke
         android:width="1dp"
         android:color="@color/common_border_color" />-->

    <!-- <solid android:color="#ffffff" />-->
    <gradient android:startColor="#525e5e" android:endColor="#525e5e" android:angle="270" />

    <corners  android:bottomRightRadius="2.3dp" android:bottomLeftRadius="0dp"
        android:topLeftRadius="0dp" android:topRightRadius="2.3dp" />
</shape>
Create another resource file named roundleft.xml and add the below code
<?xml version="1.0" encoding="utf-8"?>
<shape xmlns:android="http://schemas.android.com/apk/res/android" >
    <!-- <stroke
         android:width="1dp"
         android:color="@color/common_border_color" />-->

    <!-- <solid android:color="#ffffff" />-->
    <gradient android:startColor="#525e5e" android:endColor="#525e5e" android:angle="270" />

    <corners  android:bottomRightRadius="0dp" android:bottomLeftRadius="2.3dp"
        android:topLeftRadius="2.3dp" android:topRightRadius="0dp" />
</shape>
Step 5. Four Fragments for Four Tabs
There are four tabs in this android studio example so we have to create separate fragments for each tab.
Make first fragment with name IntroFragment.
Add below code in IntroFragment.java file
import android.os.Bundle;
import android.support.v4.app.Fragment;
import android.view.LayoutInflater;
import android.view.View;
import android.view.ViewGroup;

public class IntroFragment extends Fragment {

    public IntroFragment() {
        // Required empty public constructor
    }
    @Override
    public View onCreateView(LayoutInflater inflater, ViewGroup container,
                             Bundle savedInstanceState) {
        // Inflate the layout for this fragment
        return inflater.inflate(R.layout.fragment_intro, container, false);
    }

}
Code for fragment_intro.xml
<?xml version="1.0" encoding="utf-8"?>
<FrameLayout xmlns:android="http://schemas.android.com/apk/res/android"
    xmlns:tools="http://schemas.android.com/tools"
    android:layout_width="match_parent"
    android:layout_height="match_parent"
    tools:context=".IntroFragment">

    <!-- TODO: Update blank fragment layout -->
    <TextView
        android:layout_width="match_parent"
        android:layout_height="match_parent"
        android:gravity="center"
        android:textSize="50sp"
        android:text="@string/intro" />

</FrameLayout>
Now second fragment’s name is Location.
LocationFragment.java
import android.os.Bundle;
import android.support.v4.app.Fragment;
import android.view.LayoutInflater;
import android.view.View;
import android.view.ViewGroup;

public class LocationFragment extends Fragment {

    public LocationFragment() {
        // Required empty public constructor
    }

    @Override
    public void onCreate(Bundle savedInstanceState) {
        super.onCreate(savedInstanceState);
    }

    @Override
    public View onCreateView(LayoutInflater inflater, ViewGroup container,
                             Bundle savedInstanceState) {
        // Inflate the layout for this fragment
        return inflater.inflate(R.layout.fragment_location, container, false);
    }
}
fragment_location.xml
<?xml version="1.0" encoding="utf-8"?>
<FrameLayout xmlns:android="http://schemas.android.com/apk/res/android"
    xmlns:tools="http://schemas.android.com/tools"
    android:layout_width="match_parent"
    android:layout_height="match_parent"
    tools:context=".LocationFragment">

    <!-- TODO: Update blank fragment layout -->
    <TextView
        android:layout_width="match_parent"
        android:layout_height="match_parent"
        android:gravity="center"
        android:textSize="50sp"
        android:text="Location" />

</FrameLayout>
Third fragment is Login Fragment
LoginFragment.java
import android.os.Bundle;
import android.support.v4.app.Fragment;
import android.view.LayoutInflater;
import android.view.View;
import android.view.ViewGroup;

public class LoginFragment extends Fragment {

    public LoginFragment() {
        // Required empty public constructor
    }

    @Override
    public void onCreate(Bundle savedInstanceState) {
        super.onCreate(savedInstanceState);
    }

    @Override
    public View onCreateView(LayoutInflater inflater, ViewGroup container,
                             Bundle savedInstanceState) {
        // Inflate the layout for this fragment
        return inflater.inflate(R.layout.fragment_login, container, false);
    }
}
fragment_login.xml
<?xml version="1.0" encoding="utf-8"?>
<FrameLayout xmlns:android="http://schemas.android.com/apk/res/android"
    xmlns:tools="http://schemas.android.com/tools"
    android:layout_width="match_parent"
    android:layout_height="match_parent"
    tools:context=".LoginFragment">

    <!-- TODO: Update blank fragment layout -->
    <TextView
        android:layout_width="match_parent"
        android:layout_height="match_parent"
        android:gravity="center"
        android:textSize="50sp"
        android:text="@string/login" />

</FrameLayout>
Product Fragment is the last one.
ProductFragment.java
import android.os.Bundle;
import android.support.v4.app.Fragment;
import android.view.LayoutInflater;
import android.view.View;
import android.view.ViewGroup;

public class ProductFragment extends Fragment {

    public ProductFragment() {
        // Required empty public constructor
    }

    @Override
    public void onCreate(Bundle savedInstanceState) {
        super.onCreate(savedInstanceState);
    }

    @Override
    public View onCreateView(LayoutInflater inflater, ViewGroup container,
                             Bundle savedInstanceState) {
        // Inflate the layout for this fragment
        return inflater.inflate(R.layout.fragment_product, container, false);
    }
}
fragment_product.xml
<?xml version="1.0" encoding="utf-8"?>
<FrameLayout xmlns:android="http://schemas.android.com/apk/res/android"
    xmlns:tools="http://schemas.android.com/tools"
    android:layout_width="match_parent"
    android:layout_height="match_parent"
    tools:context=".ProductFragment">

    <!-- TODO: Update blank fragment layout -->
    <TextView
        android:layout_width="match_parent"
        android:layout_height="match_parent"
        android:gravity="center"
        android:textSize="50sp"
        android:text="@string/Product" />

</FrameLayout>
Step 6. Main Activity
In the last step, you need to add required code in Main Activity’s both files.
In the activity_main.xml, add following code
<?xml version="1.0" encoding="utf-8"?>
<LinearLayout
    xmlns:android="http://schemas.android.com/apk/res/android"
    android:orientation="vertical"
    android:layout_width="match_parent"
    android:layout_height="match_parent">

    <LinearLayout
        android:layout_width="match_parent"
        android:layout_height="50dp"
        android:orientation="horizontal"
        android:background="@mipmap/tab_bar_bg"
        android:layout_marginTop="5dp"
        android:layout_marginBottom="5dp"
        android:layout_marginRight="5dp"
        android:layout_marginLeft="5dp">


        <LinearLayout
            android:orientation="vertical"
            android:layout_width="match_parent"
            android:layout_height="match_parent"
            android:layout_weight="1"

            android:id="@+id/llIntro"
            >

            <ImageView
                android:layout_width="match_parent"
                android:layout_height="0dp"
                android:layout_weight="1"
                android:layout_marginTop="5dp"
                android:paddingTop="5dp"
                android:id="@+id/ivIntro"
                android:src="@mipmap/icon_intro_normal"
                android:foregroundGravity="center"
                />

            <TextView
                android:layout_width="match_parent"
                android:layout_height="0dp"
                android:text="@string/intro"
                android:id="@+id/tvIntro"
                android:layout_weight="1"
                android:textSize="12sp"
                android:gravity="center" />

        </LinearLayout>

        <View
            android:layout_width="0.5dp"
            android:layout_height="match_parent"
            android:background="@color/view"
            />

        <LinearLayout
            android:orientation="vertical"
            android:layout_width="match_parent"
            android:layout_height="match_parent"
            android:layout_weight="1"
            android:id="@+id/llProduct"
            >

            <ImageView
                android:layout_width="match_parent"
                android:layout_height="0dp"
                android:layout_weight="1"
                android:layout_marginTop="5dp"
                android:paddingTop="5dp"
                android:foregroundGravity="center"
                android:id="@+id/ivProduct"
                android:src="@mipmap/icon_product"
                />

            <TextView
                android:layout_width="match_parent"
                android:layout_height="0dp"
                android:text="@string/Product"
                android:id="@+id/tvProduct"
                android:layout_weight="1"
                android:gravity="center"
                android:textSize="12sp" />
        </LinearLayout>

        <View
            android:layout_width="0.5dp"
            android:layout_height="match_parent"
            android:background="@color/view"
            />

        <LinearLayout
            android:orientation="vertical"
            android:layout_width="match_parent"
            android:layout_height="match_parent"
            android:layout_weight="1"
            android:id="@+id/llLocation"
            >
            <ImageView
                android:layout_width="match_parent"
                android:layout_height="0dp"
                android:layout_weight="1"
                android:layout_marginTop="5dp"
                android:paddingTop="5dp"
                android:id="@+id/ivLocation"
                android:src="@mipmap/icon_location"
                />

            <TextView
                android:layout_width="match_parent"
                android:layout_height="0dp"
                android:text="@string/Location"
                android:id="@+id/tvLocation"
                android:layout_weight="1"
                android:gravity="center"
                android:textSize="12sp" />
        </LinearLayout>

        <View
            android:layout_width="0.5dp"
            android:layout_height="match_parent"
            android:background="@color/view"
            />

        <LinearLayout
            android:orientation="vertical"
            android:layout_width="match_parent"
            android:layout_height="match_parent"
            android:layout_weight="1"
            android:id="@+id/llLogin"
            >
            <ImageView
                android:layout_width="match_parent"
                android:layout_height="0dp"
                android:layout_weight="1"
                android:layout_marginTop="5dp"
                android:paddingTop="5dp"
                android:id="@+id/ivLogin"
                android:src="@mipmap/icon_login2"
                />

            <TextView
                android:layout_width="match_parent"
                android:layout_height="0dp"
                android:text="@string/login"
                android:id="@+id/tvLogin"
                android:layout_weight="1"
                android:gravity="center"
                android:textSize="12sp" />
        </LinearLayout>
    </LinearLayout>


    <FrameLayout
        android:id="@+id/container_body"
        android:layout_width="match_parent"
        android:layout_height="match_parent">

    </FrameLayout>


</LinearLayout>
I have designed four Linear Layouts, which represents the four tabs.
Each Linear layout includes one imageview and one textview.
ImageView represnts the tab icon and Textview represents the tab text.
You can add other UI elements as per your requirement.
After four linear layouts, there is a frame layout in which fragment for each tab will be loaded.
Update Main Activity java file
Finally, time to update MainActivity.java file
import android.support.v4.app.Fragment;
import android.support.v4.app.FragmentManager;
import android.support.v4.app.FragmentTransaction;
import android.support.v7.app.AppCompatActivity;
import android.os.Bundle;
import android.view.View;
import android.widget.ImageView;
import android.widget.LinearLayout;
import android.widget.TextView;

public class MainActivity extends AppCompatActivity {

    private int currentSelected = 0;
    private String intro="intro", product = "product", location = "location", login = "login";

    private ImageView ivIntro, ivProduct, ivLocation, ivLogin;
    private TextView  tvIntro, tvProduct, tvLocation, tvLogin;
    private LinearLayout llIntro, llProduct, llLocation, llLogin;

    @Override
    protected void onCreate(Bundle savedInstanceState) {
        super.onCreate(savedInstanceState);
        setContentView(R.layout.activity_main);

        llIntro = (LinearLayout) findViewById(R.id.llIntro);
        llProduct = (LinearLayout) findViewById(R.id.llProduct);
        llLocation = (LinearLayout) findViewById(R.id.llLocation);
        llLogin = (LinearLayout) findViewById(R.id.llLogin);

        ivIntro = (ImageView) findViewById(R.id.ivIntro);
        ivProduct = (ImageView) findViewById(R.id.ivProduct);
        ivLocation = (ImageView) findViewById(R.id.ivLocation);
        ivLogin = (ImageView) findViewById(R.id.ivLogin);

        tvIntro = (TextView) findViewById(R.id.tvIntro);
        tvProduct = (TextView) findViewById(R.id.tvProduct);
        tvLocation = (TextView) findViewById(R.id.tvLocation);
        tvLogin = (TextView) findViewById(R.id.tvLogin);

        llIntro.setOnClickListener(new View.OnClickListener() {
            @Override
            public void onClick(View v) {
                if(currentSelected == 1){

                }else {
                    getSupportActionBar().setTitle("Introduction");
                    ivIntro.setImageResource(R.mipmap.icon_intro_selected);
                    tvIntro.setTextColor(getResources().getColor(R.color.white));
                    llIntro.setBackgroundDrawable(getResources().getDrawable(R.drawable.roundleft));
                    unselectElse(1);
                    removeAllFragment(new IntroFragment(), false,intro);
                }
            }
        });

        llProduct.setOnClickListener(new View.OnClickListener() {
            @Override
            public void onClick(View v) {
                if(currentSelected == 2){

                }else {
                    getSupportActionBar().setTitle("Product");
                    ivProduct.setImageResource(R.mipmap.icon_product_selected);
                    tvProduct.setTextColor(getResources().getColor(R.color.white));
                    llProduct.setBackgroundColor(getResources().getColor(R.color.colorPrimary));
                    unselectElse(2);
                    removeAllFragment(new ProductFragment(), false, product);
                }
            }
        });

        llLocation.setOnClickListener(new View.OnClickListener() {
            @Override
            public void onClick(View v) {
                if(currentSelected == 3){

                }else {
                    getSupportActionBar().setTitle("Location");
                    ivLocation.setImageResource(R.mipmap.icon_location_selected);
                    tvLocation.setTextColor(getResources().getColor(R.color.white));
                    llLocation.setBackgroundColor(getResources().getColor(R.color.colorPrimary));
                    unselectElse(3);
                    removeAllFragment(new LocationFragment(), false, location);
                }
            }
        });

        llLogin.setOnClickListener(new View.OnClickListener() {
            @Override
            public void onClick(View v) {
                if(currentSelected == 4){

                }else {
                    getSupportActionBar().setTitle("Login");
                    ivLogin.setImageResource(R.mipmap.icon_login_selected);
                    tvLogin.setTextColor(getResources().getColor(R.color.white));
                    llLogin.setBackgroundDrawable(getResources().getDrawable(R.drawable.roundback));
                    unselectElse(4);
                    removeAllFragment(new LoginFragment(), false, login);
                }
            }
        });

    }

    private void unselectElse(int current){
        switch (currentSelected){
            case 1:
                ivIntro.setImageResource(R.mipmap.icon_intro_normal);
                tvIntro.setTextColor(getResources().getColor(R.color.colorPrimary));
                llIntro.setBackgroundColor(getResources().getColor(R.color.tranparent));
                currentSelected = current;
                break;
            case 2:
                ivProduct.setImageResource(R.mipmap.icon_product);
                tvProduct.setTextColor(getResources().getColor(R.color.colorPrimary));
                llProduct.setBackgroundColor(getResources().getColor(R.color.tranparent));
                currentSelected = current;
                break;
            case 3:
                ivLocation.setImageResource(R.mipmap.icon_location);
                tvLocation.setTextColor(getResources().getColor(R.color.colorPrimary));
                llLocation.setBackgroundColor(getResources().getColor(R.color.tranparent));
                currentSelected = current;
                break;
            case 4:
                ivLogin.setImageResource(R.mipmap.icon_login2);
                tvLogin.setTextColor(getResources().getColor(R.color.colorPrimary));
                llLogin.setBackgroundColor(getResources().getColor(R.color.tranparent));
                currentSelected = current;
                break;
        }
        if(currentSelected == 0){
            currentSelected = current;
        }
    }

    public void removeAllFragment(Fragment replaceFragment,boolean addToBackStack, String tag) {

        FragmentManager manager = getSupportFragmentManager();
        FragmentTransaction ft = manager.beginTransaction();
        manager.popBackStackImmediate(null,FragmentManager.POP_BACK_STACK_INCLUSIVE);

        if (addToBackStack) {
            ft.addToBackStack(tag);
        }
        ft.replace(R.id.container_body, replaceFragment);
        ft.commitAllowingStateLoss();
    }

}
Step 7. Explanation of Main Activity
In the main activity, I have defined four linear layouts which are representing four tabs as per below.
 llIntro = (LinearLayout) findViewById(R.id.llIntro);
 llProduct = (LinearLayout) findViewById(R.id.llProduct);
 llLocation = (LinearLayout) findViewById(R.id.llLocation);
 llLogin = (LinearLayout) findViewById(R.id.llLogin);
Now, I have set onclick listeners for each above linear layout.
It will work when the user clicks on any tab.
  llIntro.setOnClickListener(new View.OnClickListener() {
            @Override
            public void onClick(View v) {
                if(currentSelected == 1){

                }else {
                    getSupportActionBar().setTitle("Introduction");
                    ivIntro.setImageResource(R.mipmap.icon_intro_selected);
                    tvIntro.setTextColor(getResources().getColor(R.color.white));
                    llIntro.setBackgroundDrawable(getResources().getDrawable(R.drawable.roundleft));
                    unselectElse(1);
                    removeAllFragment(new IntroFragment(), false,intro);
                }
            }
        });

        llProduct.setOnClickListener(new View.OnClickListener() {
            @Override
            public void onClick(View v) {
                if(currentSelected == 2){

                }else {
                    getSupportActionBar().setTitle("Product");
                    ivProduct.setImageResource(R.mipmap.icon_product_selected);
                    tvProduct.setTextColor(getResources().getColor(R.color.white));
                    llProduct.setBackgroundColor(getResources().getColor(R.color.colorPrimary));
                    unselectElse(2);
                    removeAllFragment(new ProductFragment(), false, product);
                }
            }
        });

        llLocation.setOnClickListener(new View.OnClickListener() {
            @Override
            public void onClick(View v) {
                if(currentSelected == 3){

                }else {
                    getSupportActionBar().setTitle("Location");
                    ivLocation.setImageResource(R.mipmap.icon_location_selected);
                    tvLocation.setTextColor(getResources().getColor(R.color.white));
                    llLocation.setBackgroundColor(getResources().getColor(R.color.colorPrimary));
                    unselectElse(3);
                    removeAllFragment(new LocationFragment(), false, location);
                }
            }
        });

        llLogin.setOnClickListener(new View.OnClickListener() {
            @Override
            public void onClick(View v) {
                if(currentSelected == 4){

                }else {
                    getSupportActionBar().setTitle("Login");
                    ivLogin.setImageResource(R.mipmap.icon_login_selected);
                    tvLogin.setTextColor(getResources().getColor(R.color.white));
                    llLogin.setBackgroundDrawable(getResources().getDrawable(R.drawable.roundback));
                    unselectElse(4);
                    removeAllFragment(new LoginFragment(), false, login);
                }
            }
        });
Now you might have noticed that two methods are present in each click listener.
- unselectElse()
- removeAllFragment()
Both these methods are described below.
unselectElse
This method will deselect the current selected tab.
For example, user first clicks on Login fragment, so the icon color and text color for login tab is changes to white.
Now user selects or clicks on the product fragment, so the icon and text color for product is changed to white but here, login tab is also white.
If we do not change icon and text color of login tab back to black, there will be two selected tabs which is not ideal condition.
so unselectElse method will make the look and feel of selected tab back to the deselected.
Code for this method
    private void unselectElse(int current){
        switch (currentSelected){
            case 1:
                ivIntro.setImageResource(R.mipmap.icon_intro_normal);
                tvIntro.setTextColor(getResources().getColor(R.color.colorPrimary));
                llIntro.setBackgroundColor(getResources().getColor(R.color.tranparent));
                currentSelected = current;
                break;
            case 2:
                ivProduct.setImageResource(R.mipmap.icon_product);
                tvProduct.setTextColor(getResources().getColor(R.color.colorPrimary));
                llProduct.setBackgroundColor(getResources().getColor(R.color.tranparent));
                currentSelected = current;
                break;
            case 3:
                ivLocation.setImageResource(R.mipmap.icon_location);
                tvLocation.setTextColor(getResources().getColor(R.color.colorPrimary));
                llLocation.setBackgroundColor(getResources().getColor(R.color.tranparent));
                currentSelected = current;
                break;
            case 4:
                ivLogin.setImageResource(R.mipmap.icon_login2);
                tvLogin.setTextColor(getResources().getColor(R.color.colorPrimary));
                llLogin.setBackgroundColor(getResources().getColor(R.color.tranparent));
                currentSelected = current;
                break;
        }
        if(currentSelected == 0){
            currentSelected = current;
        }
    }
removeAllFragment()
This method will simply empty the fragment backstack.
Whenever new fragment is loaded in the frame layout, it is added into the backstack also.
This method will be helpful to overcome this issue.
The second parameter of this method will decide whether to add newly loaded fragment into the backstack or not.
Checkout it’s implementation
 public void removeAllFragment(Fragment replaceFragment,boolean addToBackStack, String tag) {

        FragmentManager manager = getSupportFragmentManager();
        FragmentTransaction ft = manager.beginTransaction();
        manager.popBackStackImmediate(null,FragmentManager.POP_BACK_STACK_INCLUSIVE);

        if (addToBackStack) {
            ft.addToBackStack(tag);
        }
        ft.replace(R.id.container_body, replaceFragment);
        ft.commitAllowingStateLoss();
    }
That was all the details about android change tab icon when selected.