
Laravel Facebook Login With Socialite Tutorial Example is the topic of this article.
We will use a package called socialite to integrate facebook login in our laravel project.
Many times, user prefers to login with social accounts like facebook, google, twitter etc. instead of traditional email login for simplification.
Check the below video how facebook login in laravel takes place.
Step 1. New Project And Socialite
Make a new laravel project using the below command
laravel new larafb
- It will make a new project called “larafb“
Now we need to integrate socialite package into our newly created laravel project.
- So fire up the below command in your terminal.
composer require laravel/socialite
This command will take some time to download required files of socialite package which will help us to integrate facebook login seamlessly.
Step 2. Write providers and aliases
Adding provides
Once your terminal has integrated socialite package files, open config->app.php file.
- Inside app.php file, you will find one array called ‘providers => []’
- In this array, add the below line
Laravel\Socialite\SocialiteServiceProvider::class,
Full source lines for ‘providers => []’ is something like this
  'providers' => [

        /*
         * Laravel Framework Service Providers...
         */
        Illuminate\Auth\AuthServiceProvider::class,
        Illuminate\Broadcasting\BroadcastServiceProvider::class,
        Illuminate\Bus\BusServiceProvider::class,
        Illuminate\Cache\CacheServiceProvider::class,
        Illuminate\Foundation\Providers\ConsoleSupportServiceProvider::class,
        Illuminate\Cookie\CookieServiceProvider::class,
        Illuminate\Database\DatabaseServiceProvider::class,
        Illuminate\Encryption\EncryptionServiceProvider::class,
        Illuminate\Filesystem\FilesystemServiceProvider::class,
        Illuminate\Foundation\Providers\FoundationServiceProvider::class,
        Illuminate\Hashing\HashServiceProvider::class,
        Illuminate\Mail\MailServiceProvider::class,
        Illuminate\Notifications\NotificationServiceProvider::class,
        Illuminate\Pagination\PaginationServiceProvider::class,
        Illuminate\Pipeline\PipelineServiceProvider::class,
        Illuminate\Queue\QueueServiceProvider::class,
        Illuminate\Redis\RedisServiceProvider::class,
        Illuminate\Auth\Passwords\PasswordResetServiceProvider::class,
        Illuminate\Session\SessionServiceProvider::class,
        Illuminate\Translation\TranslationServiceProvider::class,
        Illuminate\Validation\ValidationServiceProvider::class,
        Illuminate\View\ViewServiceProvider::class,

        /*
         * Package Service Providers...
         */
        Laravel\Socialite\SocialiteServiceProvider::class,
        /*
         * Application Service Providers...
         */
        App\Providers\AppServiceProvider::class,
        App\Providers\AuthServiceProvider::class,
        // App\Providers\BroadcastServiceProvider::class,
        App\Providers\EventServiceProvider::class,
        App\Providers\RouteServiceProvider::class,

    ],
You can see that I have added that line in above array at the middle of the array.
Inserting Aliases
There is another array like provides called Aliases in app.php file.
- In Aliases array, add the below line at the end,
'Socialite' => Laravel\Socialite\Facades\Socialite::class,
- Full source code for Aliases array, is like the following
 /*
    |--------------------------------------------------------------------------
    | Class Aliases
    |--------------------------------------------------------------------------
    |
    | This array of class aliases will be registered when this application
    | is started. However, feel free to register as many as you wish as
    | the aliases are "lazy" loaded so they don't hinder performance.
    |
    */

    'aliases' => [

        'App' => Illuminate\Support\Facades\App::class,
        'Arr' => Illuminate\Support\Arr::class,
        'Artisan' => Illuminate\Support\Facades\Artisan::class,
        'Auth' => Illuminate\Support\Facades\Auth::class,
        'Blade' => Illuminate\Support\Facades\Blade::class,
        'Broadcast' => Illuminate\Support\Facades\Broadcast::class,
        'Bus' => Illuminate\Support\Facades\Bus::class,
        'Cache' => Illuminate\Support\Facades\Cache::class,
        'Config' => Illuminate\Support\Facades\Config::class,
        'Cookie' => Illuminate\Support\Facades\Cookie::class,
        'Crypt' => Illuminate\Support\Facades\Crypt::class,
        'DB' => Illuminate\Support\Facades\DB::class,
        'Eloquent' => Illuminate\Database\Eloquent\Model::class,
        'Event' => Illuminate\Support\Facades\Event::class,
        'File' => Illuminate\Support\Facades\File::class,
        'Gate' => Illuminate\Support\Facades\Gate::class,
        'Hash' => Illuminate\Support\Facades\Hash::class,
        'Lang' => Illuminate\Support\Facades\Lang::class,
        'Log' => Illuminate\Support\Facades\Log::class,
        'Mail' => Illuminate\Support\Facades\Mail::class,
        'Notification' => Illuminate\Support\Facades\Notification::class,
        'Password' => Illuminate\Support\Facades\Password::class,
        'Queue' => Illuminate\Support\Facades\Queue::class,
        'Redirect' => Illuminate\Support\Facades\Redirect::class,
        'Redis' => Illuminate\Support\Facades\Redis::class,
        'Request' => Illuminate\Support\Facades\Request::class,
        'Response' => Illuminate\Support\Facades\Response::class,
        'Route' => Illuminate\Support\Facades\Route::class,
        'Schema' => Illuminate\Support\Facades\Schema::class,
        'Session' => Illuminate\Support\Facades\Session::class,
        'Storage' => Illuminate\Support\Facades\Storage::class,
        'Str' => Illuminate\Support\Str::class,
        'URL' => Illuminate\Support\Facades\URL::class,
        'Validator' => Illuminate\Support\Facades\Validator::class,
        'View' => Illuminate\Support\Facades\View::class,
        'Socialite' => Laravel\Socialite\Facades\Socialite::class,

    ],
See at the last line, which we have inserted.
Step 3. App at Facebook Developer
Now we need to make a new app at facebook developer console.
- Go to the : https://developers.facebook.com/
- Login to your account and you see the below screen.
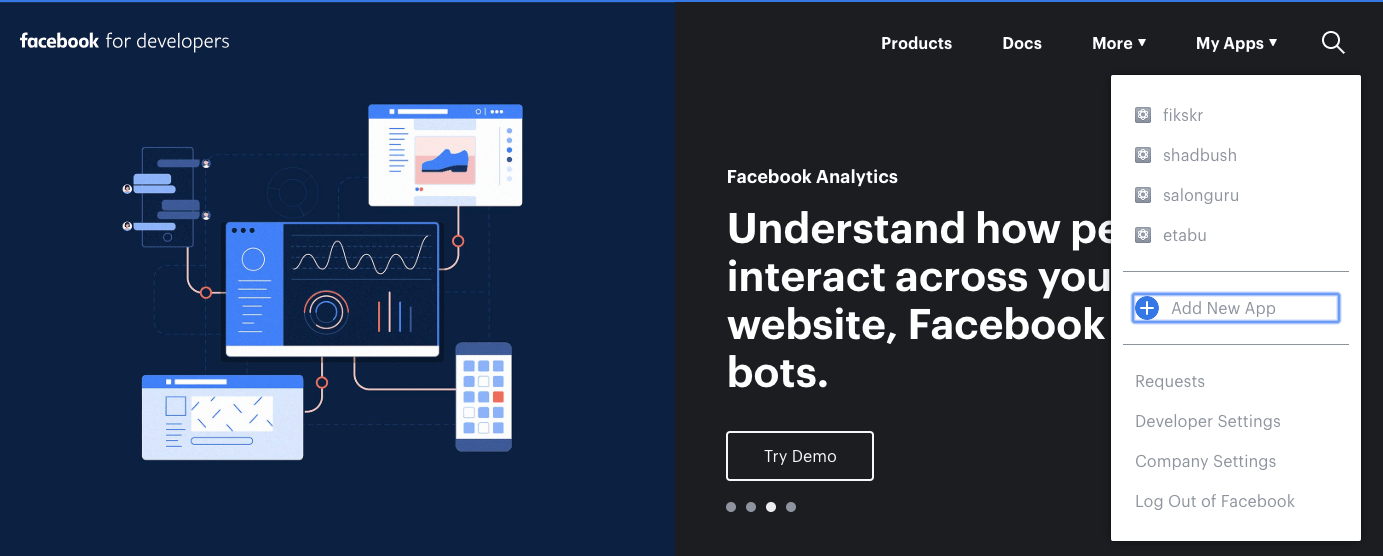
Click on My Apps and you will see a drop down as per the image.- Click on “Add New App” button. You will see the below screen.

Enter app name in Display Name section and email in Contact Email section.- Then click on Create App ID button.
After this, at the left side panel, click on Settings->Basic tab. Now you will find the below screen.

Note down App ID and App Secret at some place. We will need this later.
- In App Domains field, add localhost.
- Scroll down till end and click on Add Platform. Below pop up will be there.
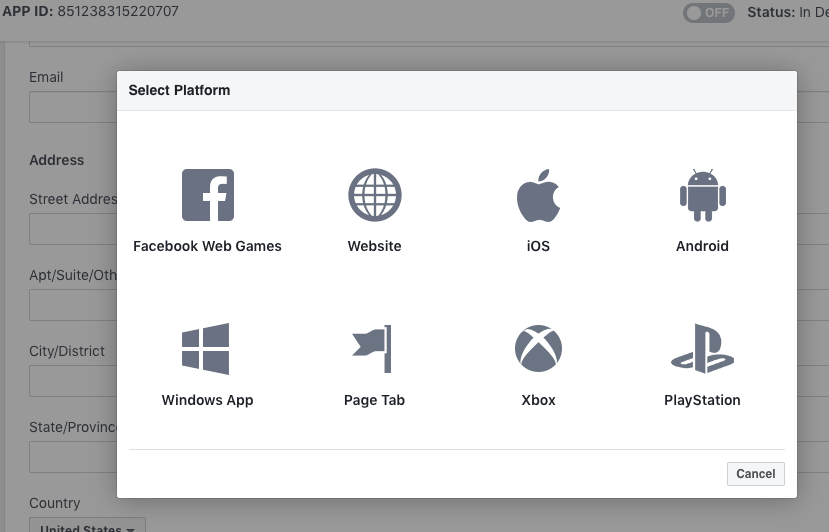
You can see that there are many platforms are available. You need to click on Website.
- At the end of the screen, there is an option like “Site URL”
- In this option, insert URL as “http://localhost:8000/”
- At last, click on “Save Changes” button.
Step 4. Adding Facebook Credentials
Now we need to put App ID and App Secret in .env file. Open your .env file and add the below source lines
FACEBOOK_CLIENT_ID = 2197359346976460
FACEBOOK_CLIENT_SECRET = your secret
CALLBACK_URL_FACEBOOK = http://localhost:8000/callback/facebook
- Replace your secret in the second line.
Now open your config->services.php file. Add below code in this file.
'facebook' => [
        'client_id' => env('FACEBOOK_CLIENT_ID'),
        'client_secret' => env('FACEBOOK_CLIENT_SECRET'),
        'redirect' => env('CALLBACK_URL_FACEBOOK'),
    ],
- Above code will fetch the values of app id, secret and callback URL from the .env file.
Full source snippet for services.php file will be like this
<?php

return [

    /*
    |--------------------------------------------------------------------------
    | Third Party Services
    |--------------------------------------------------------------------------
    |
    | This file is for storing the credentials for third party services such
    | as Stripe, Mailgun, SparkPost and others. This file provides a sane
    | default location for this type of information, allowing packages
    | to have a conventional place to find your various credentials.
    |
    */

    'mailgun' => [
        'domain' => env('MAILGUN_DOMAIN'),
        'secret' => env('MAILGUN_SECRET'),
        'endpoint' => env('MAILGUN_ENDPOINT', 'api.mailgun.net'),
    ],

    'postmark' => [
        'token' => env('POSTMARK_TOKEN'),
    ],

    'ses' => [
        'key' => env('AWS_ACCESS_KEY_ID'),
        'secret' => env('AWS_SECRET_ACCESS_KEY'),
        'region' => env('AWS_DEFAULT_REGION', 'us-east-1'),
    ],

    'sparkpost' => [
        'secret' => env('SPARKPOST_SECRET'),
    ],

    'stripe' => [
        'model' => App\User::class,
        'key' => env('STRIPE_KEY'),
        'secret' => env('STRIPE_SECRET'),
        'webhook' => [
            'secret' => env('STRIPE_WEBHOOK_SECRET'),
            'tolerance' => env('STRIPE_WEBHOOK_TOLERANCE', 300),
        ],
    ],

    'facebook' => [
        'client_id' => env('FACEBOOK_CLIENT_ID'),
        'client_secret' => env('FACEBOOK_CLIENT_SECRET'),
        'redirect' => env('CALLBACK_URL_FACEBOOK'),
    ],

];
Step 5. Changing Welcome Blade file
Open your resources->views->welcome.blade.php file.
- We need to add below line in this file.
<br><a href="redirect/facebook">Login with Facebook</a>
- This line is a link, which will open facebook login process when the user clicks it.
- I have added this line at just above the end of the file.
Whole code for welcome.blade.php file is as the following
<!doctype html>
<html lang="{{ str_replace('_', '-', app()->getLocale()) }}">
    <head>
        <meta charset="utf-8">
        <meta name="viewport" content="width=device-width, initial-scale=1">

        <title>Laravel</title>

        <!-- Fonts -->
        <link href="https://fonts.googleapis.com/css?family=Nunito:200,600" rel="stylesheet">

        <!-- Styles -->
        <style>
            html, body {
                background-color: #fff;
                color: #636b6f;
                font-family: 'Nunito', sans-serif;
                font-weight: 200;
                height: 100vh;
                margin: 0;
            }

            .full-height {
                height: 100vh;
            }

            .flex-center {
                align-items: center;
                display: flex;
                justify-content: center;
            }

            .position-ref {
                position: relative;
            }

            .top-right {
                position: absolute;
                right: 10px;
                top: 18px;
            }

            .content {
                text-align: center;
            }

            .title {
                font-size: 84px;
            }

            .links > a {
                color: #636b6f;
                padding: 0 25px;
                font-size: 13px;
                font-weight: 600;
                letter-spacing: .1rem;
                text-decoration: none;
                text-transform: uppercase;
            }

            .m-b-md {
                margin-bottom: 30px;
            }
        </style>
    </head>
    <body>
        <div class="flex-center position-ref full-height">
            @if (Route::has('login'))
                <div class="top-right links">
                    @auth
                        <a href="{{ url('/home') }}">Home</a>
                    @else


                        @if (Route::has('register'))

                        @endif
                    @endauth
                </div>
            @endif

            <div class="content">
                <div class="title m-b-md">
                    Laravel
                    <br><a href="redirect/facebook">Login with Facebook</a>
                </div>

                <div class="links">

                    <a href="https://laravel.com/docs">Docs</a>
                    <a href="https://laracasts.com">Laracasts</a>
                    <a href="https://laravel-news.com">News</a>
                    <a href="https://blog.laravel.com">Blog</a>
                    <a href="https://nova.laravel.com">Nova</a>
                    <a href="https://forge.laravel.com">Forge</a>
                    <a href="https://github.com/laravel/laravel">GitHub</a>
                </div>
            </div>
        </div>
    </body>
</html>
Step 6. Routes and Authentication
Before adding any routes, first of all trigger the below command
php artisan make:auth
- It will add some files to enable authentication feature in your laravel app.
- Now open routes->web.php file. Add the below source lines in this file.
Route::get('/redirect/{service}', 'SocialAuthController@redirect');
Route::get('/callback/{service}', 'SocialAuthController@callback');
- First route is pointing to the redirect() method in SocialAuthController file.
- Second is giving reference to the callback() method in SocialAuthController file.
So final code block for web.php looks like the below
<?php

/*
|--------------------------------------------------------------------------
| Web Routes
|--------------------------------------------------------------------------
|
| Here is where you can register web routes for your application. These
| routes are loaded by the RouteServiceProvider within a group which
| contains the "web" middleware group. Now create something great!
|
*/

Route::get('/', function () {
    return view('welcome');
});

Route::get('/redirect/{service}', 'SocialAuthController@redirect');
Route::get('/callback/{service}', 'SocialAuthController@callback');


Auth::routes();
Step 7. Making a Social Controller
In your terminal, fire the below command
php artisan make:controller SocialAuthController
This command will make a new controller named “SocialAuthController” inside app->Http->Controllers directory.
Add the below source snippet in this file
<?php

namespace App\Http\Controllers;

use Illuminate\Http\Request;
use Socialite;

class SocialAuthController extends Controller
{
    //
    public function redirect($service)
    {
        return Socialite::driver($service)->redirect();

    }

    public function callback($service)
    {
        //$user = Socialite::with($service)->user();
        $user = Socialite::driver($service)->stateless()->user();
        //dd($user);
        return view ('home')->withDetails($user)->withService ($service);
    }


}
- Above code includes two functions (redirect and callback) .
- redirect() function will tell the compiler to load the facebook login screen.
- When user give correct username and password of his facebook credentials, system will run callback() function.
- $user will get the values like id, name, email etc. information from facebook.
- Last line will redirect to the home.blade.php file. Here, we are passing $user and $service to home.blade.php file.
Step 8. Last View File
So now we have logged in with facebook and also have fetched some information like id, name etc. from it.
- Let us display these information to the user.
- Navigate to the resources->views->home.blade.php file.
Write down the below code snippet in this home.blade.php file.
@extends('layouts.app')

@section('content')
<div class="container">
    <div class="row justify-content-center">
        <div class="col-md-8">
            <div class="card">
                <div class="card-header">Dashboard</div>

                <div class="card-body">
                    @if (session('status'))
                        <div class="alert alert-success" role="alert">
                            {{ session('status') }}
                        </div>
                    @endif

                    You are logged in!
                    @if ($service == 'facebook')
                        <div class="title m -b -md">
                            Welcome {{ $details->user['name'] }} !!!
                        </div>
                    @endif

                </div>
            </div>
        </div>
    </div>
</div>
@endsection
- System will load this file after successful login with facebook.
Look at the below code block
  @if ($service == 'facebook')
                        <div class="title m -b -md">
                            Welcome {{ $details->user['name'] }} !!!
                        </div>
                    @endif
- This code lines will check one if condition. If the value of $service is facebook then it will move inside if condition.
- Then it will print name of the user. To get the name of the user, it will use $details.
Download Source Code For Laravel Facebook Login
I will take you to source code