Laravel 6/7 Socialite Google Login Authentication Tutorial Example is the core of this post.
Learn how to integrate socialite authentication as google login in laravel.
To implement social login in laravel is a handy way to simplify the authentication system.
It reduces the time of the user by skipping the registration process. Just link google account and that’s it.
We will also add the details of the user to the MySQL database.
Google will give us specific id when a user successfully integrates his google account with our laravel website. We will store this ID in the database.
Final Pictures of Example
See the series of below images that tell you the working of this tutorial.
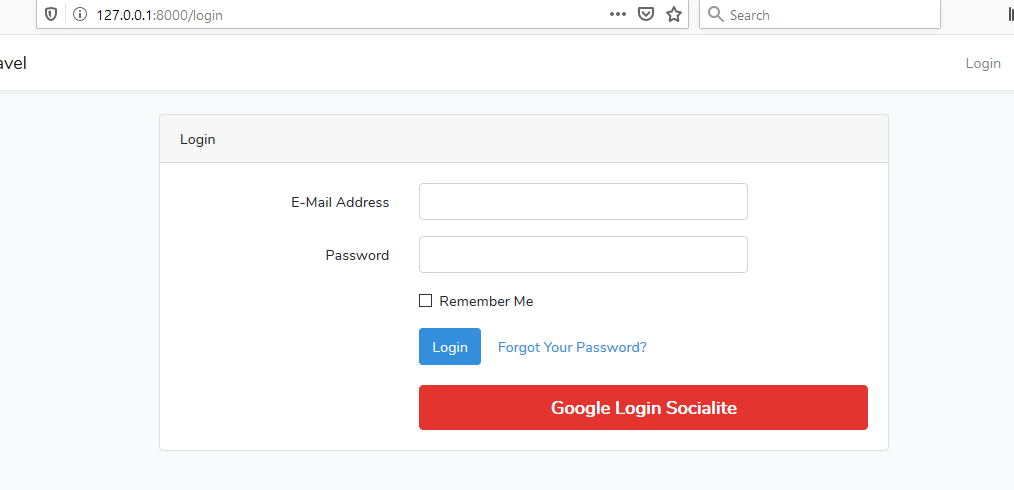
Above is the login screen of our website. Both traditional and google login systems are there.
When the user clicks the “Google Login Socialite” button, the system will open the below screen.
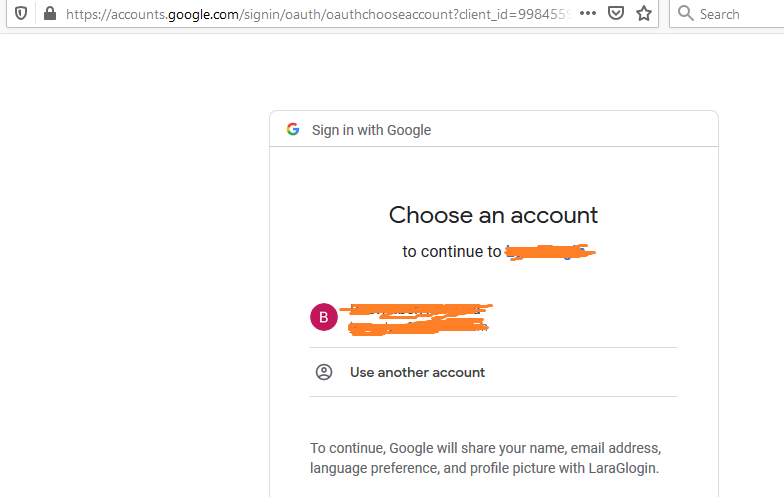
In the above image, the system will ask a user to enter the Gmail address and password.
Once the user enters Gmail address and password, the system will log in to the user using his google account credentials.
After this, it will callback to our laravel project and it will login the user. In the callback, we will enter the user details into the MySQL database.
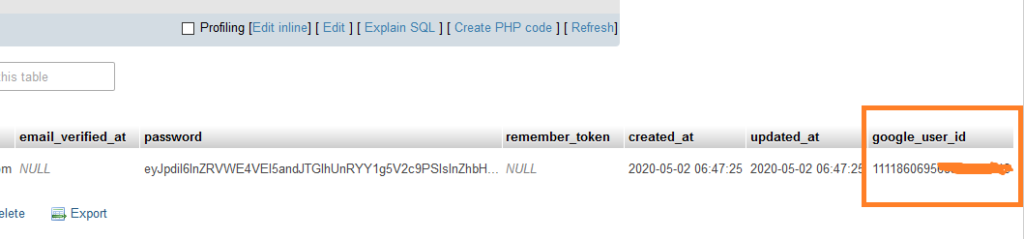
You can see that the details of the user are entered in the database using the ID that google has returned when the user successfully login using his gmail account.
Below are the steps for this socialite google login laravel example.
Step 1. A project with database
First of all, use the below command to make a new project
laravel new laragooglelogin
Once your project is created, open database tool like phpMyAdmin or whichever you are using.
Create a new database and give it a name as “laragooglelogin“.
Now open your laravel project in the code editor such as sublime text, visual studio code, etc. and open .env file.
Inside your .env file, see the code lines like below
DB_CONNECTION=mysql
DB_HOST=127.0.0.1
DB_PORT=3306
DB_DATABASE=laragooglelogin
DB_USERNAME=root
DB_PASSWORD=
Just update the above information with the settings of your computer and your database is entitled to your laravel project.
Step 2. Integration of socialite Package
Now run the following command
composer require laravel/socialite
This command will download and integrate the Socialite package into our laravel project.
After this, go to the config->app.php file and find the “providers” array.
Inside the “providers” array, add the below line
Laravel\Socialite\SocialiteServiceProvider::class,
Full code lines for “providers” array,
 'providers' => [
        /*
         * Laravel Framework Service Providers...
         */
        Illuminate\Auth\AuthServiceProvider::class,
        Illuminate\Broadcasting\BroadcastServiceProvider::class,
        Illuminate\Bus\BusServiceProvider::class,
        Illuminate\Cache\CacheServiceProvider::class,
        Illuminate\Foundation\Providers\ConsoleSupportServiceProvider::class,
        Illuminate\Cookie\CookieServiceProvider::class,
        Illuminate\Database\DatabaseServiceProvider::class,
        Illuminate\Encryption\EncryptionServiceProvider::class,
        Illuminate\Filesystem\FilesystemServiceProvider::class,
        Illuminate\Foundation\Providers\FoundationServiceProvider::class,
        Illuminate\Hashing\HashServiceProvider::class,
        Illuminate\Mail\MailServiceProvider::class,
        Illuminate\Notifications\NotificationServiceProvider::class,
        Illuminate\Pagination\PaginationServiceProvider::class,
        Illuminate\Pipeline\PipelineServiceProvider::class,
        Illuminate\Queue\QueueServiceProvider::class,
        Illuminate\Redis\RedisServiceProvider::class,
        Illuminate\Auth\Passwords\PasswordResetServiceProvider::class,
        Illuminate\Session\SessionServiceProvider::class,
        Illuminate\Translation\TranslationServiceProvider::class,
        Illuminate\Validation\ValidationServiceProvider::class,
        Illuminate\View\ViewServiceProvider::class,
        /*
         * Package Service Providers...
         */
        /*
         * Application Service Providers...
         */
        App\Providers\AppServiceProvider::class,
        App\Providers\AuthServiceProvider::class,
        // App\Providers\BroadcastServiceProvider::class,
        App\Providers\EventServiceProvider::class,
        App\Providers\RouteServiceProvider::class,
        Laravel\Socialite\SocialiteServiceProvider::class,
    ],
Now in the same app.php file, go to ” aliases ” array and add the following line in it
Laravel\Socialite\Facades\Socialite::class,
All lines for “aliases” array is as below
'aliases' => [
        'App' => Illuminate\Support\Facades\App::class,
        'Arr' => Illuminate\Support\Arr::class,
        'Artisan' => Illuminate\Support\Facades\Artisan::class,
        'Auth' => Illuminate\Support\Facades\Auth::class,
        'Blade' => Illuminate\Support\Facades\Blade::class,
        'Broadcast' => Illuminate\Support\Facades\Broadcast::class,
        'Bus' => Illuminate\Support\Facades\Bus::class,
        'Cache' => Illuminate\Support\Facades\Cache::class,
        'Config' => Illuminate\Support\Facades\Config::class,
        'Cookie' => Illuminate\Support\Facades\Cookie::class,
        'Crypt' => Illuminate\Support\Facades\Crypt::class,
        'DB' => Illuminate\Support\Facades\DB::class,
        'Eloquent' => Illuminate\Database\Eloquent\Model::class,
        'Event' => Illuminate\Support\Facades\Event::class,
        'File' => Illuminate\Support\Facades\File::class,
        'Gate' => Illuminate\Support\Facades\Gate::class,
        'Hash' => Illuminate\Support\Facades\Hash::class,
        'Http' => Illuminate\Support\Facades\Http::class,
        'Lang' => Illuminate\Support\Facades\Lang::class,
        'Log' => Illuminate\Support\Facades\Log::class,
        'Mail' => Illuminate\Support\Facades\Mail::class,
        'Notification' => Illuminate\Support\Facades\Notification::class,
        'Password' => Illuminate\Support\Facades\Password::class,
        'Queue' => Illuminate\Support\Facades\Queue::class,
        'Redirect' => Illuminate\Support\Facades\Redirect::class,
        'Redis' => Illuminate\Support\Facades\Redis::class,
        'Request' => Illuminate\Support\Facades\Request::class,
        'Response' => Illuminate\Support\Facades\Response::class,
        'Route' => Illuminate\Support\Facades\Route::class,
        'Schema' => Illuminate\Support\Facades\Schema::class,
        'Session' => Illuminate\Support\Facades\Session::class,
        'Storage' => Illuminate\Support\Facades\Storage::class,
        'Str' => Illuminate\Support\Str::class,
        'URL' => Illuminate\Support\Facades\URL::class,
        'Validator' => Illuminate\Support\Facades\Validator::class,
        'View' => Illuminate\Support\Facades\View::class,
        Laravel\Socialite\Facades\Socialite::class,
    ],
Step 3. Google App ID and Secret
Now we need to create client ID and client secret from the google console profile.
So go to this link : https://console.developers.google.com
Login to your google account if not already. You should have the below screen after login
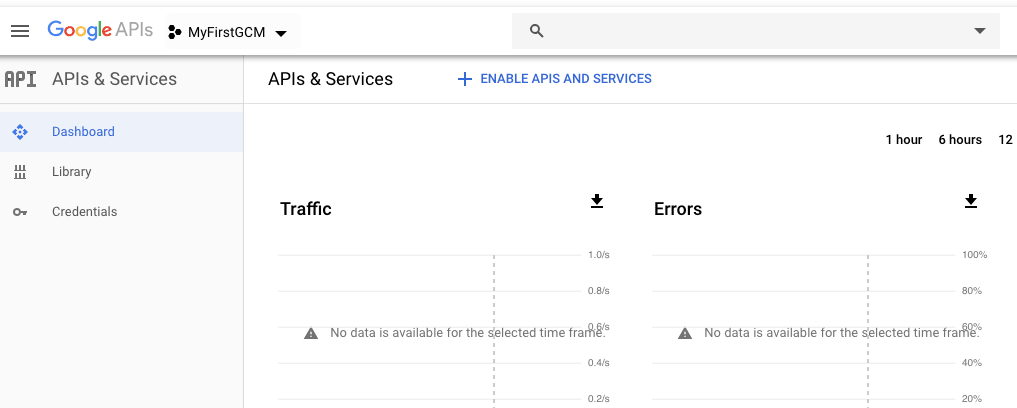
On the left side on the upper menu, there is name of the app “MyFirstGCM“.
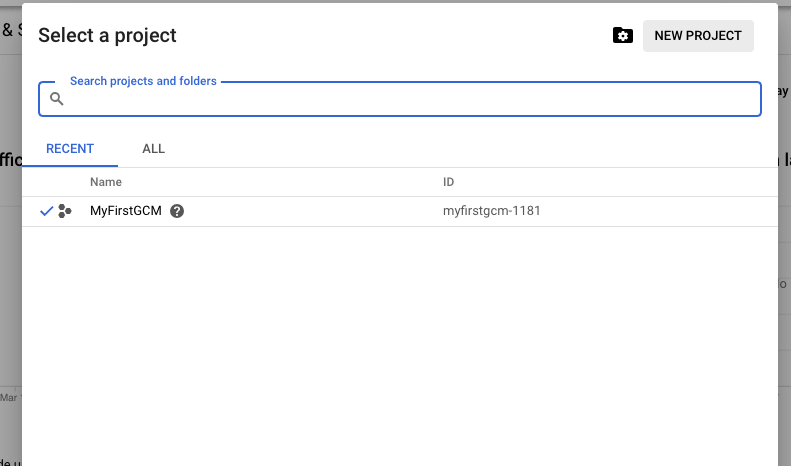
If you have not created any app then you will find like “create app or project” button, clicking on it may open a screen like below
Click on “NEW PROJECT”. The below screen will be opened.
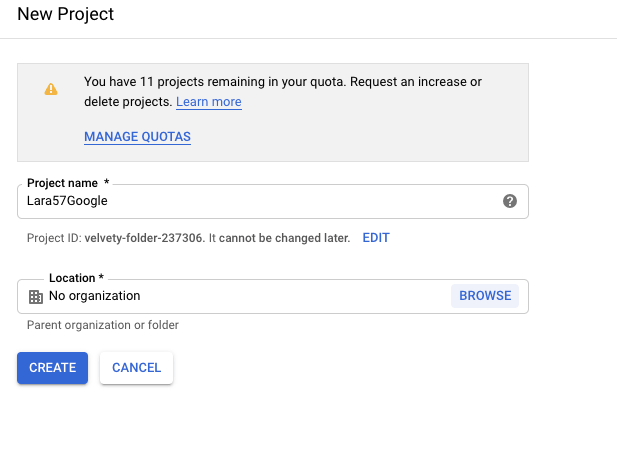
Give the Project name and click on “CREATE” button. You will see below screen after clicking on CREATE button.
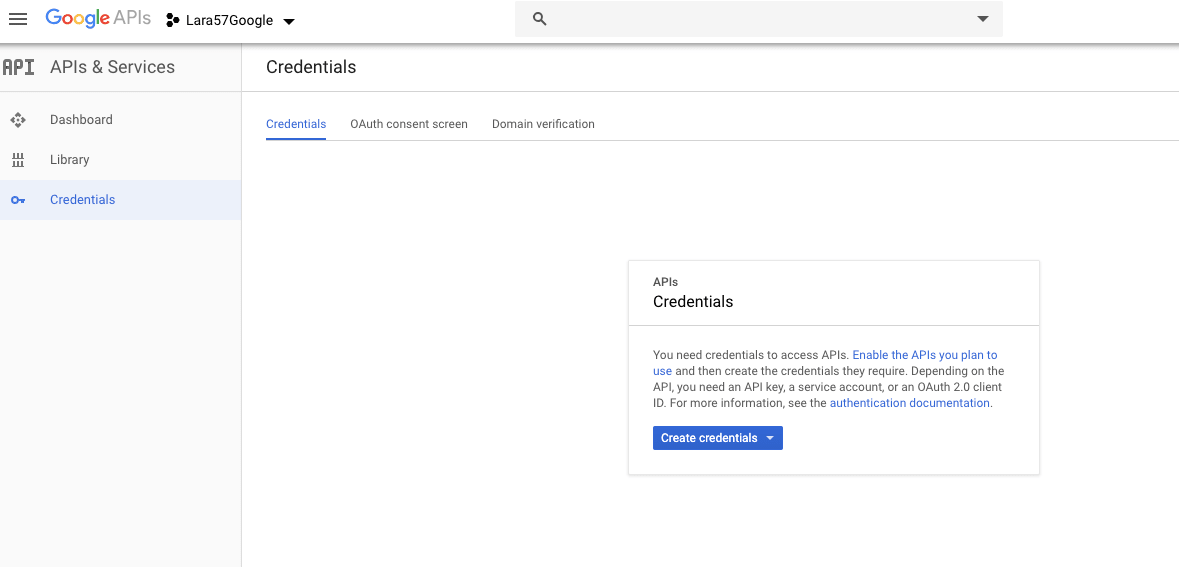
Click on the “CREATE Credentials” button. See the below image for it.
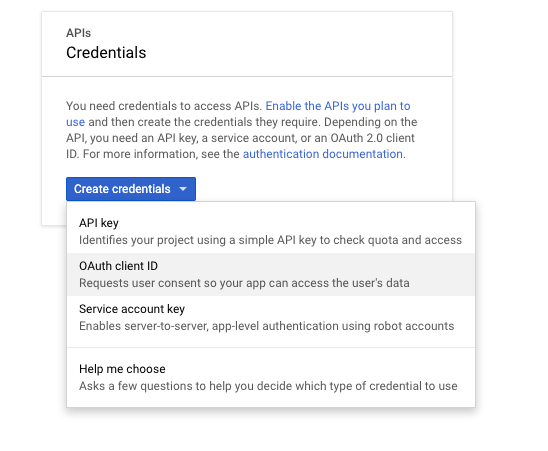
Now click on “OAuth client ID” tab. The following will be view.
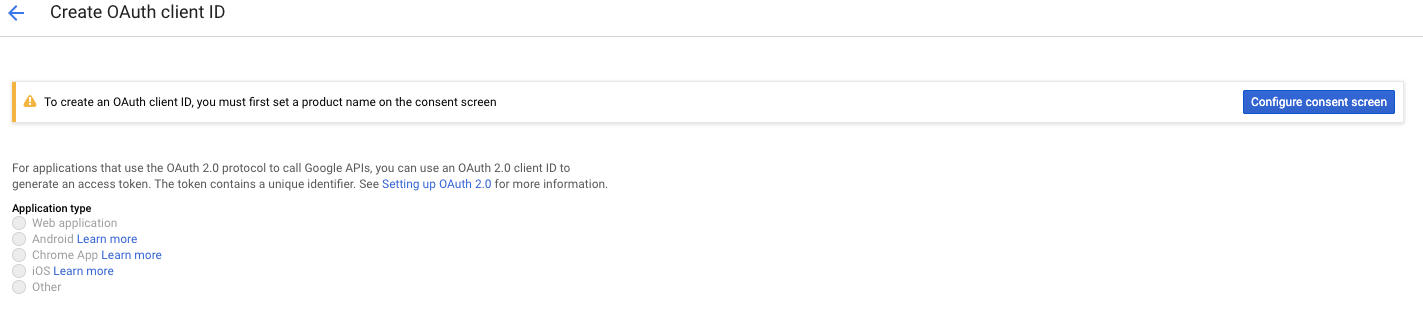
Now click on the button “Configure consent screen”.
Now one form will be opened like the below image
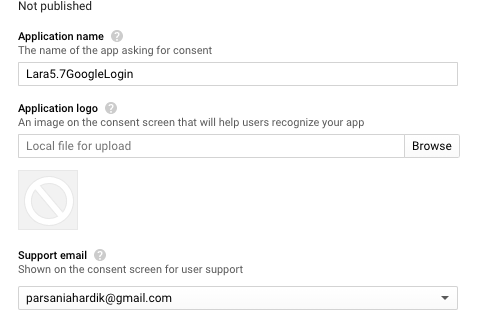
Enter the Application name, Application Home page link, Application privacy policy link, etc. and click on SAVE. (Do not click on “Submit for verification” Button)
After this, click on “Credential” from the left side panel. Repeat from 4th image. When you reach a 6th image, select the “Web Application” option. You will find the below image.

Add URLs like http://localhost:8000 and http://localhost:8000/auth/callback/google
Now click on the “Create” Button. Below screen will be opened.
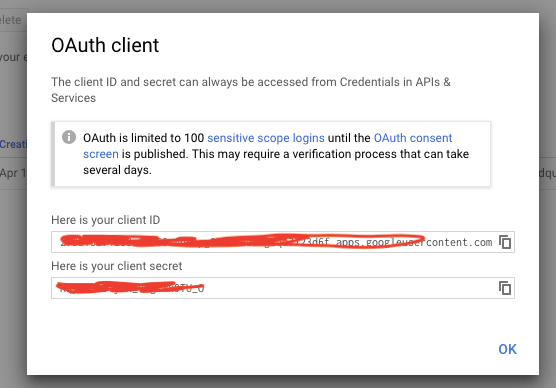
Now we have got our “Client ID” and “Client secret”. Copy both of them. We will use them later.
Now click on Dashboard to go to below screen
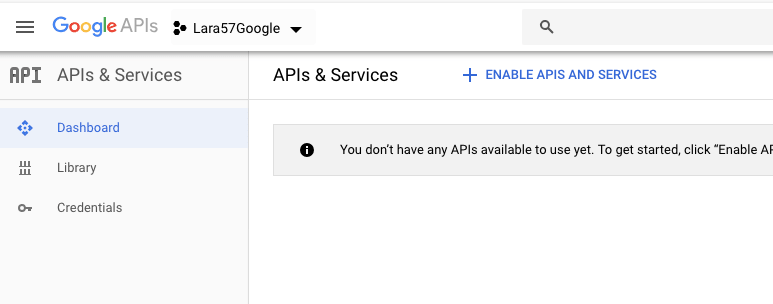
Now click on “ENABLE APIS AND SERVICES”

You will find a lot of apis. So scroll down and find Social apis as per the above image. Click on Google+ API.
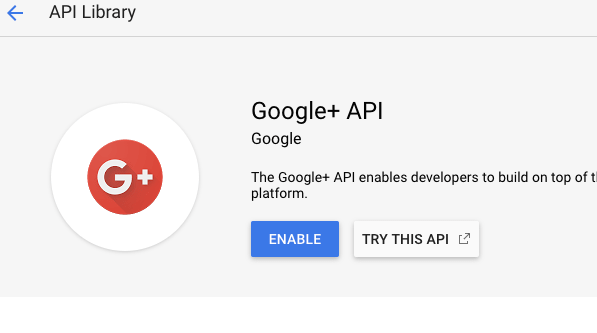
Click on the “ENABLE” button and we have finally complete our work at google developer console.
Now open yours .env file and add the below code block
GOOGLE_CLIENT_ID = 998455949167-83j3lecjdi3qd8gcpdutvkrg.......
GOOGLE_CLIENT_SECRET = Lo3CZep3X.....
CALLBACK_URL_GOOGLE = http://localhost:8000/auth/callback/google
Now navigate to the config->services.php file and write the following
  'google' => [
        'client_id' => env('GOOGLE_CLIENT_ID'),
        'client_secret' => env('GOOGLE_CLIENT_SECRET'),
        'redirect' => env('CALLBACK_URL_GOOGLE'),
    ],
Step 4. Enabling Authentication
First of all, run the below command
composer require laravel/ui
The above command will enable the UI element for authentication screens like login, registration, etc.
Now run the authentication command
php artisan ui react --auth
This command will enable the authentication feature in our project.
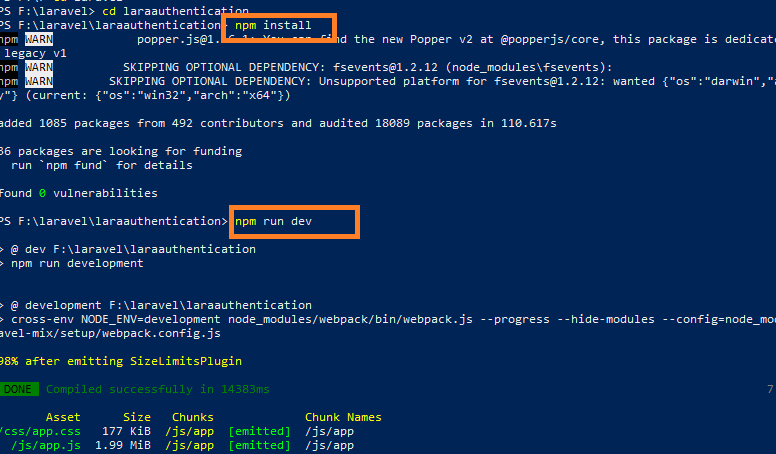
Now in order to have better user experience, run the below command
npm install
and also fire the following
npm run dev
Below lines will be there after both npm commands
Step 5. Necessary Migration, Model and Route
Run the below command to create the migration file.
php artisan make:migration Google_Login_ID
Now check at the database->migrations->timestamp_google_login_i_d.php file and add the below code lines in it
<?php
use Illuminate\Database\Migrations\Migration;
use Illuminate\Database\Schema\Blueprint;
use Illuminate\Support\Facades\Schema;
class GoogleLoginID extends Migration
{
    /**
     * Run the migrations.
     *
     * @return void
     */
    public function up()
    {
        //
        Schema::table('users', function ($table) {
            $table->string('google_user_id')->nullable();
        });
    }
    /**
     * Reverse the migrations.
     *
     * @return void
     */
    public function down()
    {
        //
    }
}
Using the above code, we add a column “google_user_id” to the “users” table.
up() function in the above code is doing this for us.
Now open the model class app->User.php and its source block should look like the below
<?php
namespace App;
use Illuminate\Contracts\Auth\MustVerifyEmail;
use Illuminate\Foundation\Auth\User as Authenticatable;
use Illuminate\Notifications\Notifiable;
class User extends Authenticatable
{
    use Notifiable;
    /**
     * The attributes that are mass assignable.
     *
     * @var array
     */
    protected $fillable = [
        'name', 'email', 'password','google_user_id',
    ];
    /**
     * The attributes that should be hidden for arrays.
     *
     * @var array
     */
    protected $hidden = [
        'password', 'remember_token',
    ];
    /**
     * The attributes that should be cast to native types.
     *
     * @var array
     */
    protected $casts = [
        'email_verified_at' => 'datetime',
    ];
}
Make sure that inside the $fillable array, you have added the new column ” google_user_id “.
Now run the following migration command
php artisan migrate
Now it is time to define the routes. So go to the routes->web.php file.
Code block for web.php file should look like the below
<?php
use Illuminate\Support\Facades\Route;
/*
|--------------------------------------------------------------------------
| Web Routes
|--------------------------------------------------------------------------
|
| Here is where you can register web routes for your application. These
| routes are loaded by the RouteServiceProvider within a group which
| contains the "web" middleware group. Now create something great!
|
*/
Route::get('/', function () {
    return view('welcome');
});
Auth::routes();
Route::get('/home', 'HomeController@index')->name('home');
Route::get('auth/{provider}', 'GoogleLoginController@redirectGoogle');
Route::get('auth/callback/{provider}', 'GoogleLoginController@runCallback');
Step 6. Controller And Blade Task
Run the below command to create the controller file
php artisan make:controller GoogleLoginController
Now go to the app/Http/Controllers/GoogleLoginController.php. Write down the below coding lines in the GoogleLoginController.php file.
<?php
namespace App\Http\Controllers;
use Illuminate\Http\Request;
use Socialite;
use Auth;
use Exception;
use App\User;
class GoogleLoginController extends Controller
{
    public function redirectGoogle($provider)
    {
        //dd($provider);
        return Socialite::driver($provider)->redirect();
    }
    public function runCallback($provider)

    {
        try {

            $user = Socialite::driver($provider)->stateless()->user();

            $finduser = User::where('google_user_id', $user->id)->first();
            if($finduser){
                Auth::login($finduser);
                return redirect('/home');

            }else{
                $newUser = User::create([
                    'name' => $user->name,
                    'email' => $user->email,
                    'google_user_id'=> $user->id,
                    'password' => encrypt('123456dummy')
                ]);
                Auth::login($newUser);
                return redirect('/home');
            }
        } catch (Exception $e) {
            dd('dfdfdfdfd');
            dd($e->getMessage());
        }
    }
}
redirectGoogle() function will initiate the Google login process.
When the user successfully enters the email address and password, the system will call the runCallback() function.
runCallback() function will add the user details in the database if it is not already present in the database.
Now open the resources/views/auth/login.blade.php file.
Write the below line inside the login.blade.php file at the end of this file.
 <a href="{{ url('auth/google') }}" style="margin-top: 20px;" class="btn btn-lg btn-danger btn-block">
                                  <strong> Google Login Socialite</strong>
                                </a>
The above code will add the “Google Login Socialite” button with a red background color.
So whole code for login.blade.php file is as the below
@extends('layouts.app')
@section('content')
<div class="container">
    <div class="row justify-content-center">
        <div class="col-md-8">
            <div class="card">
                <div class="card-header">{{ __('Login') }}</div>
                <div class="card-body">
                    <form method="POST" action="{{ route('login') }}">
                        @csrf
                        <div class="form-group row">
                            <label for="email" class="col-md-4 col-form-label text-md-right">{{ __('E-Mail Address') }}</label>
                            <div class="col-md-6">
                                <input id="email" type="email" class="form-control @error('email') is-invalid @enderror" name="email" value="{{ old('email') }}" required autocomplete="email" autofocus>
                                @error('email')
                                    <span class="invalid-feedback" role="alert">
                                        <strong>{{ $message }}</strong>
                                    </span>
                                @enderror
                            </div>
                        </div>
                        <div class="form-group row">
                            <label for="password" class="col-md-4 col-form-label text-md-right">{{ __('Password') }}</label>
                            <div class="col-md-6">
                                <input id="password" type="password" class="form-control @error('password') is-invalid @enderror" name="password" required autocomplete="current-password">
                                @error('password')
                                    <span class="invalid-feedback" role="alert">
                                        <strong>{{ $message }}</strong>
                                    </span>
                                @enderror
                            </div>
                        </div>
                        <div class="form-group row">
                            <div class="col-md-6 offset-md-4">
                                <div class="form-check">
                                    <input class="form-check-input" type="checkbox" name="remember" id="remember" {{ old('remember') ? 'checked' : '' }}>
                                    <label class="form-check-label" for="remember">
                                        {{ __('Remember Me') }}
                                    </label>
                                </div>
                            </div>
                        </div>
                        <div class="form-group row mb-0">
                            <div class="col-md-8 offset-md-4">
                                <button type="submit" class="btn btn-primary">
                                    {{ __('Login') }}
                                </button>
                                @if (Route::has('password.request'))
                                    <a class="btn btn-link" href="{{ route('password.request') }}">
                                        {{ __('Forgot Your Password?') }}
                                    </a>
                                @endif
                                <a href="{{ url('auth/google') }}" style="margin-top: 20px;" class="btn btn-lg btn-danger btn-block">
                                  <strong> Google Login Socialite</strong>
                                </a>
                            </div>
                        </div>
                    </form>
                </div>
            </div>
        </div>
    </div>
</div>
@endsection
Now run the command “php artisan serve” to start the project.
Hit the URL : https://127.0.0.1:8000/login
So this is the end of the laravel google login tutorial.
Read on how to integrate facebook login in laravel with socialite.