
Read about Kotlin Google Map View Android Integrate Google Map API example.
In this tutorial, you will learn how to integrate google map in android with Koltin.
You will need to integrate google map in your app when you are creating location based application.
For example, food delivery, taxi app like uber, etc. kind of apps need to have google map.
For google map, we need to first create app on google developer console and to generate API key.
After this using this API key, we will integrate our map in android app using Kotlin.
First of all, check the below output of this tutorial.
Tasks At Google Developer Console
Below are some tasks in the developer console.
New Project
Use the following link to go to google developer console.
https://console.developers.google.com
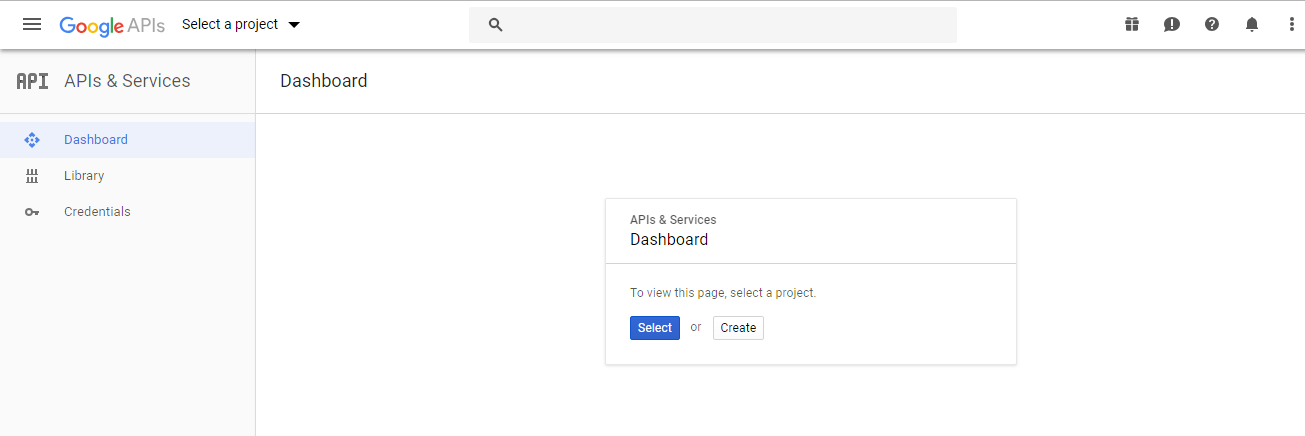
Now it will open the dashboard for developer console.
It will look like the following image
If you are already log in the Google account, You may see different screen than above image
Just find out an option to create new project or select project, mostly it is at the top bar at left corner.
Click on Create button to make new project.
Create button will open the screen like the below image
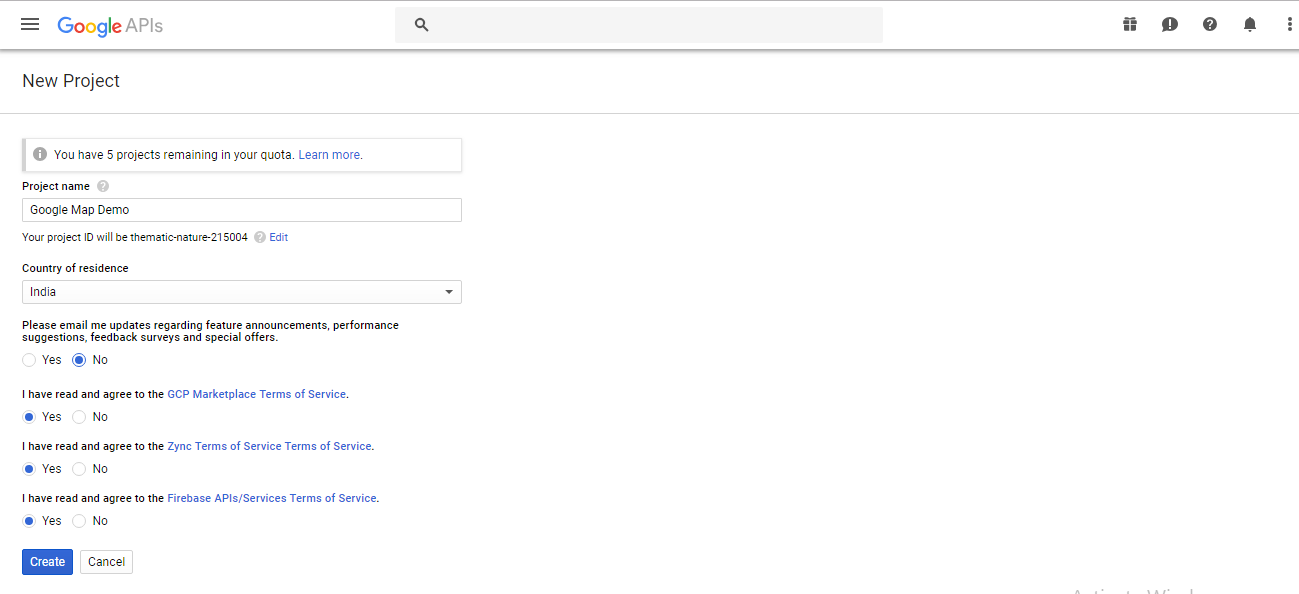
Enter the details like project name and select the country name.
After this, select radio buttons as per your requirements.
Till now, our new project is created and now it is time to enable API for Maps.
Enabling API
When you click on the create button, system will open a screen like the below image.
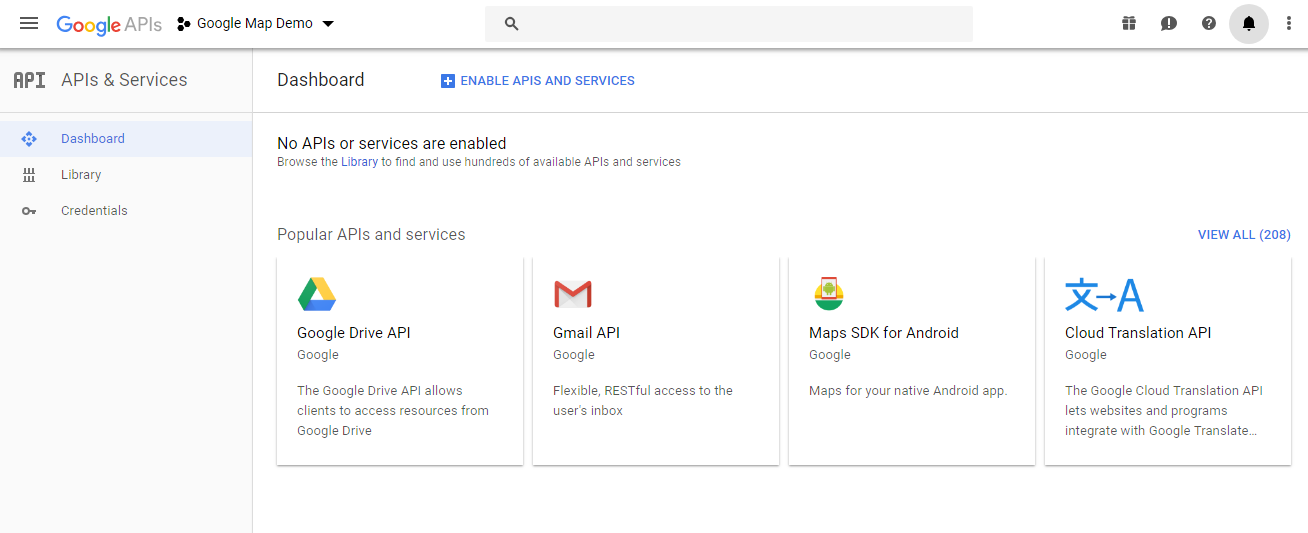
There should be options like Google Drive API, Gmail API etc.
Now Click on the Maps SDK for Android option.
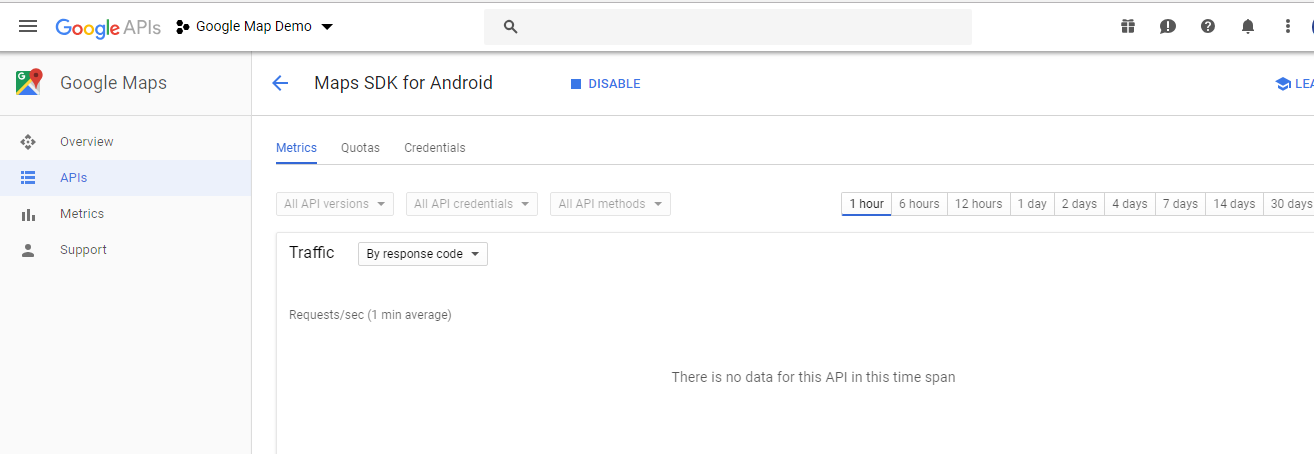
System will led you to the screen like the below image.
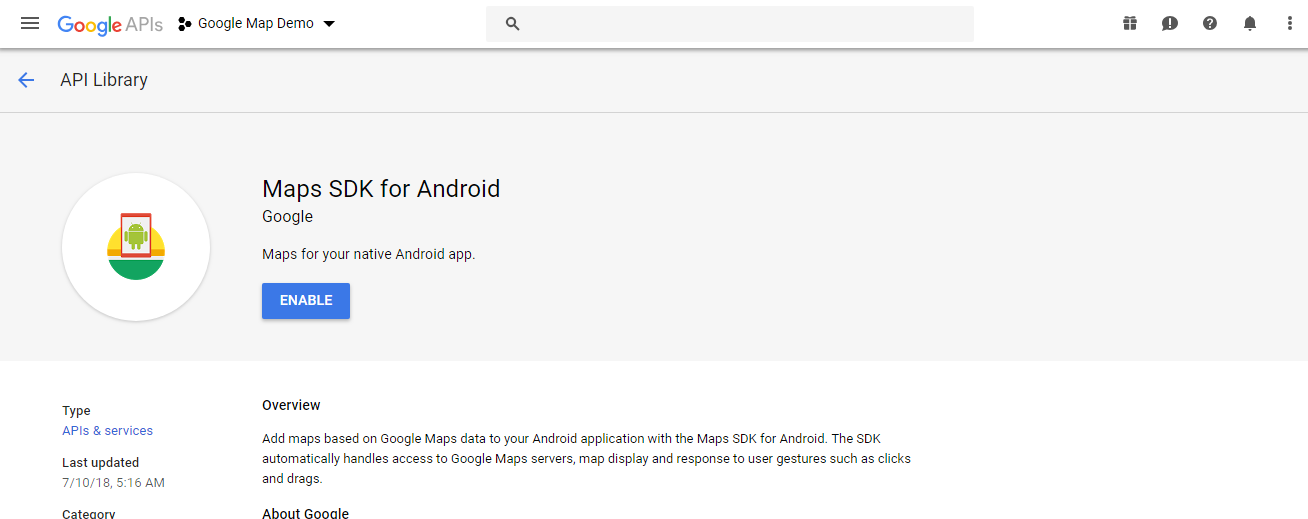
Just click the ENABLE button and our Maps API for our project is successfully enabled.
Claiming API key
When you click on the ENABLE button, system will open a dashboard like following image.
By default, at the left sidebar, APIs option is selected.
In the main middle scree, there are three tabs at the top bar: Metrics, Quotas and Credentials.
Click on the Credentials tab. System will open following screen now.
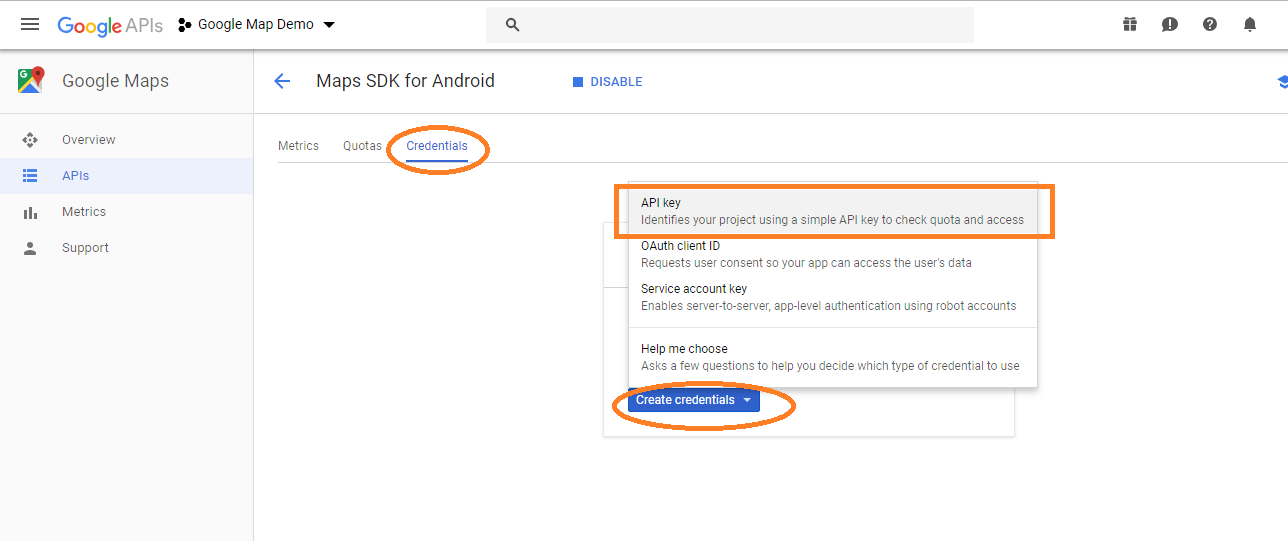
There is a button named “Create credentials”, click this button.
It will create a pop up like shown in the above image. There are three options here. Select the first option called “API key”
When you click on the “API key” option, system will open one dialog box which looks like the below image.
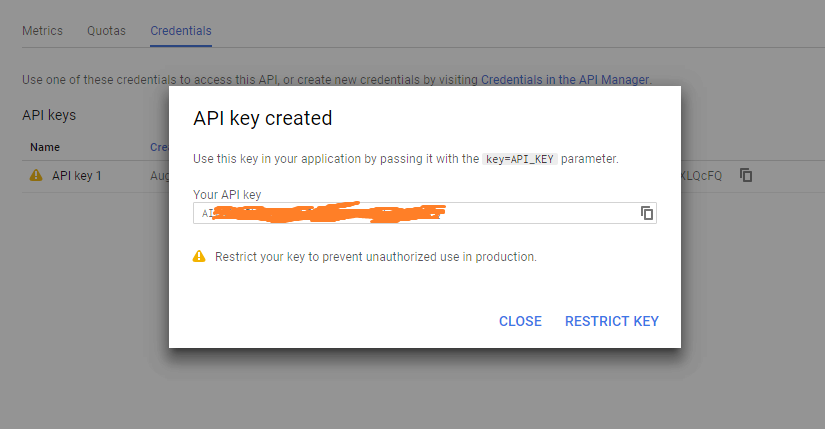
Here you have got your final API key. We will use this API key in our android studio project so copy it in notepad.
Android Studio Work
Make a new project in the android studio.
While doing this, make sure that you have selected “Empty Activity” as the default one.
If you select “Map Activity” then compiler will add some texts by default and it may seem complex so I recommend you to go on with “Empty activity”
Now open build.gradle(Module:app) file and add the following line in it.
implementation 'com.google.android.gms:play-services:12.0.1'
Above line will integrate the google play services in our project.
It will help us to use some built in classes from the various google services like map, push notification etc.
Manifest File Works
Now open your AndroidManifest.xml file.
In this file, add the below code snippet inside <application> tags.
 <meta-data
                android:name="com.google.android.geo.API_KEY"
                android:value="AIz........"/>
Inside above meta tags, you need to write your API key which we have created earlier.
You should write your API key as the value of the android:value attribute.
Now in the manifest file, you need to add the following coding lines outside of <application> tags.
 <uses-feature
            android:glEsVersion="0x00020000"
            android:required="true"/>
So, final source code for AndroidManifest.xml file is like the following
<?xml version="1.0" encoding="utf-8"?>
<manifest xmlns:android="http://schemas.android.com/apk/res/android"
          package="com.example.googlemapkotlin">

    <application
            android:allowBackup="true"
            android:icon="@mipmap/ic_launcher"
            android:label="@string/app_name"
            android:roundIcon="@mipmap/ic_launcher_round"
            android:supportsRtl="true"
            android:theme="@style/AppTheme">

        <meta-data
                android:name="com.google.android.geo.API_KEY"
                android:value="AIz.......FQ"/>

        <activity android:name=".MainActivity">
            <intent-filter>
                <action android:name="android.intent.action.MAIN"/>

                <category android:name="android.intent.category.LAUNCHER"/>
            </intent-filter>
        </activity>
    </application>

    <uses-feature
            android:glEsVersion="0x00020000"
            android:required="true"/>

</manifest>
Main Activity Work
In your activity_main.xml file, add the below lines
<?xml version="1.0" encoding="utf-8"?>
<android.support.constraint.ConstraintLayout
        xmlns:android="http://schemas.android.com/apk/res/android"
        xmlns:app="http://schemas.android.com/apk/res-auto"
        xmlns:tools="http://schemas.android.com/tools"
        android:layout_width="match_parent"
        android:layout_height="match_parent"
        tools:context=".MainActivity">

    <fragment
            android:id="@+id/map"
            android:name="com.google.android.gms.maps.SupportMapFragment"
            android:layout_width="match_parent"
            android:layout_gravity="center"
            android:layout_height="match_parent"
    />

</android.support.constraint.ConstraintLayout>
Look at the <fragment> tag in the above file.
This <fragment> tag holds the google map container.
Compiler will load the google map inside this <fragment> tag.