Welcome to Laravel 7,6 Authentication tutorial example.
You will learn to implement Registration, login, Forgot password ( Password Reset ) features in laravel.
It is very easy to implement auth features in laravel by using its built-in controller, blade view, and other files.
This command will solve the errors like “
“php artisan make:auth not working” or
“php artisan make:auth is not defined” because in the version of laravel 6 or later, this command is deprecated.
It was valid until laravel version 5.8 but after 5.8, we need to use different command to implement authentication.
I will show using which command you can add authentication in laravel version 6 or later.
Below are some images showing the final result of this example.
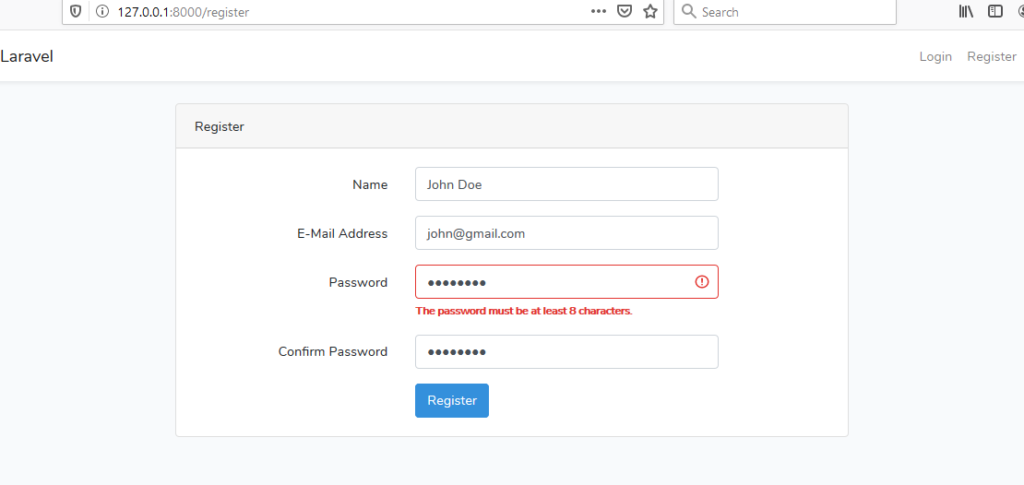
The first image shows the registration screen.
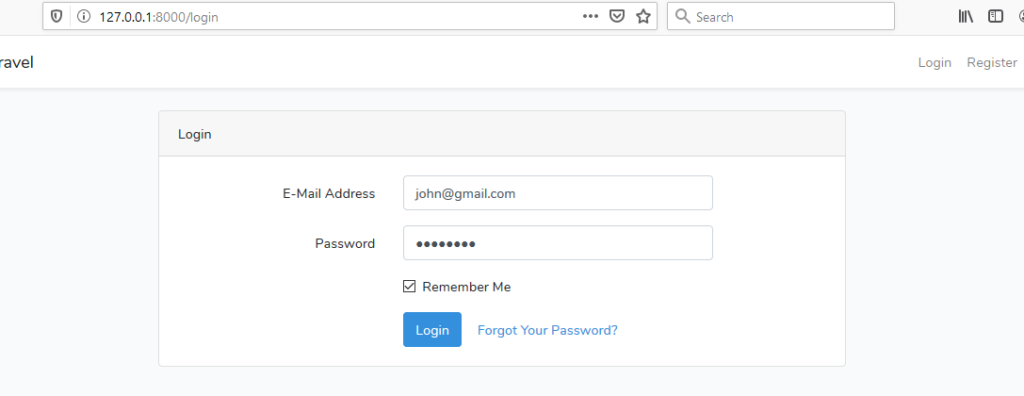
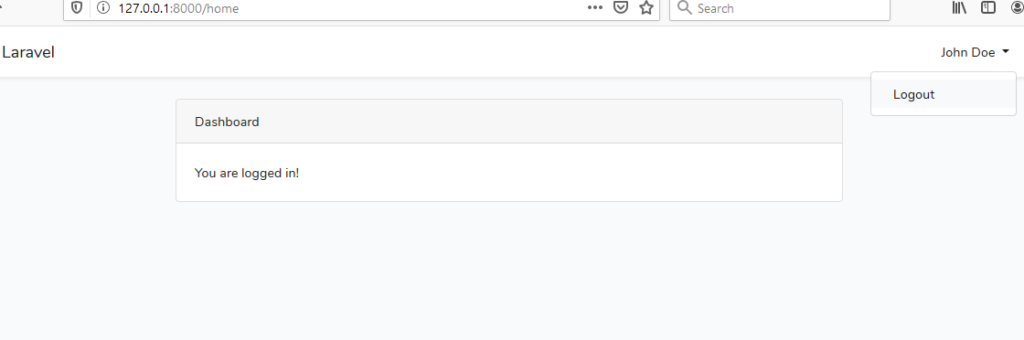
The second image is representing the login screen. A third one will be displayed when the user successfully logged in.
Now follow the below steps to create the tutorial.
Step 1. New Laravel Project
First of all, run the below command
laravel new laraAuthentication
Now go to your phpMyAdmin or other database management tool and make a new database named “laraauthentication”
Open your laravel project in the code editor tool. I am using Visual Studio code.
Go to .env file and see the below lines
DB_CONNECTION=mysql
DB_HOST=127.0.0.1
DB_PORT=3306
DB_DATABASE=laraauthentication
DB_USERNAME=root
DB_PASSWORD=
You need to update the above information as per your computer configurations.
Once you do this, your database and laravel project are connected with each other.
Step 2. Implement Authentication
From version 6 of laravel, scaffolding is deprecated and a new feature called UI is introduced.
So you need to run the below command to integrate some necessary Laravel UI files.
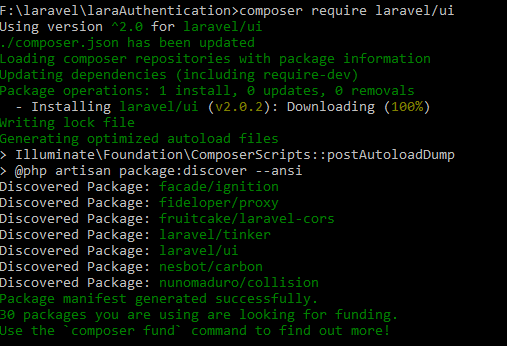
composer require laravel/ui
You should find the lines like the below image when you ran the above command
After this, run the following
php artisan ui react --auth
The above command will implement the authentication package in your laravel project.
In the earlier version than 6 of laravel, we used to run “php artisan make:auth ” command for authentication but on or after version 6, we will use “php artisan ui react –auth”.
php artisan ui react –auth – command will use React.js for front end designs.
You can also use bootstrap or Vue.js instead of React.js.
There are two separate commands for this.
For bootsrtap, it is : php artisan ui bootstrap –auth
Vue.js has this command : php artisan ui vue –auth
Make sure that you need to use only one command at a time out of the available three (React, Bootstrap or Vue).
Now run the migration command as per the following
php artisan migrate
Now we need to run two commands to integrate React or Vue.
Fire the following command first,
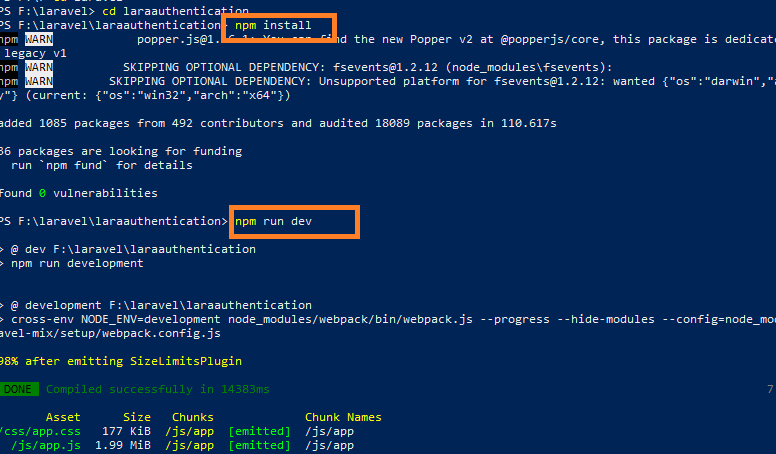
npm install
and then also run the below command
npm run dev
After the above command, a system will download some javascript files.
You will find lines like the below image after the successful implementation of the npm commands.
Possible Errors on NPM commands
If you are on Windows operating system, then firing npm commands may give you an error like “cross-env’ is not recognized as an internal or external command laravel ,angular, node, vue, react”.
As the solution of this error, I suggest you use “PowerShell” intead of common terminal, cmd, or command line.
When you have fired authentication command, the system will generate some files related to authentication and layout.
Navigate to the resources->views->auth folder.
Inside auth folder, there should be three blade files : login.blade.php, register.blade.php and verify.blade.php.
Now in the auth folder, there is another folder named “passwords“.
Passwords folder contain another three blade files : confirm.blade.php, email.blade.php and reset.blade.php
Step 3. Routes and their Protection
Now open the routes->web.php file. You should find the following code
<?php
use Illuminate\Support\Facades\Route;
/*
|--------------------------------------------------------------------------
| Web Routes
|--------------------------------------------------------------------------
|
| Here is where you can register web routes for your application. These
| routes are loaded by the RouteServiceProvider within a group which
| contains the "web" middleware group. Now create something great!
|
*/
Route::get('/', function () {
    return view('welcome');
});
Auth::routes();
Route::get('/home', 'HomeController@index')->name('home')
So you can see that routes are also added automatically by the system.
Thus, it is really easy and straight forward to implement the authentication feature in laravel.
Now we can add some security features to prevent unauthorized access on our laravel website.
Middleware can help us to add extra security layer to our laravel web app.
For this, go to the app/Http/Controllers/HomeController.php file.
If you can not find HomeController.php file, then you can manually create it.
Write down the following coding lines inside the HomeController.php file.
<?php
namespace App\Http\Controllers;
use Illuminate\Http\Request;
class HomeController extends Controller
{
    public function __construct()
    {
        $this->middleware('auth');
    }
    public function index()
    {
        return view('home');
    }
}
We also need to change the routes->web.php file. So open it and update the line “Route::get(‘/home’, ‘HomeController@index’)->name(‘home’)” by using the below line
Route::get('/home', 'HomeController@index')->name('home')->middleware('auth');
Now strat the web app using the below command
php artisan serve
Hit the URL “http://127.0.0.1:8000/register” and see the fully authenticated system.
So it was all about this laravel 7 authentication tutorial.
Hope you liked it and also it has help you to gain more knowledge on laravel.