This article will notify you about Laravel Install MySQL on your mac machine.
If you are brand new to laravel and want to install and connect mysql database with your laravel application, this tutorial perfectly fits you.
After installing mysql, we will connect our laravel project with mysql database and we will also create one database and a table in the database using migration.
So follow all the below steps to enter into the mysql world with laravel on mac.
Little Prerequisite
Before going on with this tutorial, I assume that you have successfully installed laravel on your machine and you are able to create new laravel projects using “laravel new projectname” command.
If not then visit Install Laravel On mac or Ubuntu tutorial.
After successful installation of laravel on your computer, go on with following steps.
Step 1. Installing Valet
If you have read Install Laravel On mac or Ubuntu tutorial, then you should have installed the homebrew on your computer.
If not, then we need to install homebrew first. For this, read the Step 1 in the above linked tutorial.
Then we need to have php in our laptop or PC. Again, you should have php if you have installed laravel as per the pre requisite.
Now add the below command in terminal and hit enter.
composer global require laravel/valet
For successful implementation of above command, you need to have composer and you should have set the environmental variable $PATH correctly as per the tutorial of prerequisite.
Finally, run the below command
valet install
Now you should have installed valet on your machine. Run the below command to check if valet is installed or not.
valet
If you got tests like following, then it is installed correctly.
➜  ~ valet
Password:
Laravel Valet 2.1.6

Usage:
  command [options] [arguments]

Options:
  -h, --help            Display this help message
  -q, --quiet           Do not output any message
  -V, --version         Display this application version
      --ansi            Force ANSI output
      --no-ansi         Disable ANSI output
  -n, --no-interaction  Do not ask any interactive question
  -v|vv|vvv, --verbose  Increase the verbosity of messages: 1 for normal output, 2 for more verbose output and 3 for debug

Available commands:
  fetch-share-url    Get the URL to the current Ngrok tunnel
Step 2. MySQL Installation
After installation of laravel and valet, we are all set to go for MySQL.
First of all, make sure you have homebrew installed on your mac machine.
Right now I am installing version number 5.7 of MySQL because laravel’s official documentation is suggesting this version of MySQL to me.
However, I suggest you to open this laravel official link. and find the version of MySQL referenced by them. If it is higher than 5.7 then replace version number in below command.
So open up your terminal again and hit the following command
brew install mysql@5.7
After this, execute the below command
brew services start mysql@5.7
Again, check out the version number in above command and change if laravel documentation is suggesting different version number.
First command will install the MySQL and second will start it on your machine.
Now you should be able to connect MySQL database with your laravel project. For this follow below step 3.
Step 3. Getting Sequel Pro
Visit the official web site of sequel pro.
Now download the sequel pro from it and install it. Installation is simple and we do not need to run any command to install sequel pro.
After installation, if you open up it, you will see the below screen.
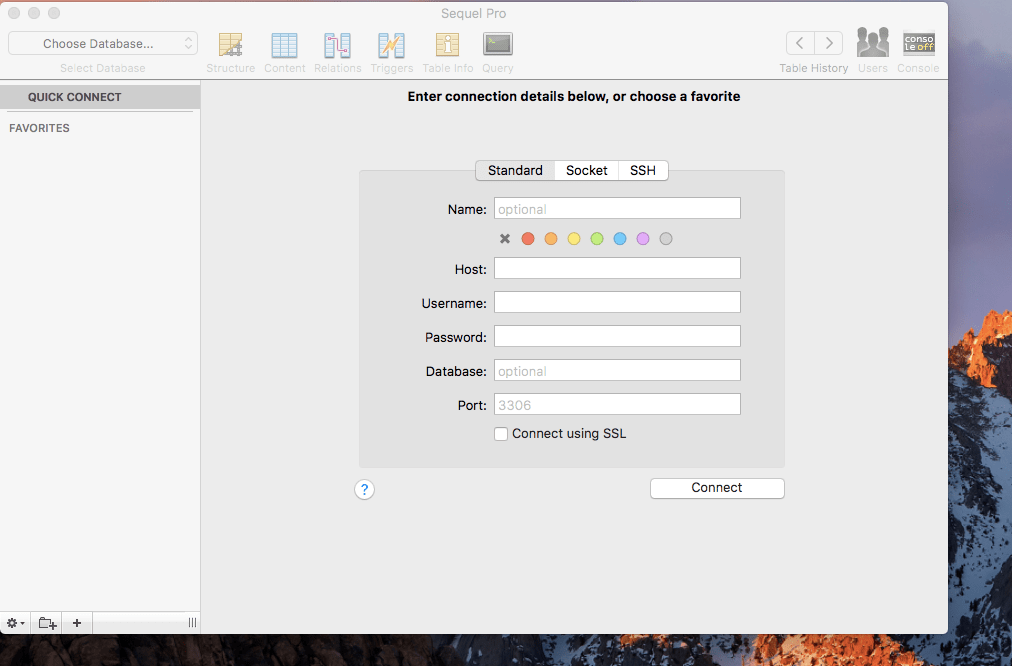
As per above image, you can see some field are there to be filled.
In the host, enter “127.0.0.1” or enter “localhost”
Username should be “root” and keep password field empty. Do not enter anything in that.
Also do not touch Database field because it is optional. In the Port, it is suggesting 3306 by default so do not touch it also.
Now hit the Connect button and you should see the below screen.
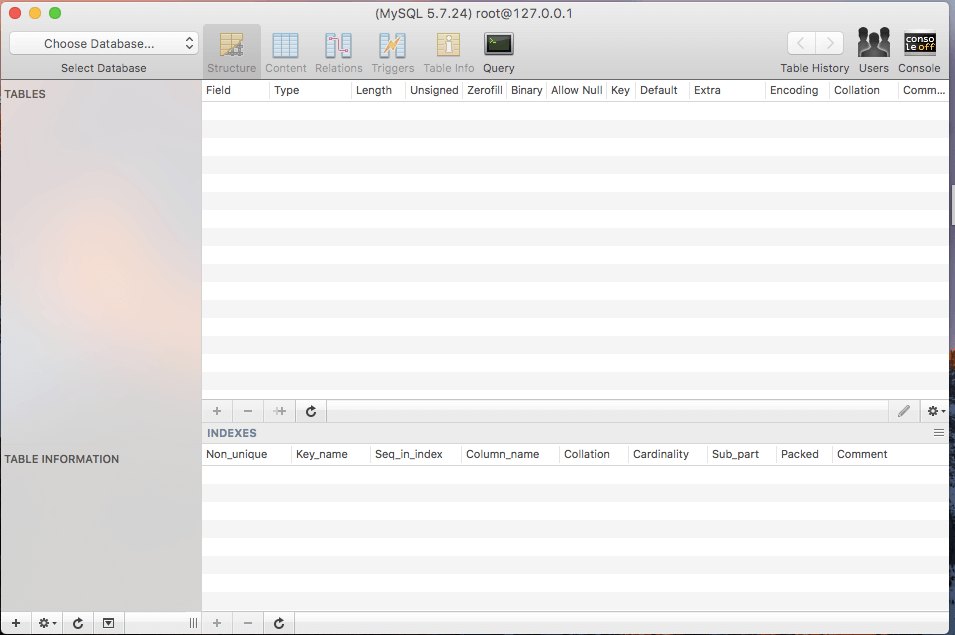
If you see the above screen then congratulations, you are connected to your MySQL.
Now click the “Choose Database” button located at the left upper corner.
Then a pop up menu will be opened, from this menu select “Add Database” option.
After this, you will see another pop up window, here give your database name and click “Add” button. I have given the database name as “laraf”
Now your database is created and you need to connect it with your laravel project.
Step 4. Making Database Connection and a new Table
Now create a new laravel project with the below command
laravel new laraf
Above command will create the new laravel project named “laraf”
Ok, now in our project open the file named .env
This file have many coding lines. Among them find below lines
DB_CONNECTION=mysql
DB_HOST=127.0.0.1
DB_PORT=3306
DB_DATABASE=homestead
DB_USERNAME=homestead
DB_PASSWORD=secret
Now my database name is laraf , username is root and password is empty. So I have updated above code as per the below one
DB_CONNECTION=mysql
DB_HOST=127.0.0.1
DB_PORT=3306
DB_DATABASE=laraf
DB_USERNAME=root
DB_PASSWORD=
So, you also need to do this with your database name, MySQL username and password.
Now in your terminal, go to your project directory and hit the below command
php artisan migrate
You should see the below lines in terminal
➜  laraf php artisan migrate
Migrating: 2014_10_12_000000_create_users_table
Migrated:  2014_10_12_000000_create_users_table
Migrating: 2014_10_12_100000_create_password_resets_table
Migrated:  2014_10_12_100000_create_password_resets_table
➜  laraf
As you can see that I am in the laraf folder, which is my laravel project and then I have hit the migration command.
Now go to the sequel pro and hit the refresh button which is located at the bottom tab bar.
After this, you should three tables, “migrations” , “password_resets” and “users”
Step 4. Adding More tables
In general, you will need to create more tables as per requirements.
So let us create a new table named “gadgets”.
For this execute the below command
php artisan make:migration create_gadgets_table
And you should see the below lines in terminal
➜  laraf php artisan make:migration create_gadgets_table
Created Migration: 2019_01_26_131603_create_gadgets_table
➜  laraf
It is saying that a new migration file is created. You can see this migration file at laraf->database->migrations directory in your editor.(I am using visual studio code)
Source code for newly generated migration file is as the below
<?php

use Illuminate\Support\Facades\Schema;
use Illuminate\Database\Schema\Blueprint;
use Illuminate\Database\Migrations\Migration;

class CreateGadgetsTable extends Migration
{
    /**
     * Run the migrations.
     *
     * @return void
     */
    public function up()
    {
        Schema::create('gadgets', function (Blueprint $table) {
            $table->increments('id');
            $table->text('title');
            $table->text('description');
            $table->timestamps();
        });
    }

    /**
     * Reverse the migrations.
     *
     * @return void
     */
    public function down()
    {
        Schema::dropIfExists('gadgets');
    }
}
In create() method, I have added two lines which are as below
$table->text('title');
$table->text('description');
Above two lines will add two columns named “title” and “description“. You can add these type of lines to create more columns with your desired names.
After making migration file, again hit “php artisan migrate” command to add gadget table in sequel pro.
Now see in sequel pro, you will a new table with name “gadgets”
So that is all about this tutorial. Have a very good day!