How to Install Elasticsearch On Mac With or without Brew is today’s tutorial.
Elasticsearch is the tool which helps web developers to implement the search filter feature in web apps.
One can integrate the elasticsearch using various programming languages like Java, PHP, Ruby etc.
To use the elasticsearch in frameworks like Laravel, Codeigniter, Ruby on Rails etc. , we need to install it on our computer.
We can install the elasticsearch on apple mac OS using two methods.
One method is by using the package manager called “Homebrew” and another method is manual installation from terminal.
We will go through both of these methods step by step.
Step 1. Installing with HomeBrew
Homebrew is the package manager which simplify the process of installing command line tools and software in the mac OS.
If you want to install the unix based command line tools like htop, cask, , nmap, wget, irssi , tree, ,links, colordiff etc. then homebrew can do it for you with minimum commands.
Homebrew can also install elasticsearch with just two commands.
If you have installed homebrew already then it’s okay otherwise you can follow the steps below to install it on your apple Mac.
Installing Homebrew
Open your terminal and fire the below command
/bin/bash -c "$(curl -fsSL https://raw.githubusercontent.com/Homebrew/install/master/install.sh)"
System may ask you for your computer’s password during the process, just enter your password and it will install the homebrew.
Now you have homebrew on your mac computer.
Elasticsearch with brew
To install the elasticsearch, hit the below command in the terminal
brew update
This command will update the version of the homebrew.
Now run the second command
brew tap elastic/tap
Once you have tapped the Elastic Homebrew repo, you can install the default distribution of Elasticsearch by below command :
brew install elastic/tap/elasticsearch-full
This command will install the latest version of elastic search on your mac.
Step 2. Manual Installation
In this method, we will download .tar file which is installer for mac OS.
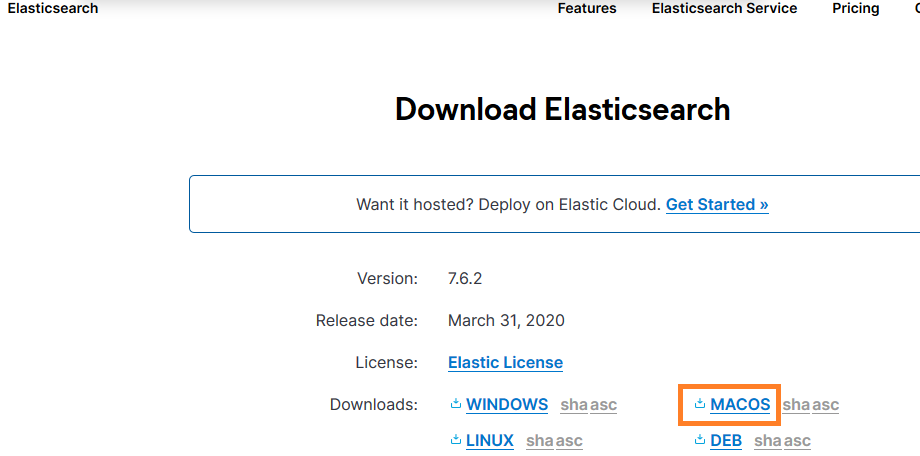
So click on official download page and it will take you to below screen

You need to click on the orange rectangular box in order to download .tar file.
Do double click this downloaded file to unpack it into its own folder (for example, elasticsearch-7.6.2), which contains all of the files that were in the TAR
You may keep this folder on the desktop for more comfort than any other directory. But if you wish then you can put this folder anywhere you want.
Now open your terminal and navigate to the directory where you have put the extracted elasticsearch folder.
Again use cd command to navigate to the bin folder.
$ cd desktop/elasticsearch-7.6.2/bin
Above command says that you have folder called “elasticsearch-7.6.2” on your desktop and there is a folder called “bin” inside the folder “elasticsearch-7.6.2“.
If you have set the ” elasticsearch-7.6.2 ” folder somewhere else then you need to navigate to that directory.
Now you can simply run below command to start the elasticsearch.
$ elasticsearch
Above command will start some process which you can see in your terminal.
Once it is done, your elasticsearch is started successfully.
You can read this tutorial to install elasticsearch on windows.
