
Laravel Export Import Excel With Database is today’s example tutorial.
We will use Maatwebsiteexcel library or package to accomplish our goal.
In this article, we will export the data from the MySQL database to the excel file.
We will also able to insert or import the data from excel file to the MySQL database.
Final Outcome Images
Below are the images of the working example.
As you can see that our example have two buttons.
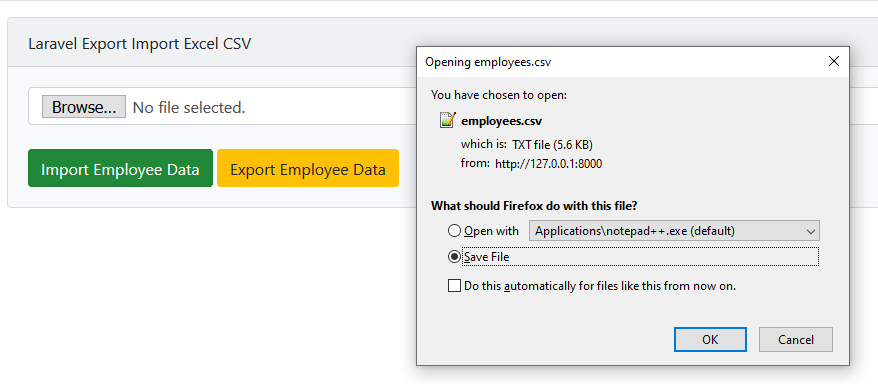
When the user clicks the “Export Employee Data” button, system will export the data from MySQL database and it will bind them into one excel file.
System will also pop up one download window from which we can download the exported excel file.
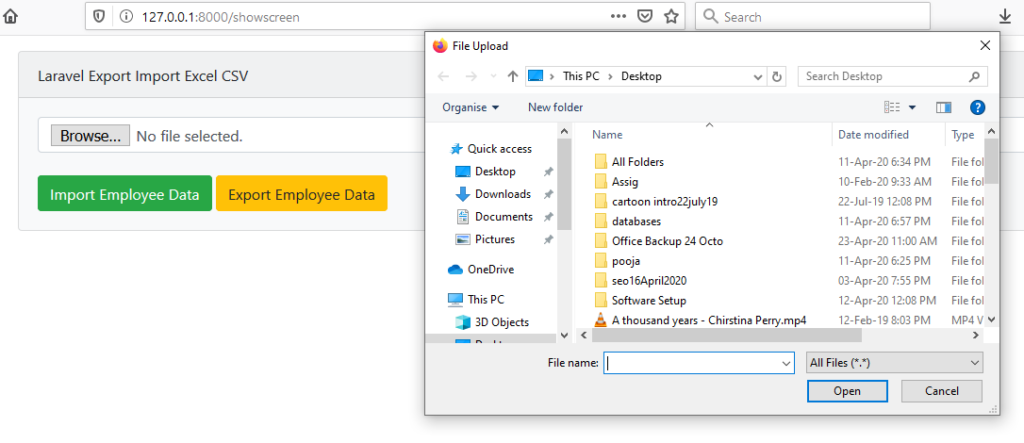
When the user clicks the “Browse” button, system will allow the user to select the excel file which he wants to import into the database.
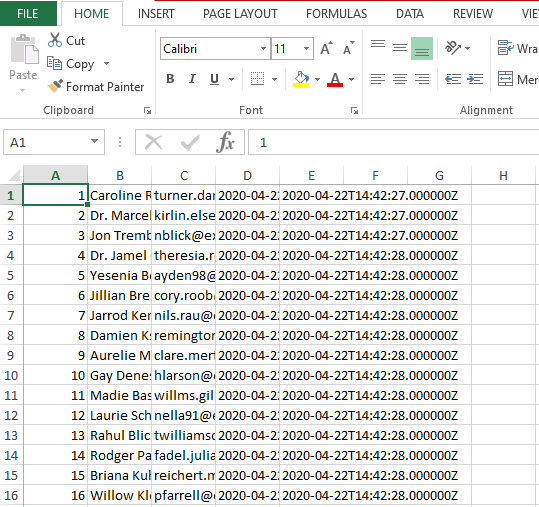
The above image is the Excel file that we have exported from the MySQL database.
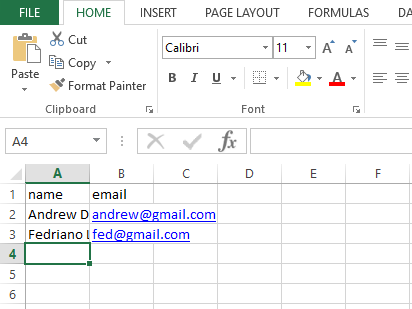
Above is the Excel file that I have imported into the database.
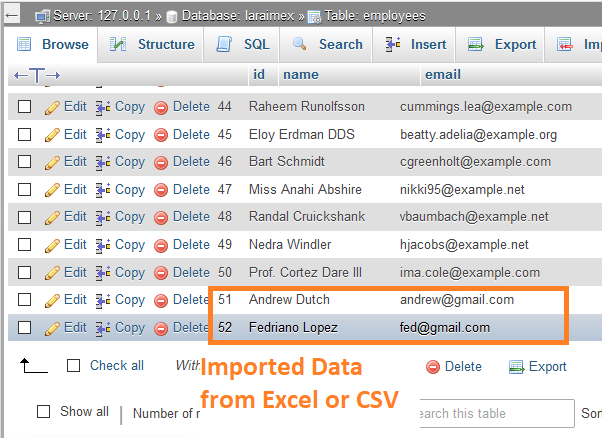
The above image is of the MySQL database. You can see that two records that are present in the excel file are successfully imported into the database.
Now follow all the below steps to create this laravel export import excel example.
Step 1. MySQL Database Connection
First of all, run the following command to make a new laravel project.
laravel new laraimportexport
Now go to your database management tool like phpMyAdmin.
Here, make a new database and give it a name like “laraimex“.
Now open your newly created laravel project in the code editor and open .env file.
Inside your .env file, find the following code lines
DB_HOST=127.0.0.1
DB_PORT=3306
DB_DATABASE=laraimex
DB_USERNAME=root
DB_PASSWORD=
Here, you need to enter some basic details like the name of the database, port number, username, etc.
Once you do it, your database and laravel project is connected successfully.
Step 2. Integrating maatwebsite/excel Package
First of all, run the following command in terminal
composer require maatwebsite/excel
This command will download the maatwebsite/excel package in your laravel project.
After this, we need to add configuration line for this package.
So navigate to the config->app.php file and find “provides” array in it.
Add the below line in the providers array.
Maatwebsite\Excel\ExcelServiceProvider::class,
Add the following line in the “aliases” array,
'Excel' => Maatwebsite\Excel\Facades\Excel::class,
Once you have added the above lines, run the below command
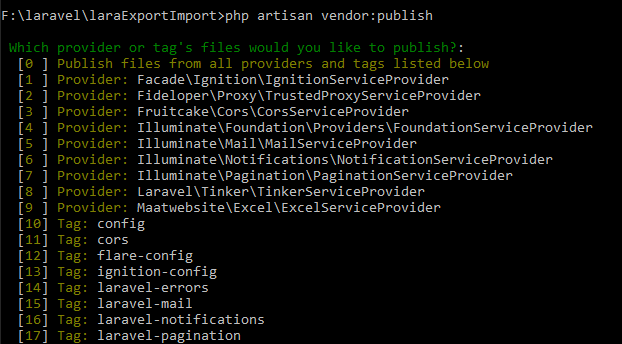
php artisan vendor:publish
This command is required to publish the configuration of package in our laravel project.
You should see the line like the below image when run the above command
Step 3. MySQL Table Creation
To create the table in database, we need to create migration file first.
So fire the following command in the command prompt
php artisan make:migration create_employees_table
Now navigate to the app->database->migrations timestamp_create_employees_table.php file.
Inside this timestamp_create_employees_table.php file, write down the below coding snippet
<?php
use Illuminate\Database\Migrations\Migration;
use Illuminate\Database\Schema\Blueprint;
use Illuminate\Support\Facades\Schema;
class CreateEmployeesTable extends Migration
{
    /**
     * Run the migrations.
     *
     * @return void
     */
    public function up()
    {
        Schema::create('employees', function (Blueprint $table) {
            $table->id();
            $table->string('name');
            $table->string('email')->unique();
            $table->timestamps();
        });
    }
    /**
     * Reverse the migrations.
     *
     * @return void
     */
    public function down()
    {
        Schema::dropIfExists('employees');
    }
}
Now notice the up() function in the above migration file.
This function has the column names and it’s types that we want to have on the employees table.
Now to finally create the table, run the below command
php artisan migrate
Now you should see the “employees” table in your database.
Now let us make a model. So run the below command
php artisan make:model Employee
This command will create model class at app->Employee.php directory.
In your Employee.php file, write the following source lines
<?php
namespace App;
use Illuminate\Database\Eloquent\Model;
class Employee extends Model
{
    //
    public $table = "employees";
    protected $fillable = [
        'name', 'email',
    ];
}
Step 4. Some Fake Data
Now to test our example, we need some fake data.
To generate dummy data, navigate to the app->database->factories->UserFactory.php file and add the below code init
$factory->define(Employee::class, function (Faker $faker) {
    return [
        'name' => $faker->name,
        'email' => $faker->unique()->safeEmail,

    ];
});
You need to add ” use App\Employee; ” line at the top of the file.
Final coding lines for UserFactory.php file is as the following
<?php
/** @var \Illuminate\Database\Eloquent\Factory $factory */
use App\User;
use App\Employee;
use Faker\Generator as Faker;
use Illuminate\Support\Str;
/*
|--------------------------------------------------------------------------
| Model Factories
|--------------------------------------------------------------------------
|
| This directory should contain each of the model factory definitions for
| your application. Factories provide a convenient way to generate new
| model instances for testing / seeding your application's database.
|
*/
$factory->define(User::class, function (Faker $faker) {
    return [
        'name' => $faker->name,
        'email' => $faker->unique()->safeEmail,
        'email_verified_at' => now(),
        'password' => '$2y$10$92IXUNpkjO0rOQ5byMi.Ye4oKoEa3Ro9llC/.og/at2.uheWG/igi', // password
        'remember_token' => Str::random(10),
    ];
});
$factory->define(Employee::class, function (Faker $faker) {
    return [
        'name' => $faker->name,
        'email' => $faker->unique()->safeEmail,

    ];
});
Now open your command prompt and run the below
php artisan tinker
After this, run the below command
factory(App\Employee::class, 50)->create();
Above command will add 50 dummy data rows in your employees table.
Step 5. Export and Import Code
First of all, run the below command
php artisan make:import EmployeesImport --model=Employee
This command should create one file EmployeesImport.php in the app->imports folder.
You need to write the below source coding lines into the EmployeesImport.php file.
<?php
namespace App\Imports;
use App\Employee;
use Maatwebsite\Excel\Concerns\ToModel;
use Maatwebsite\Excel\Concerns\WithHeadingRow;
class EmployeesImport implements ToModel, WithHeadingRow
{
    /**
    * @param array $row
    *
    * @return \Illuminate\Database\Eloquent\Model|null
    */
    public function model(array $row)
    {
        return new Employee([
            //
       // print_r($row)
            'name'     => $row['name'],
            'email'    => $row['email'],
        ]);
    }
}
Look at the above code. model() function is importing the excel data into the table employees.
Here, an excel file should have two header data like “name” and “email“. You can see sample of excel files at the beginning of the tutorial.
Now run the below command to create the EmployeesExport.php file.
php artisan make:export EmployeesExport --model=Employee
This command will make a new file at the location “app/Exports/EmployeesExport.php“.
Below is the coding snippet for the file EmployeesExport.php
<?php
namespace App\Exports;
use App\Employee;
use Maatwebsite\Excel\Concerns\FromCollection;
class EmployeesExport implements FromCollection
{
    /**
    * @return \Illuminate\Support\Collection
    */
    public function collection()
    {
        return Employee::all();
    }
    public function headings(): array
    {
        return [
            'name',
            'email',
        ];
    }
}
This file will first fetch all the data rows from the employees table.
Then it will make an excel file with all these data rows from the table “employees”.
Step 6. Route and other Files
Now we are left with three things: routes, controller, and blade view.
Navigate to the app->resources->views->web.php file. You need to add the following lines in it
Route::get('showscreen', 'ExImController@showSceen');
Route::get('export', 'ExImController@exportData')->name('export');
Route::post('import', 'ExImController@importData')->name('import');
Now run the following command
php artisan make:controller ExImController
Now go to the app/Http/Controllers/ExImController.php file.
Following is the coding snippet for the ExImController.php file.
<?php
namespace App\Http\Controllers;
use Illuminate\Http\Request;
use App\Exports\EmployeesExport;
use App\Imports\EmployeesImport;
use Maatwebsite\Excel\Facades\Excel;
class ExImController extends Controller
{
    //
    public function showSceen()
    {
       return view('showscreen');
    }
    public function exportData()
    {
        return Excel::download(new EmployeesExport, 'employees.xlsx');
    }
    public function importData()
    {
        $path1 = request()->file('file')->store('file');
        $path=storage_path('app').'/'.$path1;
        Excel::import(new EmployeesImport,$path);

    }
}
Navigate to the app->resources->views directory. Inside views folder, make a new file called showscreen.blade.php
Source code lines for showscreen.blade.php file is as the below
<!DOCTYPE html>
<html>
<head>
    <title>Laravel Export Import Excel CSV</title>
    <link rel="stylesheet" href="https://cdnjs.cloudflare.com/ajax/libs/twitter-bootstrap/4.1.3/css/bootstrap.min.css" />
</head>
<body>
<div class="container">
    <div class="card bg-light mt-3">
        <div class="card-header">
        Laravel Export Import Excel CSV
        </div>
        <div class="card-body">
            <form action="{{ route('import') }}" method="POST" enctype="multipart/form-data">
                @csrf
                <input type="file" name="file" class="form-control">
                <br>
                <button class="btn btn-success">Import Employee Data</button>
                <a class="btn btn-warning" href="{{ route('export') }}">Export Employee Data</a>
            </form>
        </div>
    </div>
</div>
</body>
</html>
Now you can run your project by “php artisan serve” command to test your example.