
Learn how to install elasticsearch on windows in this tutorial.
Elasticsearch is the service which helps us to implement search filter service in laravel, django, ruby on rails etc. web frameworks.
There are two different methods of installing elasticsearch on windows: first is using the .zip archive and second is by using .msi package.
I have covered both of these methods in this tutorial.
Prerequisites and Versions
Windows : 10 ( 64 bit )
Java : 8 or later
Both above versions are must if you want to install elasticsearch on your windows computer.
If you have not installed java 8 yet then read how to install java on windows 10.
Once you are equipped with Java 8 or later follow all the below steps to install the elasticsearch.
Method 1 : Using .zip Archive
First of all, we will use simple method by using zip version.
Step 1. Download Elasticsearch
We will download the .zip archive to start with.
So click here on the official download page of the elasticsearch.
Clicking on the above link will take you to the below image like screen

Now in the above image, look at the orange rectangular box.
You need to click on this box to download the .zip file of the elasticsearch.
Name of the downloaded file will be something like : elasticsearch-7.6.2-windows-x86_64.zip
When you double click on the downloaded elasticsearch-7.6.2-windows-x86_64.zip file, you should see file structure like the below image,
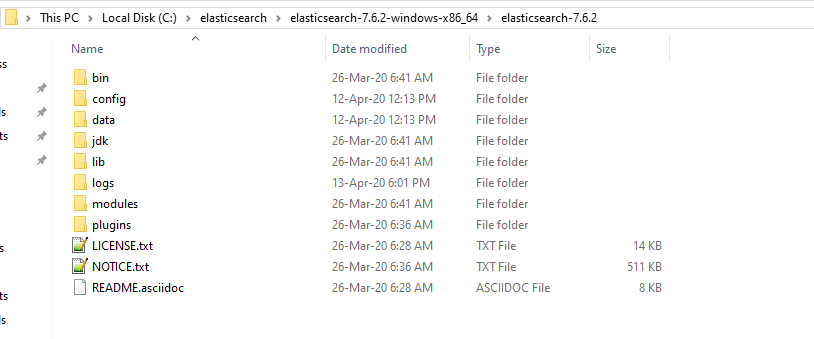
So we do not need to go through the whole installation process like we usually does, if you reached to screen like above image.
You just need to copy the whole folders in the above image to the directory wherever you want.
I have stored these folders at “C:\elasticsearch\elasticsearch-7.6.2-windows-x86_64\elasticsearch-7.6.2” directory.
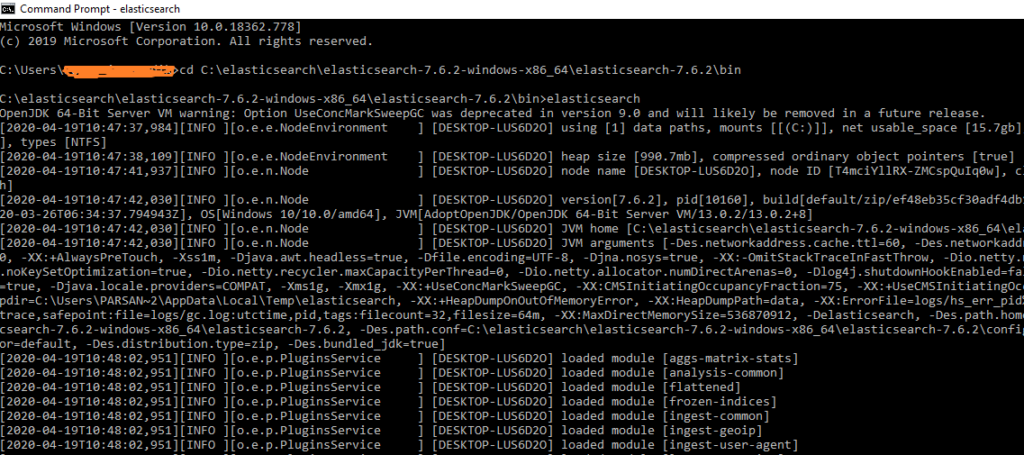
Step 2. Starting the Elasticsearch Service
To start the elasticsearch service, we need to use the command prompt.
So open your command prompt and navigate to the directory where you have placed the elasticsearch folder package. (you need to go to the bin folder)
For the navigation, you can use cd command.
See the following code snippet of command prompt
cd C:\elasticsearch\elasticsearch-7.6.2-windows-x86_64\elasticsearch-7.6.2\bin
You should replace your directory path in the above command line.

Once you have navigate to the bin folder in the command prompt, fire the below command
elasticsearch
Firing the above command should start the elasticsearch on your windows computer.
You should see the following lines in the command prompt
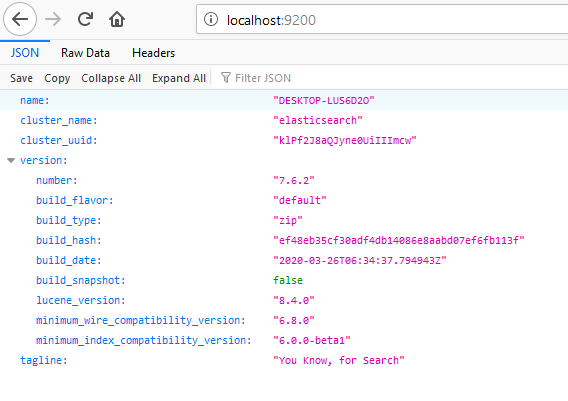
Proof of Elasticsearch
Now let us see if elasticsearch is running properly or not.
For this, you need to run http://localhost:9200/ on your browser. If you see the text like the below image then congratulations, your elasticsearch is running smoothly.
Method 2 : Using .msi package
This method can install Elasticsearch as a Windows service or you can run it manually using the elasticsearch.exe executable file.
Step 1. Download .msi for elasticsearch windows
First of all, download the .msi by click “https://artifacts.elastic.co/downloads/elasticsearch/elasticsearch-7.6.2.msi“
Now double click on downloaded .msi package to open the installation wizard.
Installation wizard should look like the below image
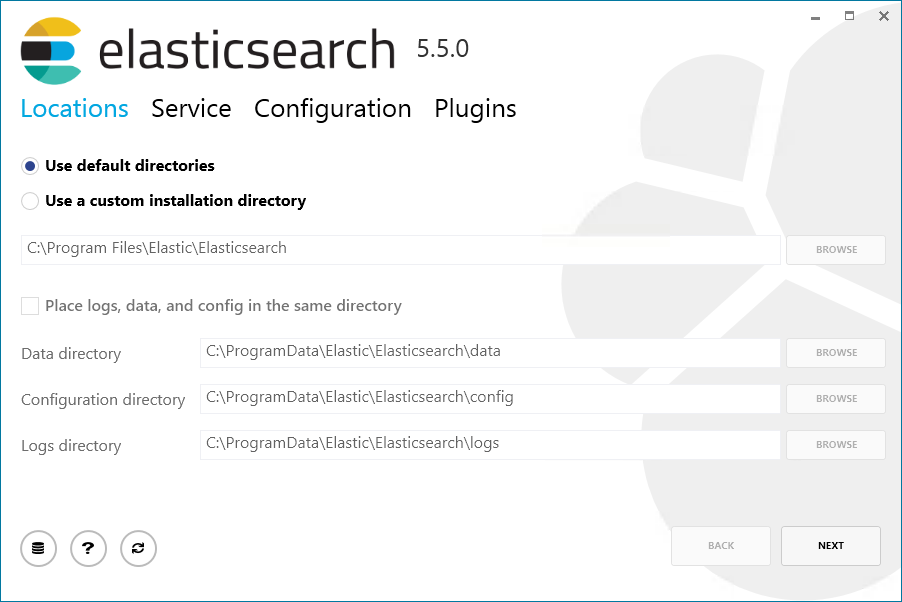
While you are on the screen like the above image, you can set the directory where you want to install your elasticsearch.
You need to set three directories for Data, Configuration and Logs.
It is recommended to use the default directory for smooth conduction of the installation process.
Now click on the NEXT button and you should be prompted to the screen like the below image
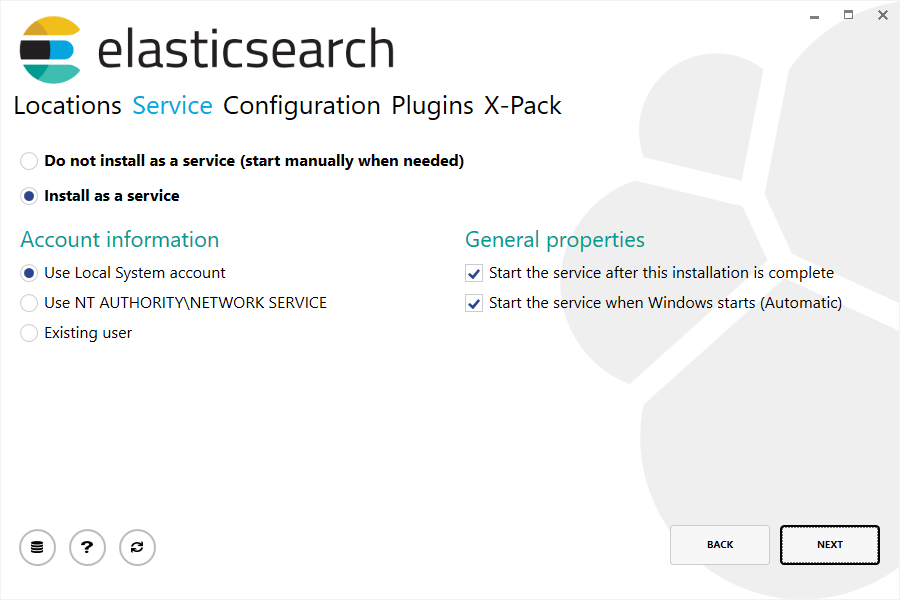
Now this step is important. It allows you to choose whether you want to install elasticsearch as a service or not.
By default, “install as a service” is selected, that means whenever you turn on your windows machine, elasticsearch service will be started automatically without any manual task.
But if you select “Do not install as a service“, you need to start the elasticsearch service manually each time you turn on your windows computer using the command prompt.
We again recommend you to stick with the default selection ” install as a service ” because it is uncomfortable to start elasticsearch service every time using command prompt.
Now click on NEXT to reach at the below screen
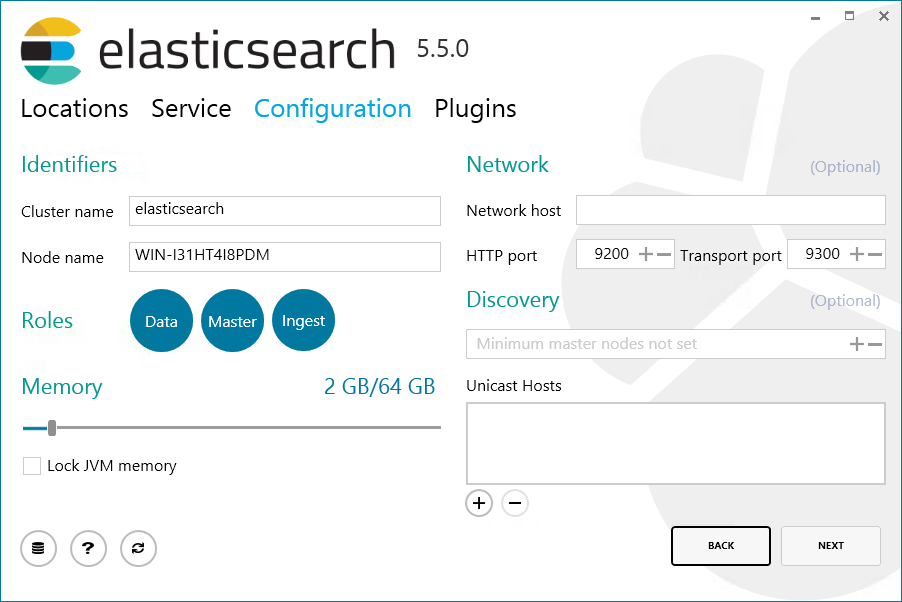
In the above screen, you can modify some basic settings like Cluster name, Mode name, Network host, HTTP port number etc.
In general, we do not need to update anything from above details, just click on the NEXT again.
You will be prompted to the screen from which you can install some other plugins as per your requirement.
After selecting the plugins, click on NEXT button.

If you have original license number then you can enter in the field : License
If not, then simply click on the INSTALL button. Then you will see that some installing process going on for some time.
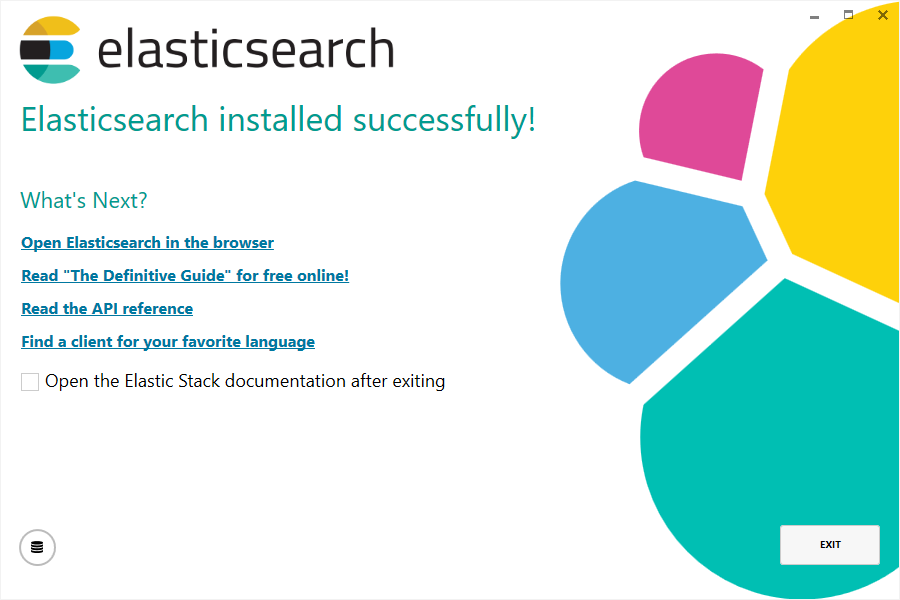
After this you should see the following image to get ensured that elasticsearch is installed successfully on your windows machine.
So it was all about installing elasticsearch on windows using two different methods.
Here is another article on installing elasticsearch on mac.