
Hello, and welcome to android pick single or multiple images from gallery or camera in android studio example.
I have made two demos, one will guide you to select single image and another will be for selecting multiple images as per below links
1. Android Pick Image from gallery or camera programmatically
2. Android Select Multiple Images from gallery or camera programmatically
1. Android Pick Image from gallery or camera programmatically
Pick image from gallery or camera in android tutorial guides you how to select/get the image from a gallery in android programmatically.
We will choose/take a photo from gallery or camera in the Android Studio by opening via Intent.
After getting image from gallery or camera, we will show it in an ImageView.
You need to implement this feature when you are creating a sign up page with image of the user.
Another example can be like when you are getting a review from the user about a specific place. Here, the user may want to add images.
First, check the output of pick image from gallery or camera in android example and then we will develop it.
Step 1: Create a new project in Android Studio.
I recommend you to make a separate new android project before you go to second step.
Benefit of doing making fresh new project is that you have empty work space in your main activity so the complexity of the coding lines is decreased.
When making new project, select Empty Activity as a default activity so main activity will not include any prewritten codes.
Step 2: Updating AndroidManifest.xml file
add required permissions between <manifest>….</manifest> tag.
 <uses-permission android:name="android.permission.READ_EXTERNAL_STORAGE" />
 <uses-permission android:name="android.permission.WRITE_EXTERNAL_STORAGE" />
 <uses-permission android:name="android.permission.CAMERA" />
Final code for AndroidManifest.xml file
<?xml version="1.0" encoding="utf-8"?>
<manifest xmlns:android="http://schemas.android.com/apk/res/android"
    package="com.example.parsaniahardik.selectimage2018">

    <uses-permission android:name="android.permission.READ_EXTERNAL_STORAGE" />
    <uses-permission android:name="android.permission.WRITE_EXTERNAL_STORAGE" />
    <uses-permission android:name="android.permission.CAMERA" />

    <application
        android:allowBackup="true"
        android:icon="@mipmap/ic_launcher"
        android:label="@string/app_name"
        android:roundIcon="@mipmap/ic_launcher_round"
        android:supportsRtl="true"
        android:theme="@style/AppTheme">
        <activity android:name=".MainActivity">
            <intent-filter>
                <action android:name="android.intent.action.MAIN" />

                <category android:name="android.intent.category.LAUNCHER" />
            </intent-filter>
        </activity>
    </application>

</manifest>
Now add the following lines in the build.gradle (Module:app) file
implementation 'com.karumi:dexter:5.0.0'
So the whole source code for build.gradle (Module:app) file looks like the below
apply plugin: 'com.android.application'

android {
    compileSdkVersion 27
    defaultConfig {
        applicationId "com.example.parsaniahardik.selectimage2018"
        minSdkVersion 15
        targetSdkVersion 27
        versionCode 1
        versionName "1.0"
        testInstrumentationRunner "android.support.test.runner.AndroidJUnitRunner"
    }
    buildTypes {
        release {
            minifyEnabled false
            proguardFiles getDefaultProguardFile('proguard-android.txt'), 'proguard-rules.pro'
        }
    }
}

dependencies {
    implementation fileTree(dir: 'libs', include: ['*.jar'])
    implementation 'com.android.support:appcompat-v7:27.1.1'
    implementation 'com.android.support.constraint:constraint-layout:1.1.3'
    testImplementation 'junit:junit:4.12'
    androidTestImplementation 'com.android.support.test:runner:1.0.2'
    androidTestImplementation 'com.android.support.test.espresso:espresso-core:3.0.2'

    implementation 'com.karumi:dexter:5.0.0'

}
This line allow us to use the dexter library.
Using this library, we will ask for the runtime permissions in the easy manner.
Step 3: Updating activity_main.xml file
Copy and paste below source code in activity_main.xml file
<?xml version="1.0" encoding="utf-8"?>
<LinearLayout xmlns:android="http://schemas.android.com/apk/res/android"
    xmlns:tools="http://schemas.android.com/tools"
    android:layout_width="match_parent"
    android:layout_height="match_parent"
    android:orientation="vertical">

    <Button
        android:layout_width="wrap_content"
        android:layout_height="wrap_content"
        android:id="@+id/btn"
        android:layout_gravity="center_horizontal"
        android:layout_marginTop="40dp"
        android:textAppearance="?android:attr/textAppearanceLarge"
        android:text="Select or Capture Image" />

    <ImageView
        android:layout_width="300dp"
        android:layout_height="300dp"
        android:layout_gravity="center"
        android:layout_marginTop="20dp"
        android:scaleType="fitXY"
        android:src="@mipmap/ic_launcher"
        android:id="@+id/iv"/>
</LinearLayout>
I have taken one button and Imageview in the main layout.
On the button click, compiler will open one dialog where there are two options.
One is to pick image from gallery and other is to capture image from camera.
If user selects image from the gallery, image will be shown in the Imageview. And if user captures image from the camera, the captured image will be shown in the ImageView.
Step 4: Preparing MainActivity.java class
Add following source code in MainActivity.java class
import android.Manifest;
import android.support.v7.app.AppCompatActivity;
import android.os.Bundle;
import android.widget.Toast;

import com.karumi.dexter.Dexter;
import com.karumi.dexter.MultiplePermissionsReport;
import com.karumi.dexter.PermissionToken;
import com.karumi.dexter.listener.DexterError;
import com.karumi.dexter.listener.PermissionRequest;
import com.karumi.dexter.listener.PermissionRequestErrorListener;
import com.karumi.dexter.listener.multi.MultiplePermissionsListener;

import android.app.AlertDialog;
import android.content.DialogInterface;
import android.content.Intent;
import android.graphics.Bitmap;
import android.graphics.BitmapFactory;
import android.media.MediaScannerConnection;
import android.net.Uri;
import android.os.Environment;
import android.provider.MediaStore;
import android.support.v7.app.AppCompatActivity;
import android.os.Bundle;
import android.util.Log;
import android.view.View;
import android.widget.Button;
import android.widget.ImageView;
import android.widget.Toast;

import java.io.ByteArrayOutputStream;
import java.io.File;
import java.io.FileOutputStream;
import java.io.IOException;
import java.util.Calendar;

import java.util.List;

public class MainActivity extends AppCompatActivity {

    private Button btn;
    private ImageView imageview;
    private static final String IMAGE_DIRECTORY = "/demonuts";
    private int GALLERY = 1, CAMERA = 2;

    @Override
    protected void onCreate(Bundle savedInstanceState) {
        super.onCreate(savedInstanceState);
        setContentView(R.layout.activity_main);

        requestMultiplePermissions();

        btn = (Button) findViewById(R.id.btn);
        imageview = (ImageView) findViewById(R.id.iv);

        btn.setOnClickListener(new View.OnClickListener() {
            @Override
            public void onClick(View v) {
                showPictureDialog();
            }
        });

    }

    private void showPictureDialog(){
        AlertDialog.Builder pictureDialog = new AlertDialog.Builder(this);
        pictureDialog.setTitle("Select Action");
        String[] pictureDialogItems = {
                "Select photo from gallery",
                "Capture photo from camera" };
        pictureDialog.setItems(pictureDialogItems,
                new DialogInterface.OnClickListener() {
                    @Override
                    public void onClick(DialogInterface dialog, int which) {
                        switch (which) {
                            case 0:
                                choosePhotoFromGallary();
                                break;
                            case 1:
                                takePhotoFromCamera();
                                break;
                        }
                    }
                });
        pictureDialog.show();
    }

    public void choosePhotoFromGallary() {
        Intent galleryIntent = new Intent(Intent.ACTION_PICK,
                android.provider.MediaStore.Images.Media.EXTERNAL_CONTENT_URI);

        startActivityForResult(galleryIntent, GALLERY);
    }

    private void takePhotoFromCamera() {
        Intent intent = new Intent(android.provider.MediaStore.ACTION_IMAGE_CAPTURE);
        startActivityForResult(intent, CAMERA);
    }

    @Override
    public void onActivityResult(int requestCode, int resultCode, Intent data) {

        super.onActivityResult(requestCode, resultCode, data);
        if (resultCode == this.RESULT_CANCELED) {
            return;
        }
        if (requestCode == GALLERY) {
            if (data != null) {
                Uri contentURI = data.getData();
                try {
                    Bitmap bitmap = MediaStore.Images.Media.getBitmap(this.getContentResolver(), contentURI);
                    String path = saveImage(bitmap);
                    Toast.makeText(MainActivity.this, "Image Saved!", Toast.LENGTH_SHORT).show();
                    imageview.setImageBitmap(bitmap);

                } catch (IOException e) {
                    e.printStackTrace();
                    Toast.makeText(MainActivity.this, "Failed!", Toast.LENGTH_SHORT).show();
                }
            }

        } else if (requestCode == CAMERA) {
            Bitmap thumbnail = (Bitmap) data.getExtras().get("data");
            imageview.setImageBitmap(thumbnail);
            saveImage(thumbnail);
            Toast.makeText(MainActivity.this, "Image Saved!", Toast.LENGTH_SHORT).show();
        }
    }

    public String saveImage(Bitmap myBitmap) {
        ByteArrayOutputStream bytes = new ByteArrayOutputStream();
        myBitmap.compress(Bitmap.CompressFormat.JPEG, 90, bytes);
        File wallpaperDirectory = new File(
                Environment.getExternalStorageDirectory() + IMAGE_DIRECTORY);
        // have the object build the directory structure, if needed.
        if (!wallpaperDirectory.exists()) {
            wallpaperDirectory.mkdirs();
        }

        try {
            File f = new File(wallpaperDirectory, Calendar.getInstance()
                    .getTimeInMillis() + ".jpg");
            f.createNewFile();
            FileOutputStream fo = new FileOutputStream(f);
            fo.write(bytes.toByteArray());
            MediaScannerConnection.scanFile(this,
                    new String[]{f.getPath()},
                    new String[]{"image/jpeg"}, null);
            fo.close();
            Log.d("TAG", "File Saved::--->" + f.getAbsolutePath());

            return f.getAbsolutePath();
        } catch (IOException e1) {
            e1.printStackTrace();
        }
        return "";
    }

    private void  requestMultiplePermissions(){
        Dexter.withActivity(this)
                .withPermissions(
                        Manifest.permission.CAMERA,
                        Manifest.permission.WRITE_EXTERNAL_STORAGE,
                        Manifest.permission.READ_EXTERNAL_STORAGE)
                .withListener(new MultiplePermissionsListener() {
                    @Override
                    public void onPermissionsChecked(MultiplePermissionsReport report) {
                        // check if all permissions are granted
                        if (report.areAllPermissionsGranted()) {
                            Toast.makeText(getApplicationContext(), "All permissions are granted by user!", Toast.LENGTH_SHORT).show();
                        }

                        // check for permanent denial of any permission
                        if (report.isAnyPermissionPermanentlyDenied()) {
                            // show alert dialog navigating to Settings
                            //openSettingsDialog();
                        }
                    }

                    @Override
                    public void onPermissionRationaleShouldBeShown(List<PermissionRequest> permissions, PermissionToken token) {
                        token.continuePermissionRequest();
                    }
                }).
                withErrorListener(new PermissionRequestErrorListener() {
                    @Override
                    public void onError(DexterError error) {
                        Toast.makeText(getApplicationContext(), "Some Error! ", Toast.LENGTH_SHORT).show();
                    }
                })
                .onSameThread()
                .check();
    }

}
Step 5: Description of MainActivity.java
In the onCreate() method, compiler will call the requestMultiplePermissions() method.
Source code for requestMultiplePermissions() is as the following
 private void  requestMultiplePermissions(){
        Dexter.withActivity(this)
                .withPermissions(
                        Manifest.permission.CAMERA,
                        Manifest.permission.WRITE_EXTERNAL_STORAGE,
                        Manifest.permission.READ_EXTERNAL_STORAGE)
                .withListener(new MultiplePermissionsListener() {
                    @Override
                    public void onPermissionsChecked(MultiplePermissionsReport report) {
                        // check if all permissions are granted
                        if (report.areAllPermissionsGranted()) {
                            Toast.makeText(getApplicationContext(), "All permissions are granted by user!", Toast.LENGTH_SHORT).show();
                        }

                        // check for permanent denial of any permission
                        if (report.isAnyPermissionPermanentlyDenied()) {
                            // show alert dialog navigating to Settings
                            //openSettingsDialog();
                        }
                    }

                    @Override
                    public void onPermissionRationaleShouldBeShown(List<PermissionRequest> permissions, PermissionToken token) {
                        token.continuePermissionRequest();
                    }
                }).
                withErrorListener(new PermissionRequestErrorListener() {
                    @Override
                    public void onError(DexterError error) {
                        Toast.makeText(getApplicationContext(), "Some Error! ", Toast.LENGTH_SHORT).show();
                    }
                })
                .onSameThread()
                .check();
    }
This method will ask for multile runtime permissions using dexter library.
We will ask for all permissions at one time.
It is better to allow every permission when you are testing this tutorial on your device to avoid unnecessary complexity.
When the user clicks the button, dialog with select options appears.
Following is the button click method.
btn.setOnClickListener(new View.OnClickListener() {
            @Override
            public void onClick(View v) {
                showPictureDialog();
            }
        });
The dialog contains options whether to select an image from gallery or to capture the image from camera.
Below is the code for showPictureDialog() method.
private void showPictureDialog(){
    AlertDialog.Builder pictureDialog = new AlertDialog.Builder(this);
    pictureDialog.setTitle("Select Action");
    String[] pictureDialogItems = {
            "Select photo from gallery",
            "Capture photo from camera" };
    pictureDialog.setItems(pictureDialogItems,
            new DialogInterface.OnClickListener() {
                @Override
                public void onClick(DialogInterface dialog, int which) {
                    switch (which) {
                        case 0:
                            choosePhotoFromGallary();
                            break;
                        case 1:
                            takePhotoFromCamera();
                            break;
                    }
                }
            });
    pictureDialog.show();
}
This method creates a dialog with two options.
One option is to select an image from the gallery.
Another option is to capture image from the camera.
If a user selects gallery, then following method is executed.
 public void choosePhotoFromGallary() {
        Intent galleryIntent = new Intent(Intent.ACTION_PICK,
                android.provider.MediaStore.Images.Media.EXTERNAL_CONTENT_URI);

        startActivityForResult(galleryIntent, GALLERY);
    }
Above gallery intent will open a new screen which includes all the gallery images.
User will select image from this screen.
And if user choose camera, then below method is run by compiler.
 private void takePhotoFromCamera() {
        Intent intent = new Intent(android.provider.MediaStore.ACTION_IMAGE_CAPTURE);
        startActivityForResult(intent, CAMERA);
    }
Above code will create a camera intent (a camera preview) So the user can capture image from here.
After selecting an image from gallery or capturing photo from camera, an onActivityResult() method is executed.
Code for onActivityResult(), is as below.
@Override
    public void onActivityResult(int requestCode, int resultCode, Intent data) {

        super.onActivityResult(requestCode, resultCode, data);
        if (resultCode == this.RESULT_CANCELED) {
            return;
        }
        if (requestCode == GALLERY) {
            if (data != null) {
                Uri contentURI = data.getData();
                try {
                    Bitmap bitmap = MediaStore.Images.Media.getBitmap(this.getContentResolver(), contentURI);
                    String path = saveImage(bitmap);
                    Toast.makeText(MainActivity.this, "Image Saved!", Toast.LENGTH_SHORT).show();
                    imageview.setImageBitmap(bitmap);

                } catch (IOException e) {
                    e.printStackTrace();
                    Toast.makeText(MainActivity.this, "Failed!", Toast.LENGTH_SHORT).show();
                }
            }

        } else if (requestCode == CAMERA) {
            Bitmap thumbnail = (Bitmap) data.getExtras().get("data");
            imageview.setImageBitmap(thumbnail);
            saveImage(thumbnail);
            Toast.makeText(MainActivity.this, "Image Saved!", Toast.LENGTH_SHORT).show();
        }
    }
If an image comes from an gallery, then compiler goes at the below code.
 if (requestCode == GALLERY) {
            if (data != null) {
                Uri contentURI = data.getData();
                try {
                    Bitmap bitmap = MediaStore.Images.Media.getBitmap(this.getContentResolver(), contentURI);
                    String path = saveImage(bitmap);
                    Toast.makeText(MainActivity.this, "Image Saved!", Toast.LENGTH_SHORT).show();
                    imageview.setImageBitmap(bitmap);

                } catch (IOException e) {
                    e.printStackTrace();
                    Toast.makeText(MainActivity.this, "Failed!", Toast.LENGTH_SHORT).show();
                }
            }

        }
If a photo is from a camera, then compiler goes to following.
else if (requestCode == CAMERA) {
            Bitmap thumbnail = (Bitmap) data.getExtras().get("data");
            imageview.setImageBitmap(thumbnail);
            saveImage(thumbnail);
            Toast.makeText(MainActivity.this, "Image Saved!", Toast.LENGTH_SHORT).show();
        }
Below is the method to save the image or photo.
public String saveImage(Bitmap myBitmap) {
        ByteArrayOutputStream bytes = new ByteArrayOutputStream();
        myBitmap.compress(Bitmap.CompressFormat.JPEG, 90, bytes);
        File wallpaperDirectory = new File(
                Environment.getExternalStorageDirectory() + IMAGE_DIRECTORY);
        // have the object build the directory structure, if needed.
        if (!wallpaperDirectory.exists()) {
            wallpaperDirectory.mkdirs();
        }

        try {
            File f = new File(wallpaperDirectory, Calendar.getInstance()
                    .getTimeInMillis() + ".jpg");
            f.createNewFile();
            FileOutputStream fo = new FileOutputStream(f);
            fo.write(bytes.toByteArray());
            MediaScannerConnection.scanFile(this,
                    new String[]{f.getPath()},
                    new String[]{"image/jpeg"}, null);
            fo.close();
            Log.d("TAG", "File Saved::--->" + f.getAbsolutePath());

            return f.getAbsolutePath();
        } catch (IOException e1) {
            e1.printStackTrace();
        }
        return "";
    }
In the above code, IMAGE_DIRECTORY is the folder name in which all the images will be saved.
So that’s all for pick image from gallery or camera in the android example. If you have queries, then ask them in the comment section. Thank you 🙂
2. Android Select Multiple Images from gallery or camera programmatically
Android select multiple images from gallery Programmatically tutorial example is for you coders.
In this example, we will pick/get the multiple images from gallery and we will show them in a gridview.
We will choose/take multiple photos from gallery in the Android Studio by opening via Gallery Intent.
You can also select single image in this tutorial.
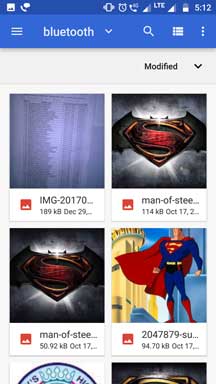
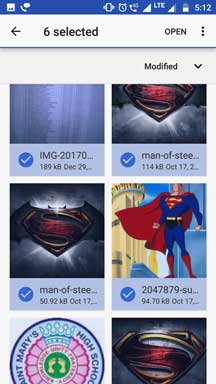
Last Images of app
The output of this tutorial is look like below images.


Step 1. Making Layout
By default you have activity_main.xml layout file.
Add following source code into it.
<?xml version="1.0" encoding="utf-8"?>
<LinearLayout xmlns:android="http://schemas.android.com/apk/res/android"
    xmlns:app="http://schemas.android.com/apk/res-auto"
    xmlns:tools="http://schemas.android.com/tools"
    android:layout_width="match_parent"
    android:layout_height="match_parent"
    android:orientation="vertical"
    tools:context=".MainActivity">

    <GridView
        android:layout_width="match_parent"
        android:layout_height="0dp"
        android:id="@+id/gv"
        android:numColumns="3"
        android:layout_weight="1">
    </GridView>

    <Button
        android:layout_width="wrap_content"
        android:layout_height="wrap_content"
        android:id="@+id/btn"
        android:text="Select Multiple Images"
        android:layout_marginTop="10dp"
        android:layout_marginBottom="10dp"
        android:layout_marginLeft="10dp"
        />

</LinearLayout>
I have taken one button and one gridview in this layout file.
When the user will click the button, it will open all the images available on the android device.
It will let the user choose one or multiple images from here.
When the user finishes picking up the images, all the selected images will be shown in the gridview.
Step 2. Java Coding
Now Add below source code in to MainActivity.java file
import android.content.ClipData;
import android.content.Intent;
import android.database.Cursor;
import android.net.Uri;
import android.provider.MediaStore;
import android.support.v7.app.AppCompatActivity;
import android.os.Bundle;
import android.util.Log;
import android.view.View;
import android.view.ViewGroup;
import android.widget.Button;
import android.widget.GridView;
import android.widget.Toast;
import java.util.ArrayList;
import java.util.List;

public class MainActivity extends AppCompatActivity {

    private Button btn;
    int PICK_IMAGE_MULTIPLE = 1;
    String imageEncoded;
    List<String> imagesEncodedList;
    private GridView gvGallery;
    private GalleryAdapter galleryAdapter;

    @Override
    protected void onCreate(Bundle savedInstanceState) {
        super.onCreate(savedInstanceState);
        setContentView(R.layout.activity_main);

        btn = findViewById(R.id.btn);
        gvGallery = (GridView)findViewById(R.id.gv);

        btn.setOnClickListener(new View.OnClickListener() {
            @Override
            public void onClick(View v) {
                Intent intent = new Intent();
                intent.setType("image/*");
                intent.putExtra(Intent.EXTRA_ALLOW_MULTIPLE, true);
                intent.setAction(Intent.ACTION_GET_CONTENT);
                startActivityForResult(Intent.createChooser(intent,"Select Picture"), PICK_IMAGE_MULTIPLE);
            }
        });

    }

    @Override
    protected void onActivityResult(int requestCode, int resultCode, Intent data) {
        try {
            // When an Image is picked
            if (requestCode == PICK_IMAGE_MULTIPLE && resultCode == RESULT_OK
                    && null != data) {
                // Get the Image from data

                String[] filePathColumn = { MediaStore.Images.Media.DATA };
                imagesEncodedList = new ArrayList<String>();
                if(data.getData()!=null){

                    Uri mImageUri=data.getData();

                    // Get the cursor
                    Cursor cursor = getContentResolver().query(mImageUri,
                            filePathColumn, null, null, null);
                    // Move to first row
                    cursor.moveToFirst();

                    int columnIndex = cursor.getColumnIndex(filePathColumn[0]);
                    imageEncoded  = cursor.getString(columnIndex);
                    cursor.close();

                    ArrayList<Uri> mArrayUri = new ArrayList<Uri>();
                    mArrayUri.add(mImageUri);
                    galleryAdapter = new GalleryAdapter(getApplicationContext(),mArrayUri);
                    gvGallery.setAdapter(galleryAdapter);
                    gvGallery.setVerticalSpacing(gvGallery.getHorizontalSpacing());
                    ViewGroup.MarginLayoutParams mlp = (ViewGroup.MarginLayoutParams) gvGallery
                            .getLayoutParams();
                    mlp.setMargins(0, gvGallery.getHorizontalSpacing(), 0, 0);

                } else {
                    if (data.getClipData() != null) {
                        ClipData mClipData = data.getClipData();
                        ArrayList<Uri> mArrayUri = new ArrayList<Uri>();
                        for (int i = 0; i < mClipData.getItemCount(); i++) {

                            ClipData.Item item = mClipData.getItemAt(i);
                            Uri uri = item.getUri();
                            mArrayUri.add(uri);
                            // Get the cursor
                            Cursor cursor = getContentResolver().query(uri, filePathColumn, null, null, null);
                            // Move to first row
                            cursor.moveToFirst();

                            int columnIndex = cursor.getColumnIndex(filePathColumn[0]);
                            imageEncoded  = cursor.getString(columnIndex);
                            imagesEncodedList.add(imageEncoded);
                            cursor.close();

                            galleryAdapter = new GalleryAdapter(getApplicationContext(),mArrayUri);
                            gvGallery.setAdapter(galleryAdapter);
                            gvGallery.setVerticalSpacing(gvGallery.getHorizontalSpacing());
                            ViewGroup.MarginLayoutParams mlp = (ViewGroup.MarginLayoutParams) gvGallery
                                    .getLayoutParams();
                            mlp.setMargins(0, gvGallery.getHorizontalSpacing(), 0, 0);

                        }
                        Log.v("LOG_TAG", "Selected Images" + mArrayUri.size());
                    }
                }
            } else {
                Toast.makeText(this, "You haven't picked Image",
                        Toast.LENGTH_LONG).show();
            }
        } catch (Exception e) {
            Toast.makeText(this, "Something went wrong", Toast.LENGTH_LONG)
                    .show();
        }

        super.onActivityResult(requestCode, resultCode, data);
    }
}
Now let us understand what output will we have when the above code is run by the compiler.
When the user will click on the button, below code will be run.
btn.setOnClickListener(new View.OnClickListener() {
            @Override
            public void onClick(View v) {
                Intent intent = new Intent();
                intent.setType("image/*");
                intent.putExtra(Intent.EXTRA_ALLOW_MULTIPLE, true);
                intent.setAction(Intent.ACTION_GET_CONTENT);
                startActivityForResult(Intent.createChooser(intent,"Select Picture"), PICK_IMAGE_MULTIPLE);
            }
        });
I have created one intent object here.
This intent will call the activity which will fetch all the images from android devices.
User will select necessary images from here and when he completes this task, he will be taken back to our app.
When compiler comes back to our app, it also takes selected images with it.
At this time, onActivityResult() method is called and these images are available in this method.
Take a look at the code structure of onActivityResult() method.
@Override
    protected void onActivityResult(int requestCode, int resultCode, Intent data) {
        try {
            // When an Image is picked
            if (requestCode == PICK_IMAGE_MULTIPLE && resultCode == RESULT_OK
                    && null != data) {
                // Get the Image from data

                String[] filePathColumn = { MediaStore.Images.Media.DATA };
                imagesEncodedList = new ArrayList<String>();
                if(data.getData()!=null){

                    Uri mImageUri=data.getData();

                    // Get the cursor
                    Cursor cursor = getContentResolver().query(mImageUri,
                            filePathColumn, null, null, null);
                    // Move to first row
                    cursor.moveToFirst();

                    int columnIndex = cursor.getColumnIndex(filePathColumn[0]);
                    imageEncoded  = cursor.getString(columnIndex);
                    cursor.close();

                    ArrayList<Uri> mArrayUri = new ArrayList<Uri>();
                    mArrayUri.add(mImageUri);
                    galleryAdapter = new GalleryAdapter(getApplicationContext(),mArrayUri);
                    gvGallery.setAdapter(galleryAdapter);
                    gvGallery.setVerticalSpacing(gvGallery.getHorizontalSpacing());
                    ViewGroup.MarginLayoutParams mlp = (ViewGroup.MarginLayoutParams) gvGallery
                            .getLayoutParams();
                    mlp.setMargins(0, gvGallery.getHorizontalSpacing(), 0, 0);

                } else {
                    if (data.getClipData() != null) {
                        ClipData mClipData = data.getClipData();
                        ArrayList<Uri> mArrayUri = new ArrayList<Uri>();
                        for (int i = 0; i < mClipData.getItemCount(); i++) {

                            ClipData.Item item = mClipData.getItemAt(i);
                            Uri uri = item.getUri();
                            mArrayUri.add(uri);
                            // Get the cursor
                            Cursor cursor = getContentResolver().query(uri, filePathColumn, null, null, null);
                            // Move to first row
                            cursor.moveToFirst();

                            int columnIndex = cursor.getColumnIndex(filePathColumn[0]);
                            imageEncoded  = cursor.getString(columnIndex);
                            imagesEncodedList.add(imageEncoded);
                            cursor.close();

                            galleryAdapter = new GalleryAdapter(getApplicationContext(),mArrayUri);
                            gvGallery.setAdapter(galleryAdapter);
                            gvGallery.setVerticalSpacing(gvGallery.getHorizontalSpacing());
                            ViewGroup.MarginLayoutParams mlp = (ViewGroup.MarginLayoutParams) gvGallery
                                    .getLayoutParams();
                            mlp.setMargins(0, gvGallery.getHorizontalSpacing(), 0, 0);

                        }
                        Log.v("LOG_TAG", "Selected Images" + mArrayUri.size());
                    }
                }
            } else {
                Toast.makeText(this, "You haven't picked Image",
                        Toast.LENGTH_LONG).show();
            }
        } catch (Exception e) {
            Toast.makeText(this, "Something went wrong", Toast.LENGTH_LONG)
                    .show();
        }

        super.onActivityResult(requestCode, resultCode, data);
    }
All the core logic is present in the above source code.
If user choose single image
When compiler comes to this code, first it will check whether user have selected single image or multiple image.
If user have picked up single image then compiler will run below code
if (requestCode == PICK_IMAGE_MULTIPLE && resultCode == RESULT_OK
                    && null != data) {
                // Get the Image from data

                String[] filePathColumn = { MediaStore.Images.Media.DATA };
                imagesEncodedList = new ArrayList<String>();
                if(data.getData()!=null){

                    Uri mImageUri=data.getData();

                    // Get the cursor
                    Cursor cursor = getContentResolver().query(mImageUri,
                            filePathColumn, null, null, null);
                    // Move to first row
                    cursor.moveToFirst();

                    int columnIndex = cursor.getColumnIndex(filePathColumn[0]);
                    imageEncoded  = cursor.getString(columnIndex);
                    cursor.close();

                    ArrayList<Uri> mArrayUri = new ArrayList<Uri>();
                    mArrayUri.add(mImageUri);
                    galleryAdapter = new GalleryAdapter(getApplicationContext(),mArrayUri);
                    gvGallery.setAdapter(galleryAdapter);
                    gvGallery.setVerticalSpacing(gvGallery.getHorizontalSpacing());
                    ViewGroup.MarginLayoutParams mlp = (ViewGroup.MarginLayoutParams) gvGallery
                            .getLayoutParams();
                    mlp.setMargins(0, gvGallery.getHorizontalSpacing(), 0, 0);

                }
Here, we will have the data of the selected image in the form of URI.
We can set the image in the imageview by using this URI.
After retrieving the image, compiler will set the gridview with this image.
I will describe the code for gridview and it’s adapter in the last chapter of this tutorial.
When the user have selected multiple images
Now if the user have selected multiple images then the below code will be initiated.
 if (data.getClipData() != null) {
                        ClipData mClipData = data.getClipData();
                        ArrayList<Uri> mArrayUri = new ArrayList<Uri>();
                        for (int i = 0; i < mClipData.getItemCount(); i++) {

                            ClipData.Item item = mClipData.getItemAt(i);
                            Uri uri = item.getUri();
                            mArrayUri.add(uri);
                            // Get the cursor
                            Cursor cursor = getContentResolver().query(uri, filePathColumn, null, null, null);
                            // Move to first row
                            cursor.moveToFirst();

                            int columnIndex = cursor.getColumnIndex(filePathColumn[0]);
                            imageEncoded  = cursor.getString(columnIndex);
                            imagesEncodedList.add(imageEncoded);
                            cursor.close();

                            galleryAdapter = new GalleryAdapter(getApplicationContext(),mArrayUri);
                            gvGallery.setAdapter(galleryAdapter);
                            gvGallery.setVerticalSpacing(gvGallery.getHorizontalSpacing());
                            ViewGroup.MarginLayoutParams mlp = (ViewGroup.MarginLayoutParams) gvGallery
                                    .getLayoutParams();
                            mlp.setMargins(0, gvGallery.getHorizontalSpacing(), 0, 0);

                        }
                        Log.v("LOG_TAG", "Selected Images" + mArrayUri.size());
                    }
Compiler will make one arraylist which contains all the URIs of all the selected images.
One for loop is initiated here. In the every iteration of this for loop, URI of the image is added into the arraylist.
The number of iterations of the for loop equal to the number of selected images, means that if the user have taken three images then the for loop will have three iterations.
This arraylist is then used to set up the gridview.
Step 3. Setting up the GridView
Before setting up the gridview, first we need to create one layout resource file.
This layout resource file (gv_item.xml) will represent the every single cell of the gridview.
Code for gv_item.xml
<?xml version="1.0" encoding="utf-8"?>
<LinearLayout xmlns:android="http://schemas.android.com/apk/res/android"
    xmlns:app="http://schemas.android.com/apk/res-auto"
    android:layout_width="wrap_content"
    android:layout_height="wrap_content"
    android:orientation="vertical">

    <ImageView
        android:layout_height="130dp"
        android:layout_width="130dp"
        android:padding="10dp"
        android:id="@+id/ivGallery"
        android:src="@mipmap/ic_launcher_round"
        android:scaleType="fitXY"
        />

</LinearLayout>
Every gridview implementation requires the adapter class which will provide necessary data to the gridview.
Here, I have written GalleryAdapter.java class for this purpose.
Source code for GalleryAdapter.java is as following
import android.content.Context;
import android.net.Uri;
import android.view.LayoutInflater;
import android.view.View;
import android.view.ViewGroup;
import android.widget.BaseAdapter;
import android.widget.ImageView;

import java.util.ArrayList;

public class GalleryAdapter extends BaseAdapter {

    private Context ctx;
    private int pos;
    private LayoutInflater inflater;
    private ImageView ivGallery;
    ArrayList<Uri> mArrayUri;
    public GalleryAdapter(Context ctx, ArrayList<Uri> mArrayUri) {

        this.ctx = ctx;
        this.mArrayUri = mArrayUri;
    }

    @Override
    public int getCount() {
        return mArrayUri.size();
    }

    @Override
    public Object getItem(int position) {
        return mArrayUri.get(position);
    }

    @Override
    public long getItemId(int position) {
        return 0;
    }

    @Override
    public View getView(int position, View convertView, ViewGroup parent) {

        pos = position;
        inflater = (LayoutInflater) ctx
                .getSystemService(Context.LAYOUT_INFLATER_SERVICE);

        View itemView = inflater.inflate(R.layout.gv_item, parent, false);

        ivGallery = (ImageView) itemView.findViewById(R.id.ivGallery);

        ivGallery.setImageURI(mArrayUri.get(position));

        return itemView;
    }


}
We are passing an arraylist of image URIs in the second parameter of the constructor.
Compiler will use this arraylist to set up the image in the imageview.
Look at the getView() method in the adapter class. Image is set up with the URI in this method.
All the technical aspects for android select multiple images from gallery example is over now